


Results 11 to 20 of 50
-
02-03-2015, 10:20 AM #11Technician

- Join Date
- Jan 2015
- Location
- Little Rock, AR
- Posts
- 97
In regards to the insulating pad, can we use "header wrap" wrapped in kapton tape for that? The wrap I am finding on Amazon says it is good for over 1000 degrees F, is fairly inexpensive, and available in different widths.
Robert
-
02-03-2015, 10:25 AM #12Technologist
- Join Date
- Aug 2014
- Location
- Oklahoma
- Posts
- 191


Got a link to that? I was thinking about Checking out the local hardware store for something.
-
02-03-2015, 10:28 AM #13Technician
- Join Date
- Jan 2015
- Location
- Little Rock, AR
- Posts
- 97
Here is one variant...
http://goo.gl/xItfGb
They are available in different widths and colors as well.
Robert
-
02-03-2015, 10:37 AM #14Staff Engineer
- Join Date
- May 2014
- Location
- Highlands Ranch, Colorado USA
- Posts
- 1,437
I had purchased to try, but never got around to installing, fiberglass mesh like that used in Bondo repairs. The thought was to try trimming a piece down to size and layering it in kapton as N5QM suggests.
I'm not familiar with the details of the clough42 cooling system, but I ultimately figured I didn't want to restrict airflow at all under the lowest fin on the hex heatsink by putting something like this there. I figured that was the most important area of the heatsink to ensure as much airflow as I could. I ended up just layering the aluminum block in kapton, and cut away the lower shelf of the stock hex cooling shroud.
-
02-03-2015, 10:42 AM #15Engineer
- Join Date
- Nov 2014
- Posts
- 522
 Originally Posted by printbus

On clough's design the bottom of the heatsink is isolated from the heaterblock by the shroud and the kapton and fiberglass are used to protect the ABS from the heatblock
-
02-03-2015, 10:43 AM #16Technician
- Join Date
- Jan 2015
- Location
- Little Rock, AR
- Posts
- 97
An alternative may be to wrap the hotend with the fiberglass/kapton. I found this as an example...
-
02-04-2015, 01:47 AM #17Engineer
- Join Date
- Nov 2014
- Posts
- 522
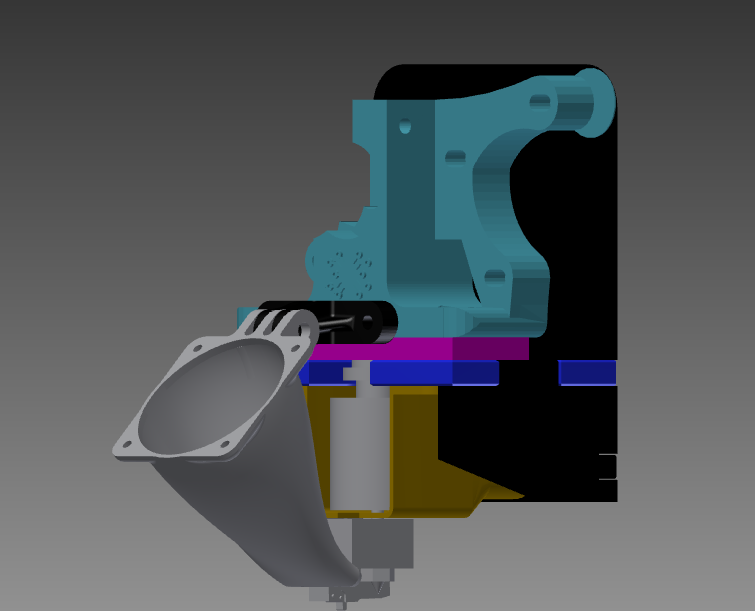
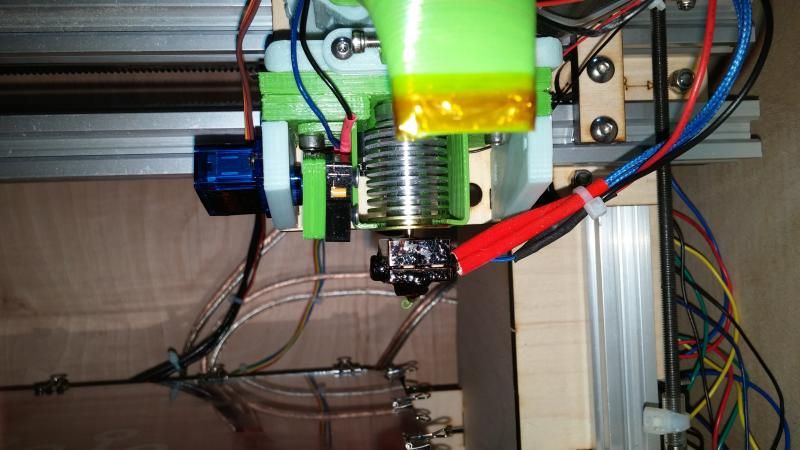
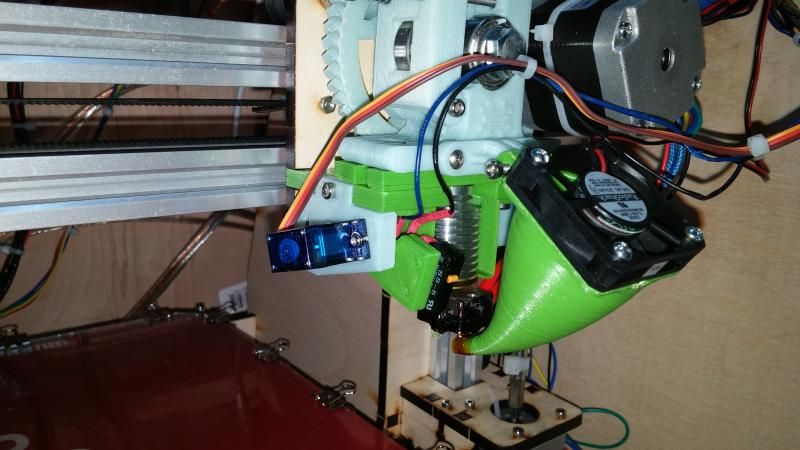
There are a few model updates coming, I ended up using the Hexagon metal plate and that allowed me to use the original bolts with a minor tweak to the extruder body to allow the press fit connector to countersink into the body itself instead of requiring a shim. With the thinner metal plate being used the body of the E3D is slightly lower that originally intended, it fits but if you look at the pic the bottom fins are causing a very slight bow in the plastic, and lastly i forgot to cut out the entire horn dimensions in the ABL foot.
Electronics and initial prints are tomorrow then i will be printing the updated parts to check fit on them. I'll also take pics of the modification i did to the extruder body.
edit: Oh and i plan to implement a part cooling fan in the same general design as clough's as well once i have these parts finished. The hexagon part shroud wont work due to the height difference.Last edited by sniffle; 02-04-2015 at 01:58 AM.
-
02-04-2015, 08:05 AM #18Technician
- Join Date
- Jan 2015
- Location
- Little Rock, AR
- Posts
- 97
That looks quite nice! I am interested to hear what you think of the performance of the e3d vs the hex.
-
02-05-2015, 02:04 AM #19Engineer
- Join Date
- Nov 2014
- Posts
- 522
and... it "should" be done...
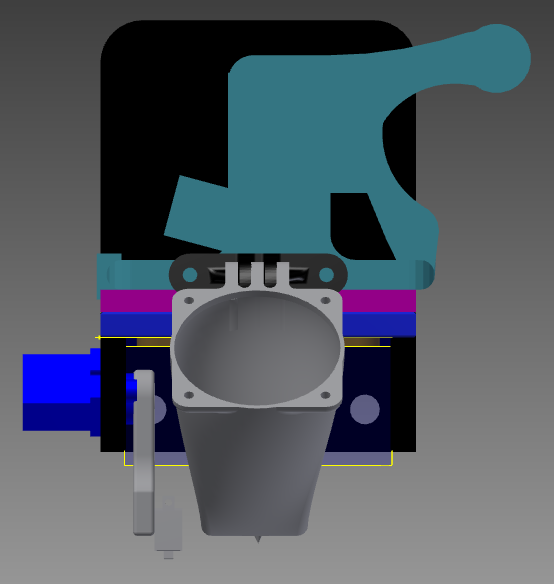

all parts have been run through netfab, and i included some of clough42's original parts just to make life easier and things won't need to be hunted down. I can also report that the fan suggested for the hexagon hotend cools the E3D just fine using this method. If everything in this is printed it will produce the above design. I still have to print and test the part cooling fan shroud but it is otherwise complete and will be printed tomorrow.
Oh, also the mount plate, hot end shroud, and ABL foot all have been updated and corrected as well. I have printed the shroud, I'll print the foot with the part cooling shroud and try to get them installed tomorrow, but it may be next week.
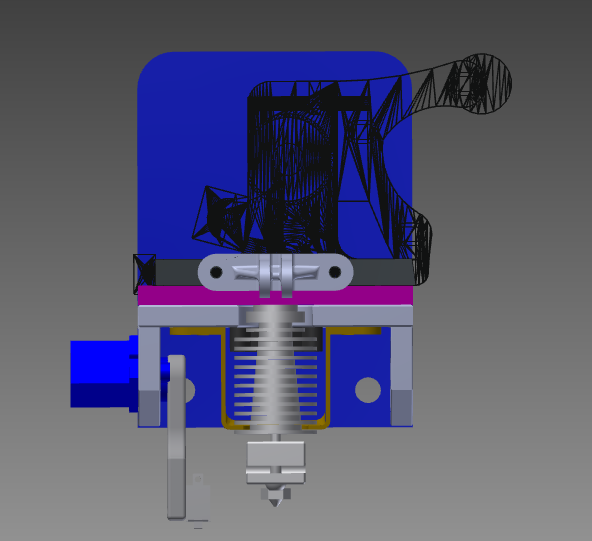
My hat's off to clough! I had to learn how to reproduce the design for the shroud i hadn't really messed with lofts outside of the hot end fan shroud and that was a simple loft compared to this, but i managed :-) still a couple rough spots that are kinda hard to find but they are there... Doing this has definitely made me a better designer... now to bed...
I couldn't attach the file for some reason so here is a TinyUpload link to the files.
http://s000.tinyupload.com/index.php...34851980310233
-
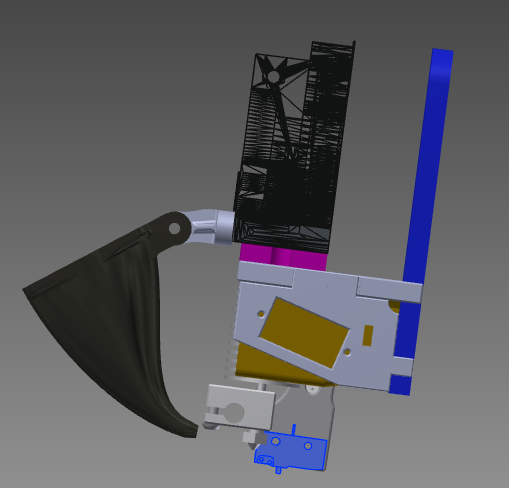
02-16-2015, 11:40 AM #20Engineer
- Join Date
- Nov 2014
- Posts
- 522
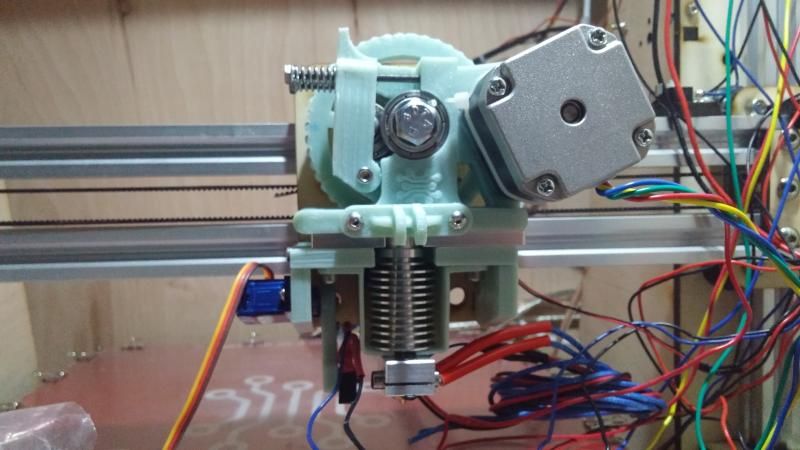
OK, after much feedback from AbuMaia here is the latest version of the E3DV6 cooling system remixed from Clough42's Hexagon cooling system.
Download Link:
http://s000.tinyupload.com/index.php...76615418331363
Note: all required files have E3D at the beginning of the file name. There are also 2 different ABL feet, 1 marked XL in the filename for in case the other foot isn't quite long enough.
here are some pics of both the model and it installed on my own printer.


 Reply With Quote


Holes and pockmarks in print walls
06-04-2024, 09:14 AM in General 3D Printing Discussion