


Results 21 to 29 of 29
Thread: my i3v 10" build
-
12-13-2014, 09:54 PM #21Engineer-in-Training

- Join Date
- Feb 2014
- Location
- CT
- Posts
- 345
Nice job..
-
12-13-2014, 09:58 PM #22Student
- Join Date
- Nov 2014
- Posts
- 34
Final build thoughts
Now that I've built the printer and successfully printed something I'm ready to clean up all the wiring mess, mount the power supply where it ought to be and do all the other little things to make this a nice clean machine. This is where the fun starts for all those who love to tinker. I can't wait!
I have to say that I'm very impressed and pleased with the quality of Makerfarms kit. It went far smoother than I imagined and the end result is quality that I can brag about. Wait until I've got it tuned in! I will be writing Colin a few kind words very soon. I would highly, enthusiastically recommend anyone get a hold of one of Colin's kits and get making.
My suggestion is just get in and get dirty! The kit is not as complicated as it may seem and the experience you gain putting it all together is invaluable. Now that I actually know what everything is and does and where it all goes and how it's all supposed to work, I have a better idea of what changes I want to make. I think I could easily strip the whole thing down and build it back up in a few hours now. I'm planning on collecting a list of mods and then breaking the machine down partway to straighten up all the wiring. I'm glad I didn't make a fuss over it before, I really have a good feel for the machine now.
Thanks for looking over my posts and special thanks to the kind, generous souls on this forum who encourage and guide newbies like myself!
-
12-13-2014, 10:03 PM #23Student
- Join Date
- Nov 2014
- Posts
- 34
One thing I forgot: cheap power supplies. Terrible! I picked up a 12v power supply of an ebay seller I get arduino's from. It does what it's supposed to, I haven't verified voltage supplied under load but everything seemed to be smooth. The fan, however, sounds like an 18 wheeler stuck in low gear. Replacing that fan is very high on the list of things to do.
Also, I did a quick check of the stepper motors during the 2+ hour print. The X motor was tepid as was the extruder. The Z motors were cold to the touch, the Y was warm but nowhere close to hot. I slid a sheet of cardboard under the heat bed and it has been taking about 4 minutes to get to 80C. I have a few fans that I've salvaged from ancient PCs, I'm planning on getting one blowing on the RAMPS.
-
12-13-2014, 11:20 PM #24Staff Engineer
- Join Date
- May 2014
- Location
- Highlands Ranch, Colorado USA
- Posts
- 1,437

Congrats on the first prints.
Is this one of the MeanWell knock-off supplies? AbuMaia went through a fan issue on his. Thread NEED REPLACEMENT POWER SUPPLY FAN might be of help. Originally Posted by danrodz

-
12-14-2014, 12:16 AM #25Engineer
- Join Date
- Jul 2014
- Location
- Eastern Colorado
- Posts
- 536
Mine's been working well with the new fan, though I think the replacement fan is louder than the stock one. Also, my fan didn't start out bad, it took a few months to sound like a bearing was wearing out. I need to get new screws to mount mine, too. The ones I have seem just a fraction too small, the threads don't catch, so the power supply is just kinda hanging on them right now.
-
12-14-2014, 02:44 PM #26Student
- Join Date
- Nov 2014
- Posts
- 34
That thread was actually very helpful, thanks! I dismounted the fan and looked it over and remounted, the grinding noise seems to be gone now but I don't trust it. It will be replaced soon. Originally Posted by printbus
-
12-15-2014, 09:06 AM #27Engineer-in-Training
- Join Date
- Mar 2014
- Location
- USA
- Posts
- 388
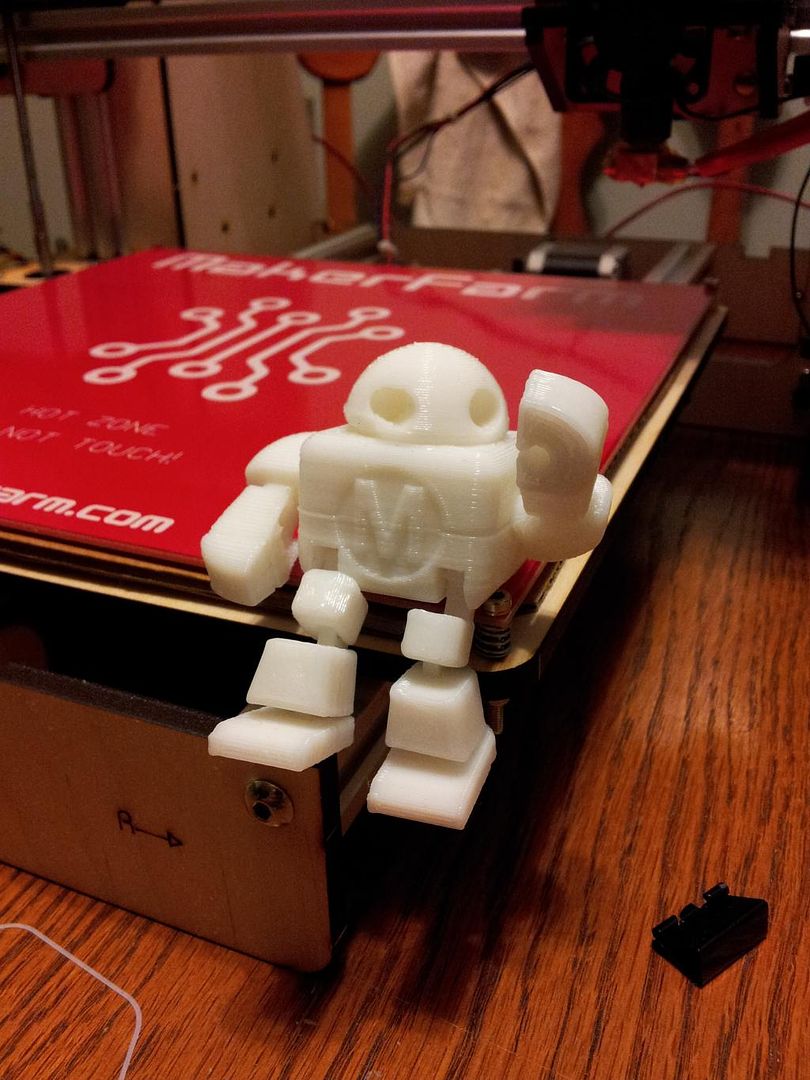
danrodz, fantastic job!! You did good with your build and also with debugging the y axis belt tension issues on your own! I think we can expect some great things to come from you, seeing that one of your first prints was the articulated robot and it actually articulates!

*jumps on soapbox*
As much as I don't want to, one thing I feel obliged to mention for your safety's sake is to be cautious about leaving the printer running while you are running errands. It can easily malfunction and break itself or worse go up in flames at a worst possible case. The sooner you or someone else can catch a malfunction the better! I'm sure you know all this, were being cautious, and didn't need to hear it from me.
*backflips off soapbox*
Keep up the great work!
-
12-15-2014, 05:16 PM #28Student
- Join Date
- Nov 2014
- Posts
- 34
Thanks for the kind words! Originally Posted by gmay3
You are absolutely right of course. Once we left the house I thought of it and berated myself for such foolishness and half expected to see the FD hosing down my charred house when we got back. And just to reinforce the lesson, as I was printing later that evening, the filament got tangled in the spool. I don't know what would have happened if I hadn't been there to guide it along but I was glad I was.
-
12-16-2014, 08:35 AM #29Engineer-in-Training
- Join Date
- Mar 2014
- Location
- USA
- Posts
- 388
Haha completely understand that. My thinking is that I trust something I built more than something China built, but I can't sue myself if my house goes up in flames Originally Posted by danrodz


 Reply With Quote


Please explain to me how to...
05-13-2024, 03:08 PM in 3D Printer Parts, Filament & Materials