Results 151 to 160 of 173
Thread: My First CoreXY
-
04-23-2022, 02:35 AM #151
-
05-25-2022, 10:06 PM #152
Well alright so my oversized coreXY build is done and it prints. I have printed a handful of things with it in PLA and PETG and I just know at some point here I will be happy with all this but for now we really need to do something about vibrations and inertia. The DD setup on the 500 Pro frame really wants to print super slow to get any kind of a decent print out of it.
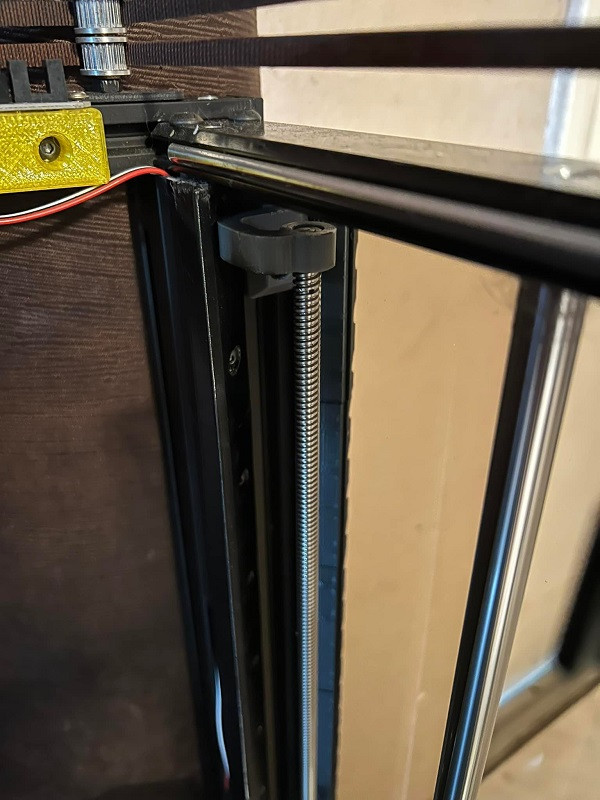
So the first thing I need to address is my 4 Z leadscrews. I left them open at the top and as the print grows the vibrations get worse from the increasing amount of unsupported leadscrew up top x4. So I made this simple part to hold the leadscrews. It uses a few pennies of the PETG, a single m4x10mm screw and m4 drop in T-slot nut. And it has a little deflection under light load so small amounts of runout on the leadscrew shouldn't impact the print quality..
-
05-25-2022, 10:19 PM #153
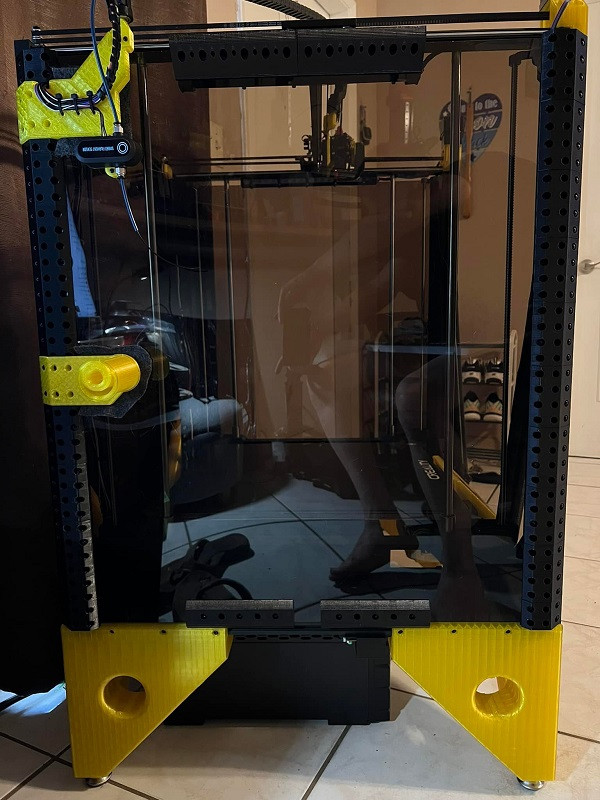
The other problem I need to address is the large cube. It just has a lot of flex to it when the hammer starts swinging. In both X and Y. On the sides of this printer I do not really get to put the oversized corner or triangle pieces in because of the quad Z setup. But I have another idea. I mist build a structural enclosure. Like the cardboard back we nail to the cheap furniture. It makes a square rigid. So I got some tinted plexiglass from Lowe's and ordered a whole mess of hardware from ebay and started printing out these pieces. Each one is 80mm tall and has 8 screws holding it to the frame and 4 screws holding the plexilgass inside a 40mm slot..

There are over 500 fasteners holding the 2 sides on. Here is the other side..
-
06-05-2022, 10:06 PM #154
I am almost done with the 3 sides of my enclosure that I wanted to make structural. I can not begin to describe how happy I am with the results of this. There was so much drilling and so many screws and this took time to complete but it was so worth it. The cube is now so rigid I have to really fine tune the adjustable rubber feet to keep it from rocking on the tile..
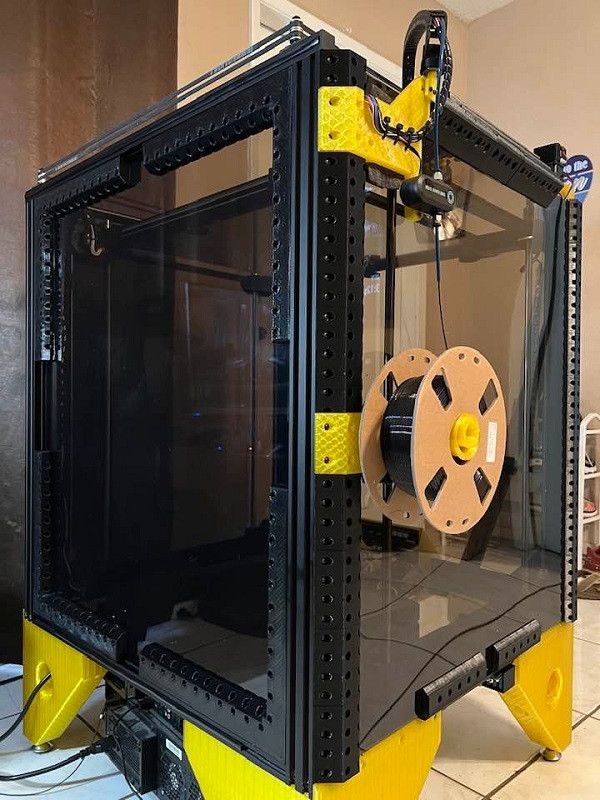 Also this pictures shows how my X5SA 500 Pro will fit through a door completely assembled. The frame is wider than it is deep. So in building I have only mounted things to the sides and not a mm in front or behind the core metal frame. It is a tight fit and in some places I might need to take a door off it's hinges but this large format printer will fit through a doorway without loosing a single calibration.
-
06-07-2022, 02:59 PM #155
very nice indeed !
so what's the biggest thing you can make ?
You could probably print the main body of a pinball cabinet in 2 or 3 pieces :-)
Sooo, how fast can you run it ?
-
06-08-2022, 08:48 PM #156
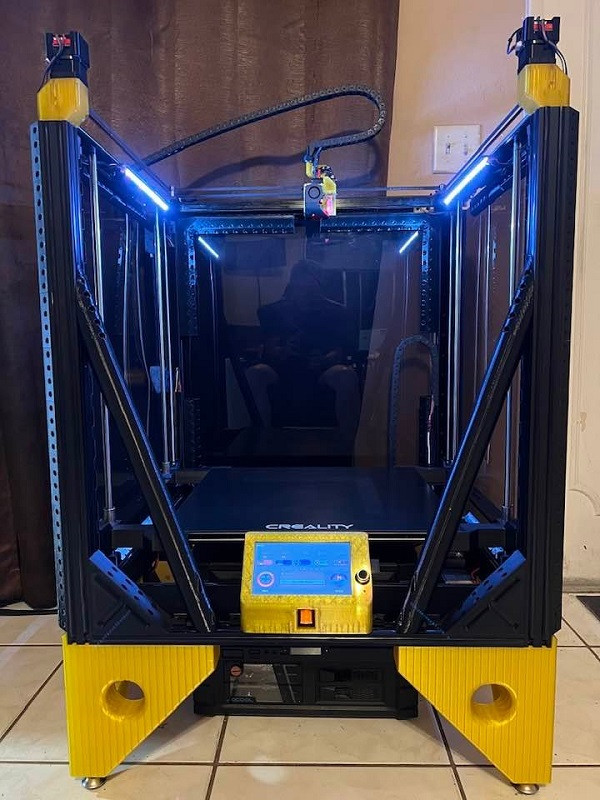
So my actual print volume is 510mm X 480mm X 600mm. I can get Z to 610 or 612 but I need 10mm headroom for safe Z homing. And the DD setup cost me a little on Y. But I plan on getting that back when I convert to the HIWIN rails and cars. As far as how fast it can run, it is finally time to find out..
-
06-13-2022, 06:01 PM #157
Ok so my best time on printing this 'rocket for mega scaling' scaled to 600mm on Z is right around 2hrs and 20min including time for the bed and extruder heaters to warm from room temp and for the printer to home. My extruder is sliding along X and Y at 48 mm/s while printing with a 0.8mm nozzle at 0.6mm layer height. PETG filament is notorious for wanting to print slow and I am putting it down at a rate of 23.04 (mm)3/s or the filament is being pulled in at 9.58 mm/s. If we look at travel speed this machine doesn't look so hot but if we look at extruder flowrates this machine isn't doing too bad..
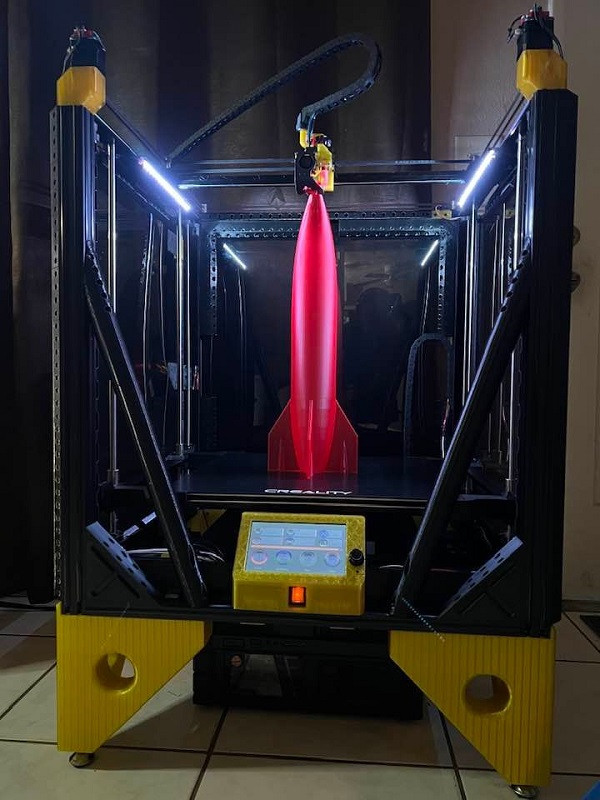 And that time is for perfect results, BTW. I can get it to print at faster speeds but with degradation in print quality. This is the limit of me getting excellent or the best quality this machine is capable of producing.
-
06-13-2022, 06:06 PM #158Technologist

- Join Date
- Apr 2021
- Posts
- 186
23mm3/s sounds about right for a Magnum with PETG. That's about 2.5 times higher than a standard E3D V6.
If you want some giggles though, the CHT nozzle comes in 1.4 and 1.8mm variants. I've only got a 1.2 vanadium and that is still hilarious to use. Such chonky layers.
-
06-19-2022, 01:40 PM #159
That actually sounds pretty cool. I might chase down a 1.2 vanadium nozzle. I can't wrap my brain around a nozzle diameter the same size as the filament's diameter.
I think I made a mistake on the print speed limitation. My problems above this print speed is warpage in the print as the layers build and a terrible top to the rocket. I really think this is a failure of my part cooling fan the speed limitation I am currently at. This printer does have a big 4020 fan with a specific made duct from Bondtech. Very nice setup. But I have it maxing out at 50% and I think I can do a bit better if I let it go full speed. Although from what I have been watching on the speed run benchy videos is the part cooling fan seems to become these huge blowers on either sides of the bed. I will re test for speed with the fan at 100% and report back.
Time to fire up the Pro Cube..

-
06-24-2022, 11:57 AM #160
My sapphire pro has two of those fans, one each side.
And blows in a wide fan from both sides.
I could improve it quite significant;y with a shaped duct each side, insted of the metal deflectors.
But honrestly, with a 0.4mm nozzle, my default print speeds is 150mm/s at 0.3 layer height. And that's on a factory spec machine.
But that rocket - damn for something that size, that is really shifting the plastic !
Very nice !
You know this means you could knock out a two part pinball cabinet in about 8 hours :-)
A few internal wooden batons for extra rigidity and you'd be good to go :-)


 Reply With Quote


Kickstarter campaing LEGENDARY...
Today, 08:02 AM in Free Self Promotion