Results 91 to 100 of 125
Thread: 10" Pegasus Build
-
04-08-2016, 09:08 AM #91
-
04-08-2016, 09:20 AM #92
The first thing I made other than the test cubes was a dryer knob for my poor wife who has been using a pair of pliers to turn on the dryer for many months now. It's one thing to be told what a 3d printer can do but a whole 'nother thing to actually hold a useful item that was just printed for you.... she was so happy and couldn't believe I made it on my printer.

-
04-12-2016, 07:08 AM #93
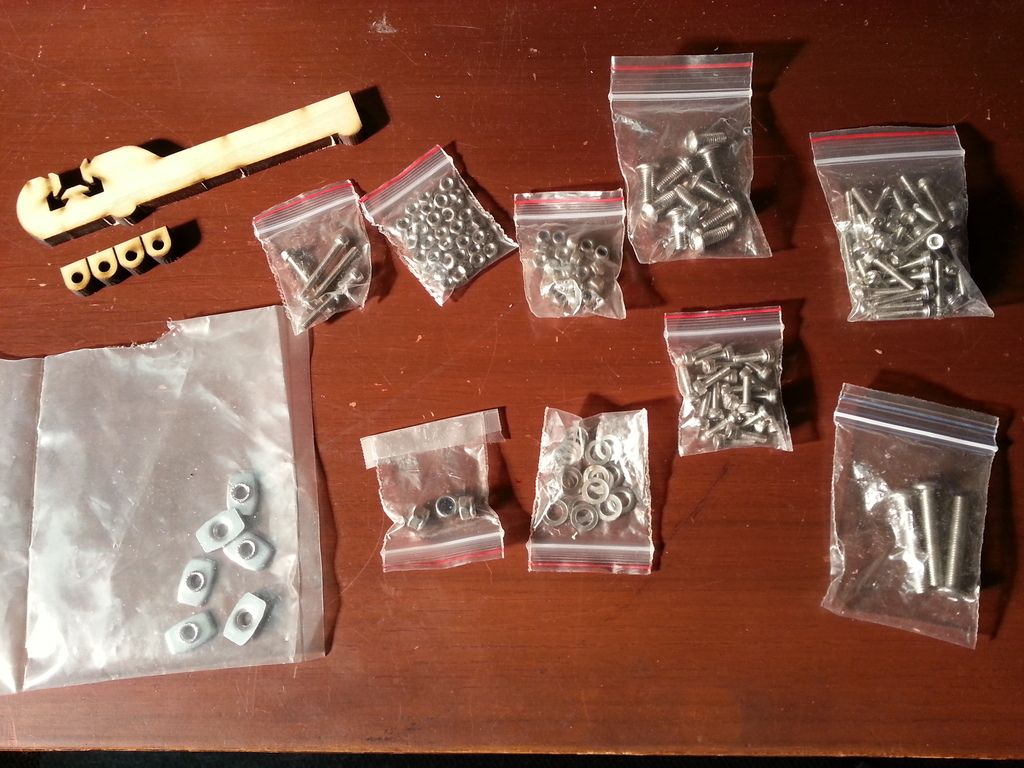
Holy crap, did I forget to put some parts on? I have all this left over after the build...
-
04-12-2016, 07:16 AM #94
I'm having an awful hard time getting ABS to not lift partway through the print on all but the smallest parts. Hairspray, extra hairspray, glue stick, none of them seem to have any effect on the problem. I really don't want to mess with ABS slurry.
I thought it may have been cold air currents coming in the room every time I went in to peek at the progress so I cranked the heat up in the tiny little office the printer is in and closed the door and stayed out until the print was done (to simulate an enclosure), but the same lifting took place.
I have tried a 5mm brim, tried adjusting bed heat temp up & down (90-115) tried lowering nozzle temp a bit (from 250 down to 230) but to no avail. I'm starting to wonder if it is the tiny little fan on the e3d v6 heatsink that is spraying errant air currents around on the print. Is it ok to reverse the fan so that the air is blowing away from the heatsink instead of onto it?
-
04-12-2016, 12:52 PM #95Student

- Join Date
- Jan 2016
- Posts
- 34
ABS seems to be the hardest material to get right sometimes, I have had some prints come out flawless and then larger prints just refuse to stay stuck. I am still working on getting ABS to behave. A few things have helped.
Starting with a fresh build plate with a fresh layer of Gluestick or tape. both tape and gluestick loose there holding power after a few prints.
Getting the bed Z height set, if its to high the first layer will not stick.
A brim sometimes helps.
Slow down the print speed, I have been playing with print speed and that seems to help allot.
Reduce infill when possible, more plastic means more warping from cooling.
My last print was a large shroud for a heatsink(100*69mm)/fan(92mm) combo, the print was pretty large and i had a brim, it still managed to pull up all 4 corners but the center stayed stuck, even with all the warping it was a SOB to pull off the plate.
-
04-12-2016, 02:44 PM #96
The bed height is set so I can shove (won't easily slide in... needs a push) a piece of paper in between bed and nozzle. I am using cheap dollar store glue stick, maybe I should go buy a good quality glue stick instead. I have tried a 5mm brim and it seemed to help a tiny bit but ultimately the part still lifted.
I am going to try a raft next and I will slow down the print speed as per your suggestion and see what that does for me. I would like to reverse the direction of the e3d heatsink fan but worried about not providing enough cooling for it so hopefully somebody who knows can chime in with some info about that.
-
04-12-2016, 04:00 PM #97
At least a handful of people have reversed the fan airflow and obtained improved ABS prints by doing so, at least with the hexagon hot end and the i3v printer. On the i3v, the bottom of the x-carriage is sort of a box, and air coming in from the normal fan orientation has nowhere to go but down onto the print area. Reversing the fan still creates some airflow below the carriage, but it doesn't seem to be as problematic. Maybe it isn't as localized.
Airflow across the heatsink will be airflow across the heatsink. All other things equal, the direction of the airflow shouldn't matter. When I migrated to the e3d v6 on my i3v, I never installed the fan in the direction e3d specifies. Granted I don't print for hours on end, but I've had no issues with the reverse mounted fan for a year. To further eliminate spillage from the fan hitting the forward side of the heat bed, I initially just added a piece of painters tape to the bottom of the fan, facing forwards and cupped up a bit to act as a poor man's deflector. I eventually came up with my own shroud design that adds a 10 degree angle on the the fan mount.
Some other notes...
I rarely hassle with ABS anymore, but I think people have also found it important to cover the heatbed glass with something during the warmup time, and to let the covered bed soak at temperature for a while before starting a print. Otherwise the bottom of the heat bed where the thermistor is could be at temperature when the glass still has a ways to go.
Adding large circle-like "mouse ears" onto corners of print objects is sometimes recommended on problem parts. This gives significantly more adhesion area in the corners where it is needed. There was a thread a while ago that discussed adding those onto an existing design - perhaps someone has the link to it.
Component designs can also include schemes to minimize problems. For example, the design I started with for a box to hold the GLCD on my i3v included a number of channels cut into the inside walls. The originator included comments that said the channels were there to relieve strain from shrinkage as the box walls printed. You can see these inside channels in the thingview of the box part - http://www.thingiverse.com/thing:817274
-
04-12-2016, 10:19 PM #98Technologist

- Join Date
- Apr 2015
- Location
- Lakeport, CA.
- Posts
- 174
Just to reinforce printbus' comments:
Reversing the airflow on the Hex HE is a big win.
Allowing significant build plate heat soak time, ditto.
The only persistent caveat I've encountered has been w/ the i3v 12"..., try to keep the objects centered on the bed and away from the edges, ESPECIALLY the front edge of the build table. Huge temp variability across the surface...
I still use ABS almost exclusively..., mostly because PLA goes brittle too quickly for my rate of usage.
-
04-13-2016, 10:05 AM #99
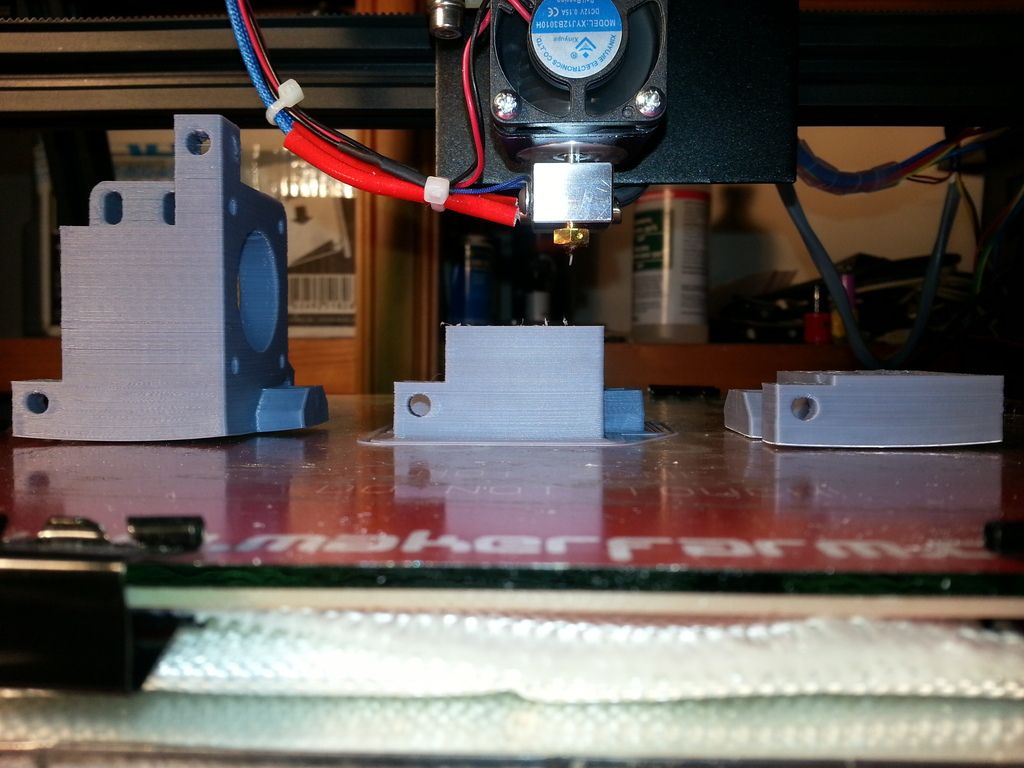
Lots of good info there guys, thanks. I think I may have the ABS issue solved by simply reversing the e3d heatsink fan. When installed the way the instructions state, the fan blows through the heatsink and immediately hits the metal X carriage. With the extruder assembly right above it, there is nowhere for the air to go but down onto the print (as you can see in the pic).
In the pic below, the part has always lifted by now but as you can see there is no lifting happening at all. The parts on either side are previous attempts with obvious results. It's a shame I had to cancel this print as I had a problem with the extruder as I will detail in my next post.
EDIT: I also let the heatbed 'soak' for a while before printing this part as well.
Last edited by flatty_420; 04-13-2016 at 11:02 AM.
-
04-13-2016, 10:11 AM #100
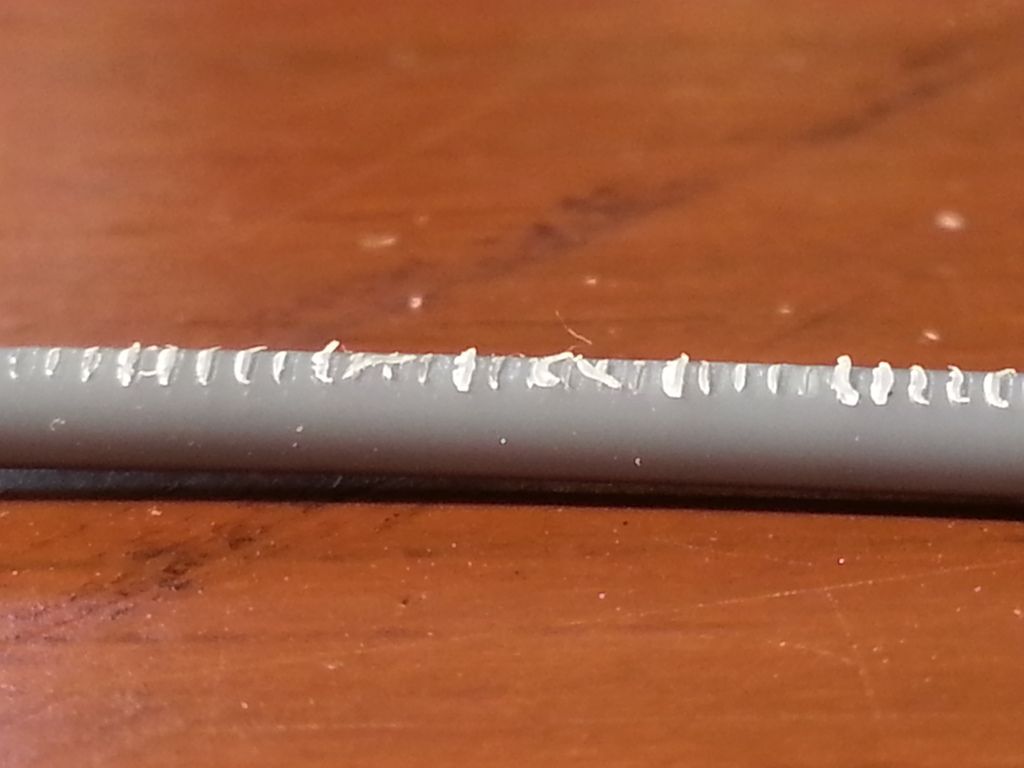
I checked on my print and found the printer was printing in mid-air with nothing coming out of the hotend. Upon further inspection I found the hobbed gear all clogged up with ABS fragments and it was just slipping on the filament instead of driving it down through the hotend. I initially was worried that reversing the heatsink fan had caused problems but I was able to manually extrude by pushing down on the filament.
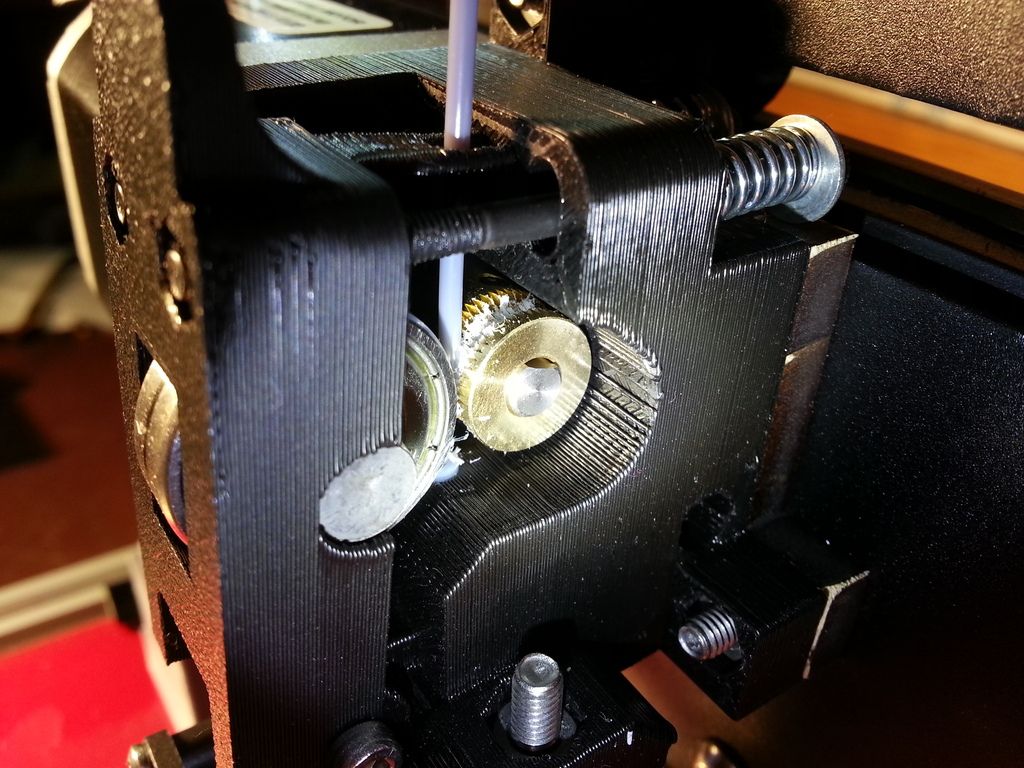
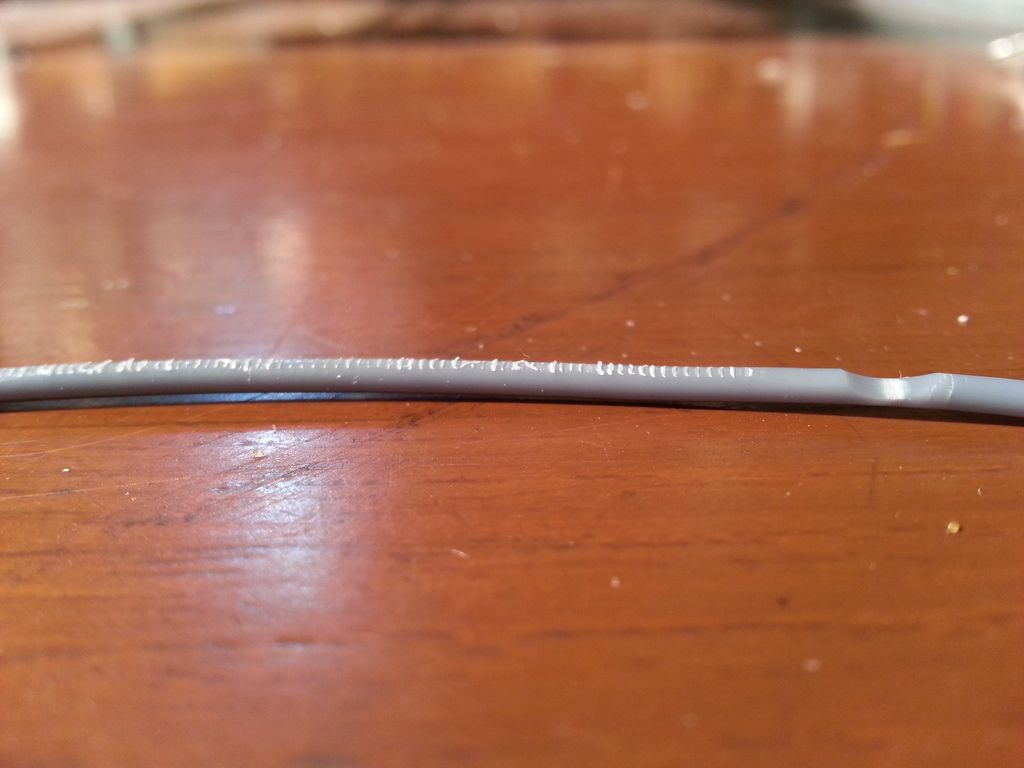
Here is a pic of the filament. Do the marks show too much or not enough tightness on the hobbed gear/idler? Or maybe this is caused by something else...


 Reply With Quote


Ender 3v2 poor printing quality
10-28-2024, 09:08 AM in Tips, Tricks and Tech Help