


Results 1 to 10 of 166
Thread: New 12" user and I am LOST!
Threaded View


-
02-05-2015, 09:34 AM #3Engineer

- Join Date
- Nov 2014
- Posts
- 522
These machines are meant for the tinkerer, I also have a 12" printer it prints great now but it took some effort to get it there.
That being said I'll throw a few suggestions out there and a few questions.
What are you trying to print with ABS or PLA?
Ok here we go...
#1) try different USB ports. If that doesnt work it could be a bad USB cable, It happens that they go bad sometimes quickly, as they are usually cheap chinese cables. Beyond that i don't have a mac so i won't be much help.
#2 & #3) OK bed leveling... Manual bed leveling can be a major pain, and must be redone every so often when prints start getting off... when you do get it right you will know. Before you level the bed you need to level the X-Carraige to the Z-Axis so that when you use the print head to level the bed you are using something level to level with. To do this i use a set of digital calipers i got from lowes, and used the depth gauge to measure from inside one of the z-motor bolt heads to the top of the z nut trap on the X carriage, on both sides. these values need to match
After you level the X-Carriage, I personally use a feeler gauge but others use paper, you want the paper to have resistance when you drag it under the nozzle. It is generally suggested to go around twice and always start the rounds in the plastic spacer corner. If you are adjusting using the Z-rods for height you aren't doing it correctly. You must adjust fine tune Z height with the micro adjusting bolt for the Z endstop. When you home the printer it should go to a position in the corner that looks the same as if it were about to start a print.
What surface are you printing onto? It must be a flat surface like glass and be secured using binder clips(if you are using window glass(2mm or 3mm from lowes ~$2.50 a sheet) i suggest using micro binder clips($1.50 or so for 70 at walmart) they take up less bed space and you don't have to remove the wings on the 12" bed you shoudl use at least 5 per side to make sure the heated bed is held formly to the glass and is kept flat against the bed so that you adjustments are actually seen when you adjust the bed.
4) Once you actually start printing parts part of the looks of the part come down to more calibration. proper e-steps in the firmware are important, a good average is somewhere around 870-890. Once that's set you can do micro calibration with your Extrusion Multiplier. Sometimes it is also the Slicer that is used, If the extruded filament looked a little thin then try using Cura it tends to extrude a little thicker, and has less options so it is a little easier to learn on. You will find that once you have the bed mechanically setup properly the slicer plays a really big roll in print quality.
Feel free to ask questions we will all help as much as we can. I promise you that with some effort on your part we will get you printing well i promise.
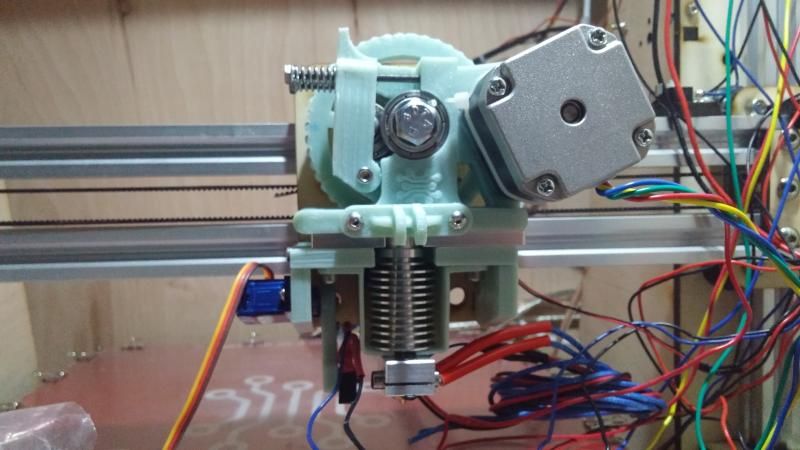
all of the bluish parts were printed on my 12" makerfarm printer using MakerGeeks Glow in the Dark ABS, we will get you there :-)

 Reply With Quote


Qidi X Plus 3 Paper thin first...
05-27-2024, 01:15 AM in General 3D Printing Discussion