


Results 1 to 10 of 255
Threaded View


-
05-30-2014, 12:51 AM #10Staff Engineer

- Join Date
- May 2014
- Location
- Highlands Ranch, Colorado USA
- Posts
- 1,437

Y Idler subassembly
Y IDLER SUBASSEMBLY
When I glued the wood parts together, I made sure the brackets for the idler pulley were perpendicular to the forward plate. This led to room for three washers with the bearings instead of the two used in the build video. I initially put the extra washer between the bearings, but when the Y axis components were assembled I noticed the idler brackets here are offset a bit from the bracket on the Y bed. I moved the extra washer to the side opposite of where the belt will ride.
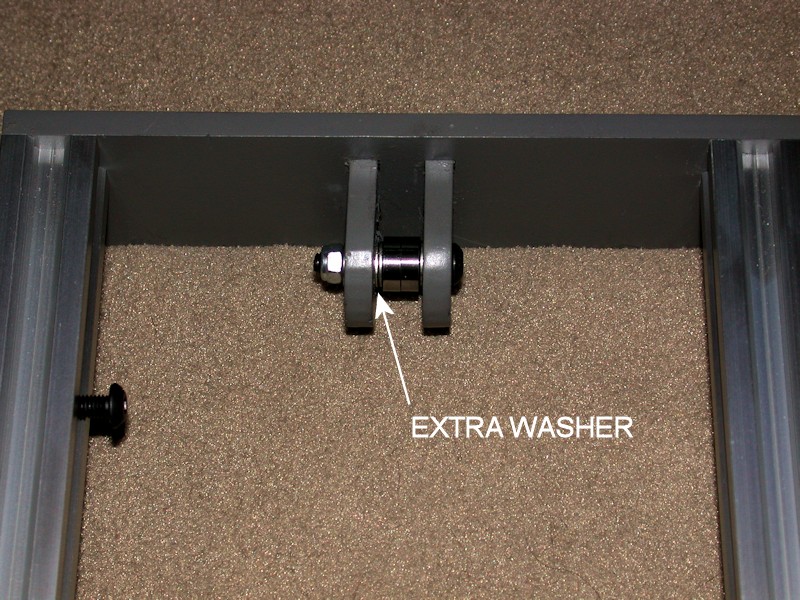
Gluing the brackets in place and filling the joints before painting leads to a clean look on the front of the printer. A disadvantage of this, however, is that I left no way here to adjust how the belt rides on the bearings. Normally, adjustment of the bolts holding the brackets in place could likely be used to slightly change the angle of the bolt with respect to the belt. The belt will tend to ride towards one side or the other if the bolt isn't exactly 90 degrees from the belt.
FOLLOWUP COMMENT: After using the printer a while, I haven't been having problems with the belt rubbing on the wood brackets, but there's a custom belt guide design now available on Thingiverse that is worth considering. I installed it after using the printer a while simply because it's a better design approach.
FOLLOWUP COMMENT #2: An improved version of the belt guide pulley is available at http://www.thingiverse.com/thing:790138Last edited by printbus; 05-31-2015 at 08:12 AM. Reason: Added mention of improved belt guide pulley


 Reply With Quote


New to 3d printing looking for...
05-20-2024, 12:56 AM in Tips, Tricks and Tech Help