


Results 141 to 150 of 173
Thread: My First CoreXY
-
10-28-2021, 02:56 PM #141Technologist

- Join Date
- Apr 2021
- Posts
- 186
2.0.9.2 is latest release (but I don’t think has support for the Octopus Pro) - https://github.com/MarlinFirmware/Marlin/releases
Looks like it was released 25 days ago.
Got my attention too now. Bugfix version (at least) includes support for BTT’s tft35, so I won’t need to run the marlin 12864 emulator mode
-
04-08-2022, 06:31 AM #142Technologist
- Join Date
- Apr 2021
- Posts
- 186
The X5SA is a bit of a lucky dip. It's a decent frame (and indeed, that frame has been repurposed by several designs, such as the VzBot), with bottom of the barrel components and electronics. It's a printer that you should anticipate a need for upgrades.
-
04-08-2022, 10:32 PM #143Staff Engineer
- Join Date
- Jul 2016
- Location
- South Florida, USA
- Posts
- 1,244

I wish i had gone this route and would strongly recommend this printer right here: https://voronkits.com/products/voron...t-newest-model And here is a video on that printer from a trusted name in the 3d printing community: https://www.youtube.com/watch?v=0E0dM0ZdpRE
-
04-10-2022, 07:07 PM #144Staff Engineer
- Join Date
- Jul 2016
- Location
- South Florida, USA
- Posts
- 1,244
I have a BTT UPS 24v installed on all of my printers. Battery backups suck because they have a finite amount of time allowed for a print to finish. Even a 3 day long print that just started hours ago can be saved in a power failure if only the BTT UPS 24v was installed..
On this printer I have mounted the UPS under the frame rail. Tucked away and out of sight it is always ready to save my prints whenever the power failure comes and without any big bulky or heavy battery backup sitting on the floor or next to a power outlet. Just this..
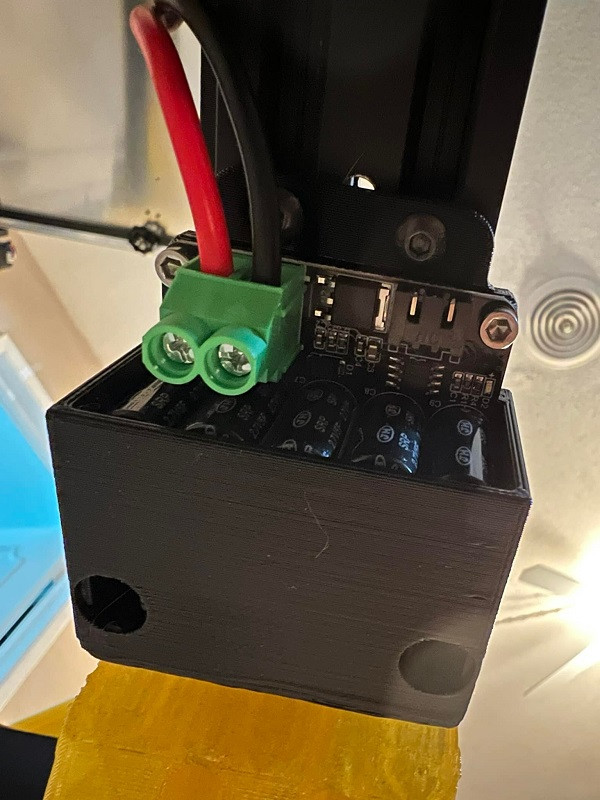
For anybody interested in the extrusion mount in the above picture it can be downloaded right here: BTT UPS 24v Extrusion Mount by AutoWiz - Thingiverse
-
04-12-2022, 02:41 AM #145Staff Engineer
- Join Date
- Jul 2016
- Location
- South Florida, USA
- Posts
- 1,244
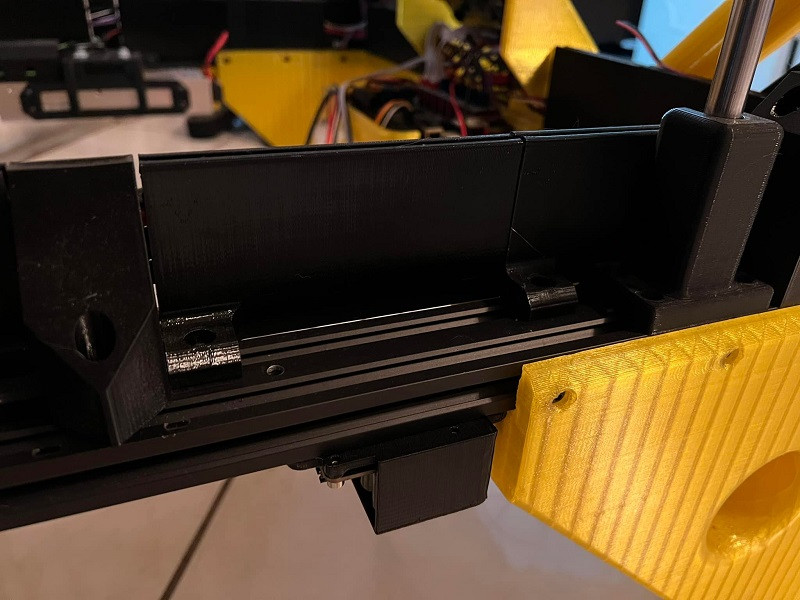
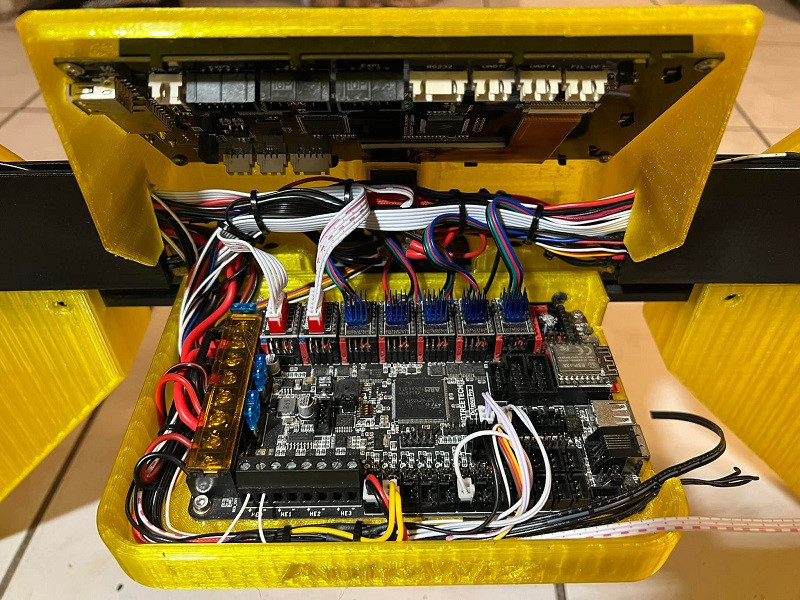
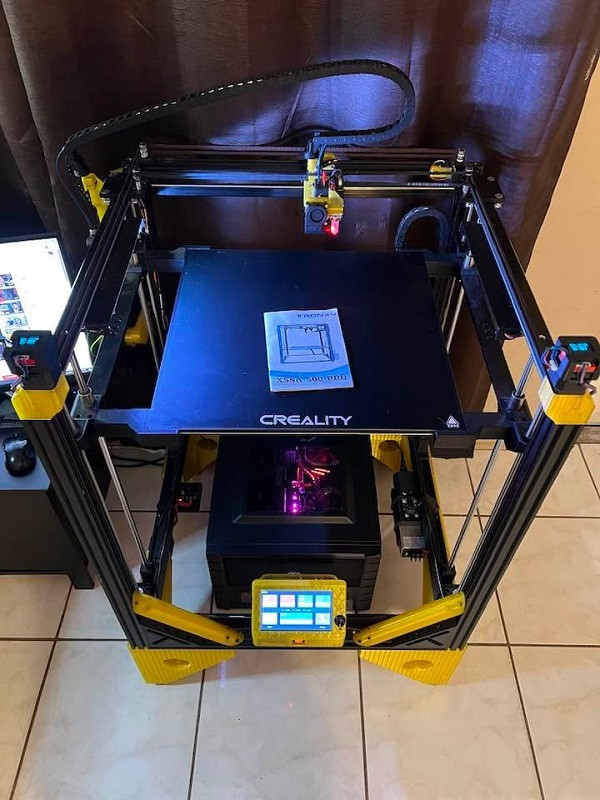
I had to take a break from my hobbies for a while but I am finally getting back to it. I really want to finish my huge CoreXY and it was almost done. I had it down to some wiring and firmware. But then life happened. Anyways there is a lot of dust on my zero mile and kinda pricey printer. I will work on that but for now I am sorry for the dusty pictures. I have finished my power supply, SSR, and power receptacle. They are all together on one side of the frame and wired appropriately..
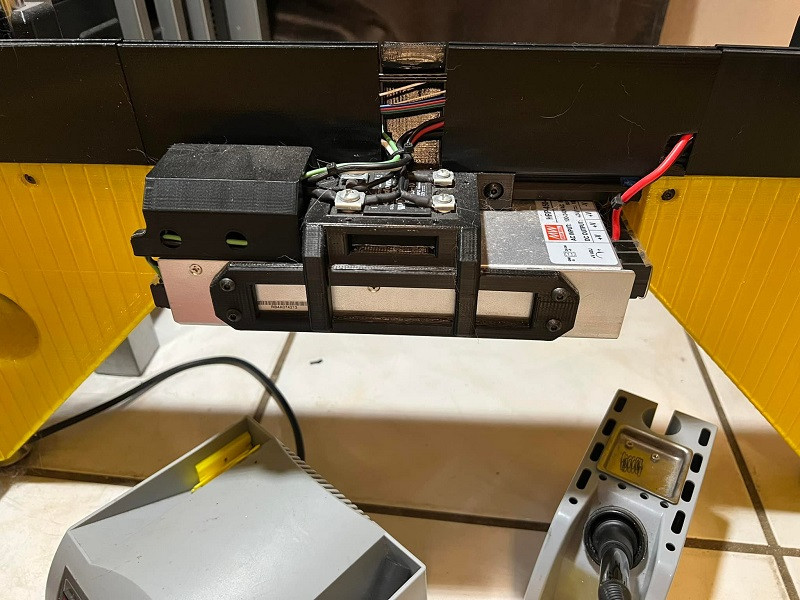
The Meanwell is a 450watt 24v 1u power supply so it fits really nicely in compact places. The SSR is a CRYDOM and it is supposed to have in built zero cross despite not having a fifth pin. To go along with the SSR I have raised the fuse amperage in the power receptacle from 5a to 10a just so it wont pop the fuse when it is trying to heat the bed..
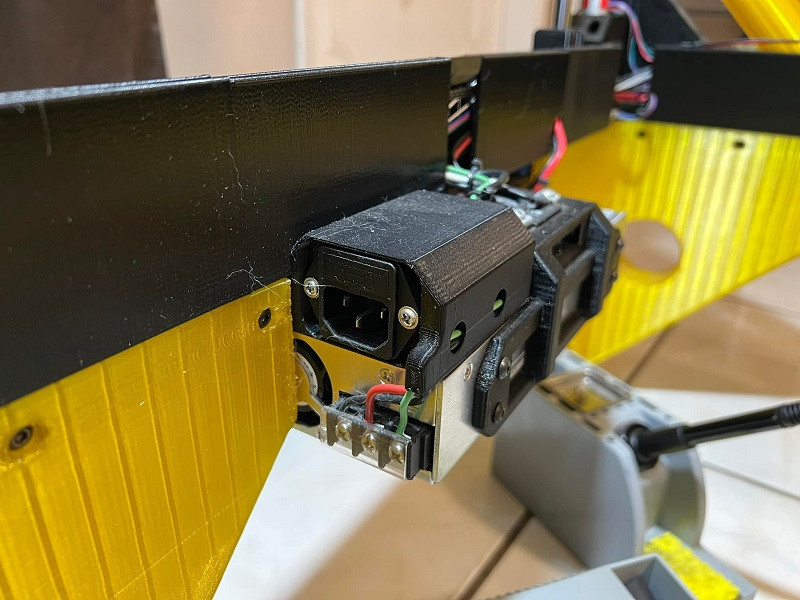
Just a couple more wires. I have the 2 endstops to connect to the mainboard along with the smart filament sensor and then i need to connect some ribbons and some wires for that tft70 and I am ready for the firmware. So close..
-
04-15-2022, 02:17 AM #146Staff Engineer
- Join Date
- Jul 2016
- Location
- South Florida, USA
- Posts
- 1,244
And we are alive. I have Marlin 2.0.9.3 configured for it. This was very easy for me as I already have 2.0.9.1 configured for the Big Red IDEX with also with an Octopus board and running dual Z Auto Align. So the firmware is very close and that part of this went fast. I do still have a host of verifications and calibrations to go through before I get to a print but it is up and running enough for me to test the UI..
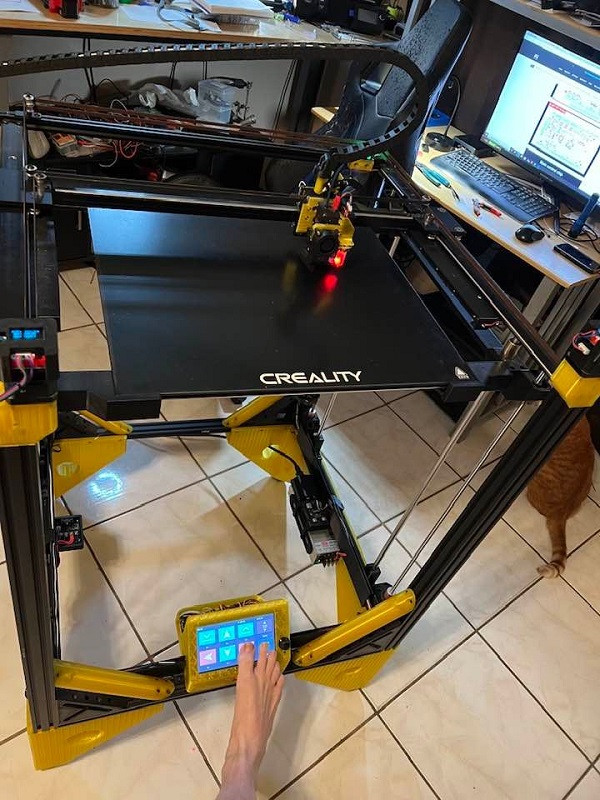 The Foot Input works perfectly! The icons are big enough on the 7" touchscreen that my big toe works just fine.
-
04-15-2022, 08:53 PM #147Staff Engineer
- Join Date
- Jul 2016
- Location
- South Florida, USA
- Posts
- 1,244
The first thing I decided to print was the 3Dbenchy. But 200% scale. Because my nozzle is 2x the size at 0.8mm and I am printing at 2x the layer height at 0.4mm-0.6mm..
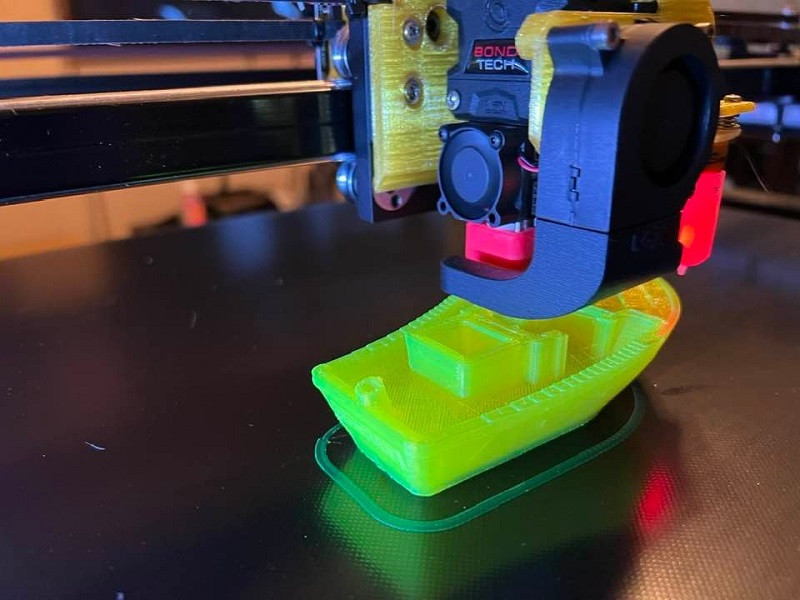 The benchy came out great. Of course. This is just a first thing I could think of to print. It will be the only benchy ever printed on this rig..
 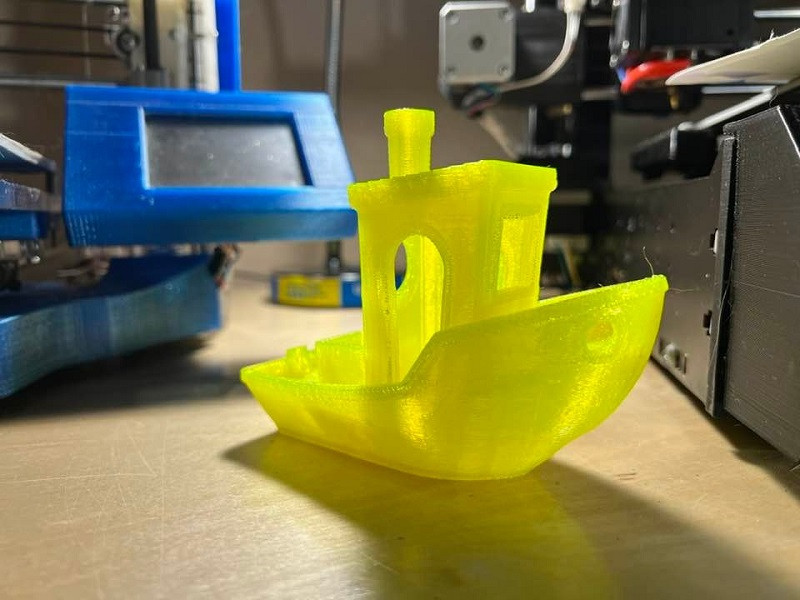 The part cooling fan is perfect. Blowing air directly where it should. And a lot of it, too. The G34 command works splendidly. Exactly as I had hoped for. I will make a video and upload it showing what it does and how it does it soon. But for now check out how nice this benchy came out for being printed with such a large nozzle and layer height..
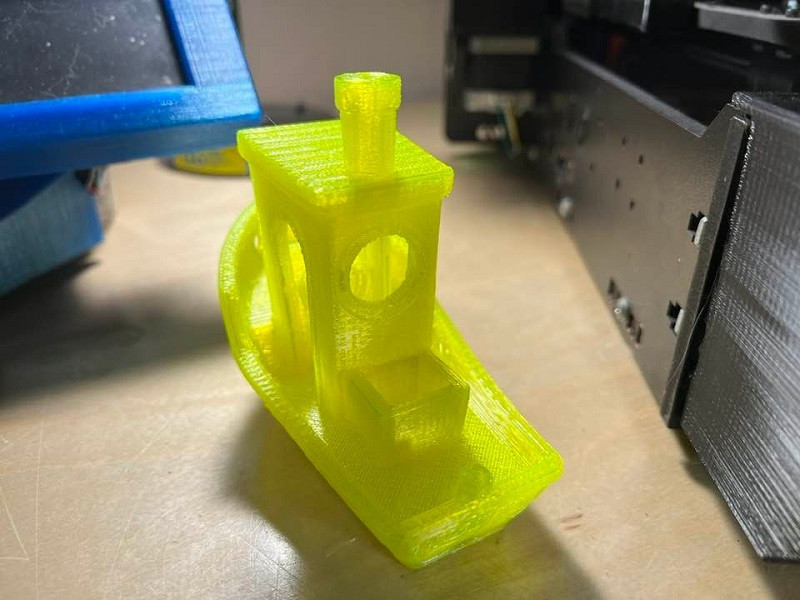
-
04-16-2022, 12:08 AM #148Staff Engineer
- Join Date
- Jul 2016
- Location
- South Florida, USA
- Posts
- 1,244
-
04-16-2022, 12:52 AM #149Staff Engineer
- Join Date
- Jul 2016
- Location
- South Florida, USA
- Posts
- 1,244
Here is my take on active bed leveling with the Quad Z Auto Align feature in Marlin 2.0.9.3..
Quad Z Auto Align with G34 - YouTube
-
04-21-2022, 01:54 AM #150Staff Engineer
- Join Date
- Jul 2016
- Location
- South Florida, USA
- Posts
- 1,244
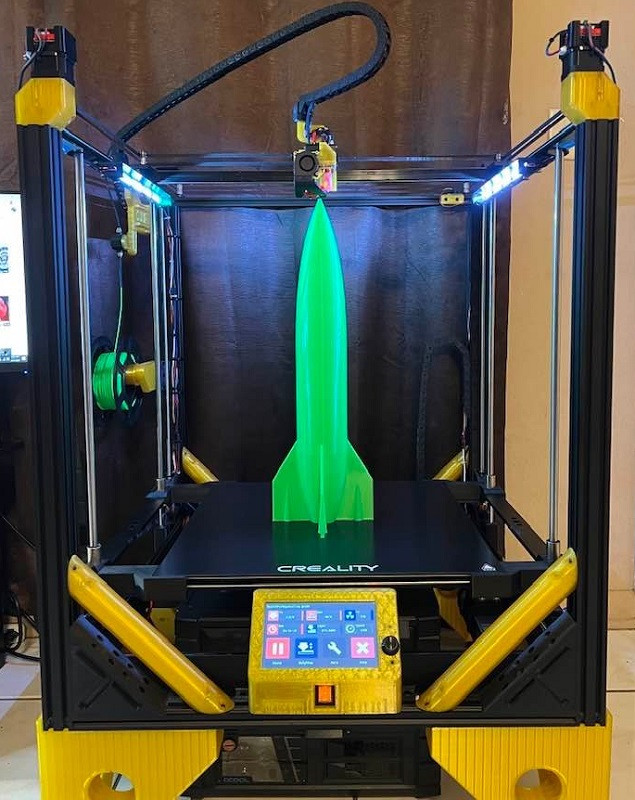
This is PLA+ printed with a 0.8mm nozzle and 0.6mm layer height. The rocket is 574mm tall or 400% scale and the next one I do I will scale the Z to 600mm and let the percentage fall wherever it will and I will get the full 600mm. But for now check out how this rocket came out..

 Reply With Quote


Printing time- Is this right?
09-13-2024, 07:51 AM in General 3D Printing Discussion