Results 1 to 10 of 10
-
02-18-2021, 10:57 AM #1Student

- Join Date
- Sep 2018
- Posts
- 10
HELP NEEDED - Bigtreetech BTT EXP-MOT + SKR V1.3 Firmware setup with Marlin
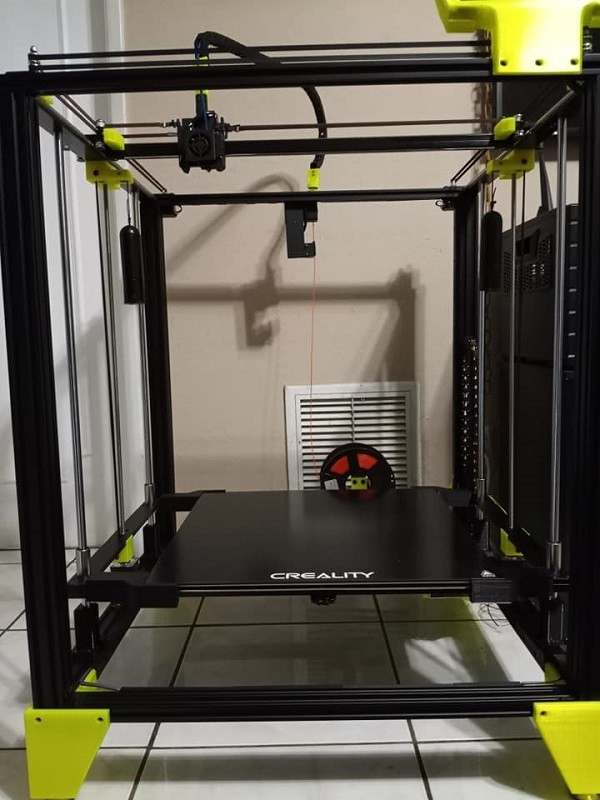
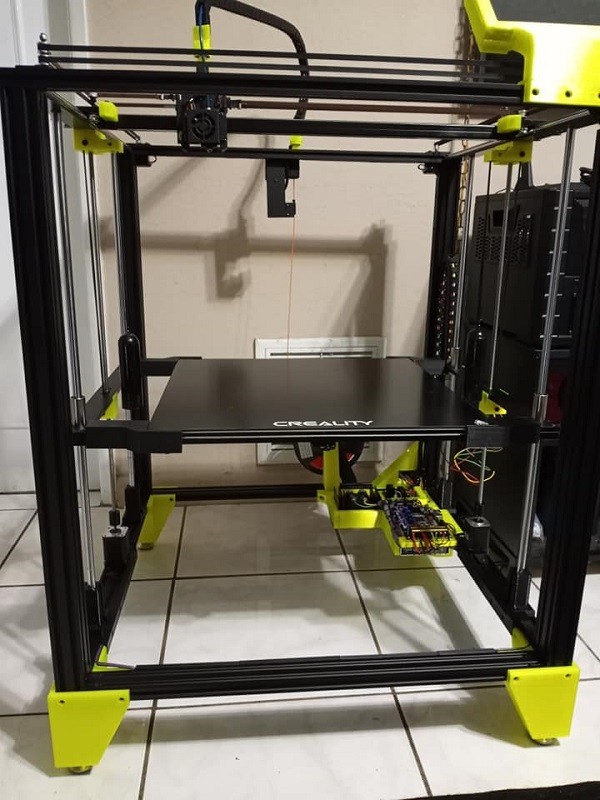
Hi 3D printing community,My project for the last few months has been 1.0M x 1.2M x 0.4M huge 3d printer. I've been having trouble lifting the massive printbed which I've attributed to issues with stepperdrivers which until now has consisted of a single TMC5160 driving 4 steppers in series.I came across the Bigtreetech BTT EXP-MOT a few weeks ago which would evidently solve my problem of not having enough stepper driver slots on my printer board which is the SKR V1.3. Unfortunately I cant for the life of me figure out how to set up the expansion module in the Marlin firmware and support online is pretty limited. I contacted their support and they said"You need to define the pins according to the pin diagram of the module and the EXP port of the motherboard. Then add the definition in the pins file of the motherboard firmware."Unfortunately all my attempts to do this have apparently been wrong. I came across a forum which said there was a single header definition line in my Marlin code that would make them functional but this didn't work either.Has anyone used this and had any success? Any help or guidance to give?I've attached an image of my printer cause I think it looks pretty cool
-
02-18-2021, 11:36 AM #2
-
02-18-2021, 11:37 AM #3
-
02-18-2021, 11:45 AM #4
Yet another way to avoid the firmware troubles is to just get a single stepper driver expansion board and wire the pins to the bank of pins right next to the Z stepper driver on your SKR board. This method splits the signal going to the driver and will now send the same identical signal to 2 stepper drivers which you can then split each to goto 2 steppers and have 4 motors driven by 2 drivers off of 1 set of pins and without any firmware changes. Here is one of my printers where I had this done for X and Y. If you look you can follow the wires from the expansion boards back to the SKR board..
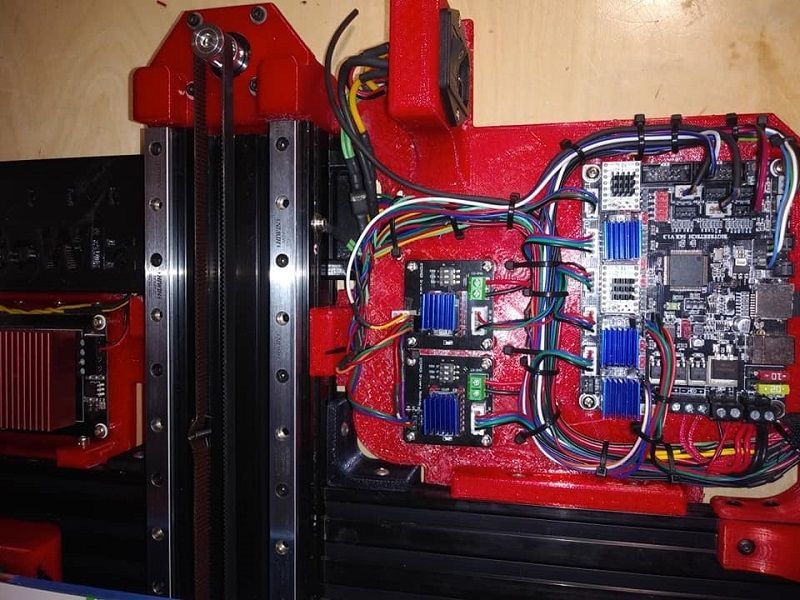
Last edited by AutoWiz; 02-18-2021 at 12:05 PM.
-
02-18-2021, 11:54 AM #5
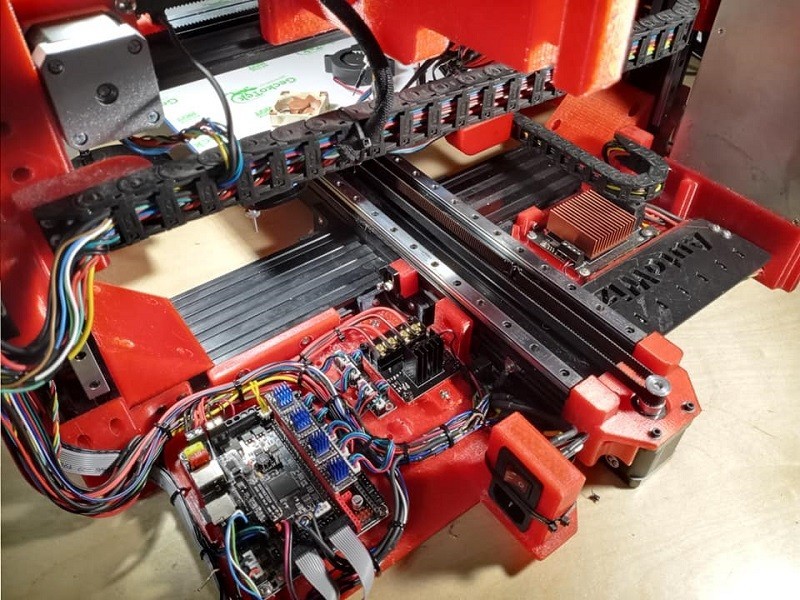
The above printer was only driving 2 stepper motors per axis and so in the above picture there is 1 signal getting split to 2 stepper drivers and then each going to it's own motor. I later corrected this wasteful setup and just ran splitters with TMC2226 drivers. But if I needed to drive 4 motors in the same way I would put both of these setups together and split both sides of the stepper signal. In the below picture I have 6 motors driving movement on my printer and a 5 filament Prusa MMU2S and if you look on the SKR 1.4 Turbo there is still an open socket for another stepper..
-
02-23-2021, 09:58 AM #6Student

- Join Date
- Sep 2018
- Posts
- 10
I'm not using 4 steppers for weight reasons but for stability of the large bed. I have constant force springs instead of counterbalance weights. They're visible in the image. I would use two steppers alongside some linear guides but was running into issues with the linear guides jamming.
-
02-23-2021, 10:05 AM #7Student

- Join Date
- Sep 2018
- Posts
- 10
I like this idea! Its much cleaner than figuring out the firmware issues and closer to what I'd like to have done originally. I can't quite see where you've attached the wires to the extra driver boards. Is there something I could research to find a documented way to do this for the SKR board or could you possibly show me some closer pictures of which pins you're getting for the extra driver boards? Would there be any downside to having 3 additional breakout boards so that there is a driver for each stepper instead of 2 drivers supporting 2 steppers each? Is there a model number for that driver breakout board?
-
02-23-2021, 11:29 AM #8
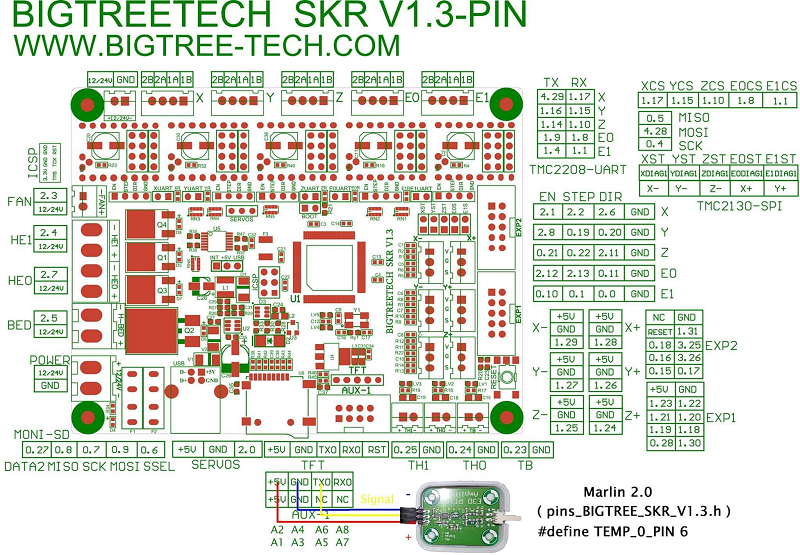
I got expansion boards from ebay from a link just like this one: DRV8825/A4988 42CH Stepper Motor Driver Expansion Board For 3D Prin ju | eBay . Those expansion boards do not have the extra 2 pins that the TMC2209/2226 drivers have so I think you will have to use 2208 or earlier drivers for this or find a better expansion board. Then it is just a matter of looking at a pinout of your SKR board and connecting the step and dir pins and also bringing 5v and gnd over to the board. I think I grabbed power and or gnd from one of the exp headers and then step and dir pins were right next to the stepper. And here is that pinout..
-
03-05-2021, 08:20 PM #9
-
08-21-2021, 06:57 PM #10Student

- Join Date
- Sep 2018
- Posts
- 10
Took me awhile to get back to it sorry. I ended up using AutoWiz's suggestion to add some breakout boards to duplicate the inputs into 3 extra stepper drivers and it works great! Not sure if there is a way to mark a thread as solved or closed but I certainly got the answers I needed.
Ill start a separate thread for this but In case anyone has an easy answer Ill add it here too. My current project issue is that I intend to use manual zeroing for all axis but my bed lowers a few mm before a print starts. It lowers twice at different speeds then once more after the hotend has reached temperature. Cant find a relevant setting in Marlin firmware.


 Reply With Quote




Ender 3v2 poor printing quality
10-28-2024, 09:08 AM in Tips, Tricks and Tech Help