


Results 61 to 70 of 354
Thread: 370mm X 250mm X 300mm
-
06-30-2018, 10:32 PM #61Staff Engineer

- Join Date
- Jul 2016
- Location
- South Florida, USA
- Posts
- 1,244

So here are the printed parts for Z belt relocation kit that i am now discarding..

Of course I keep all the original parts that came with the printer so no matter what I can always take it back to its original state. Here is the backside of my Black Widow with a hybrid Dual Z mod..
And here we are frontside and powered on..
So instead of buying another 1.8 degree stepper motor matched to the one I already had for the Z I decided to order a set of 0.9 degree stepper motors for X and Y. The install was simple but this is a resolution increase for my printer. And I used one of the factory X or Y stepper for the dual Z as it was matched to the other one.so obviously I have some changes I need to make in marlin for all this to work properly.
-
07-01-2018, 10:28 PM #62Staff Engineer
- Join Date
- Jul 2016
- Location
- South Florida, USA
- Posts
- 1,244
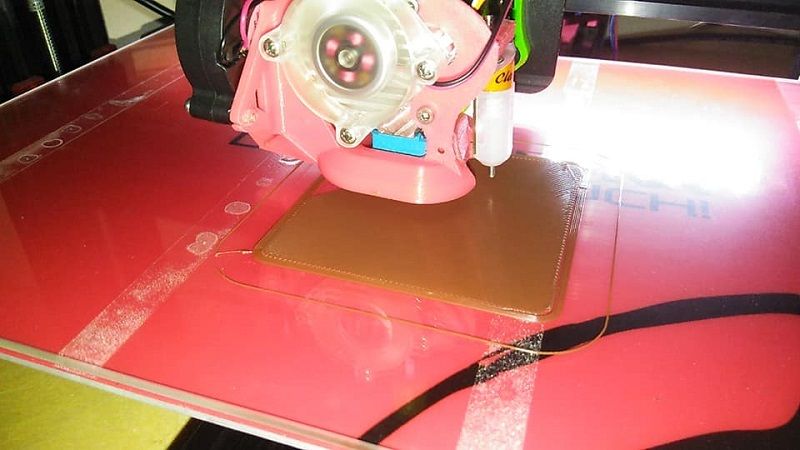
So I had a friend teach me a trick. Wipe the bed with white distilled vinegar before each print and nothing else is needed to print with PLA directly on glass. And Good Bye 3m blue tape. As always the key to any successful print is sticking that first layer..
-
07-02-2018, 06:59 PM #63Staff Engineer
- Join Date
- Jul 2016
- Location
- South Florida, USA
- Posts
- 1,244
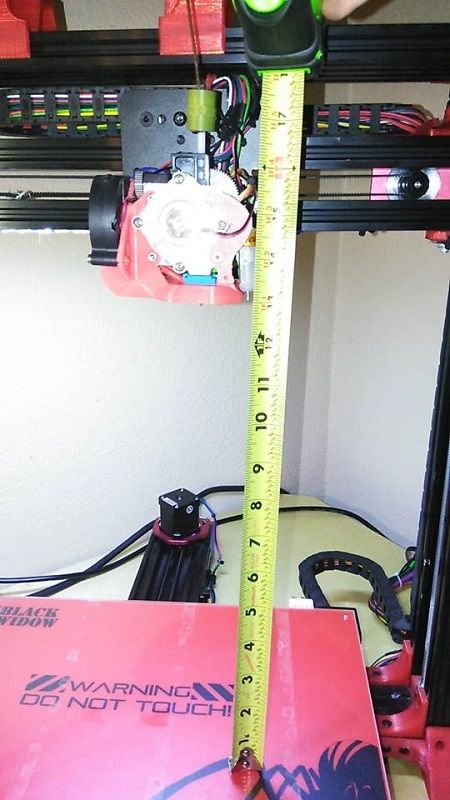
My actual build height right now is 13" or 330mm. That is 30mm over stock.
-
07-04-2018, 11:23 PM #64Staff Engineer
- Join Date
- Jul 2016
- Location
- South Florida, USA
- Posts
- 1,244
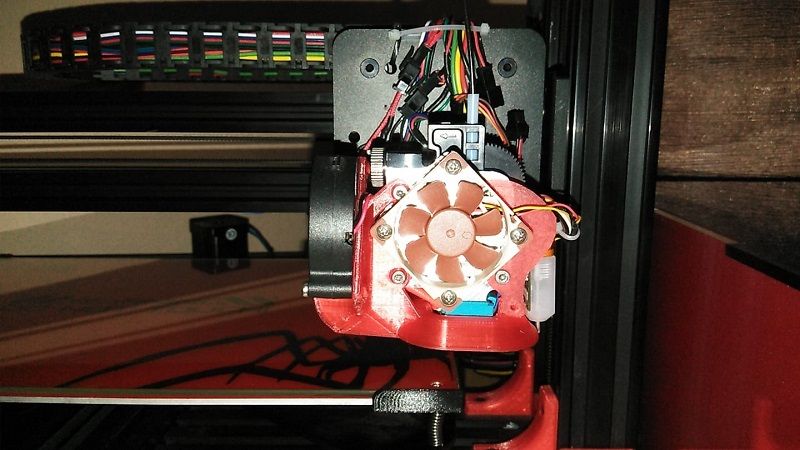
After getting this back together and printing a few things, I have decided to swap the extruder drive motor. The pancake motor it currently uses is a genuine e3d 0.9 degree motor. I am swapping it to a regular size 0.9 degree stepper motor for a few reasons. I am considering a volcano hotend and 0.6mm nozzle at some point. And also because I wish to use this genuine e3d pancake 0.9 degree motor for another lighter duty printer. The thing about these nema17 0.9 degree stepper motors is they don't come with connectors so wires must be soldered...
 The pancake stepper motors are for the smaller printers with the smaller nozzles. Here we need bigger and better. And thankfully the mount I printed will fit an even larger motor than what I am using.
-
07-08-2018, 10:49 PM #65Staff Engineer
- Join Date
- Jul 2016
- Location
- South Florida, USA
- Posts
- 1,244
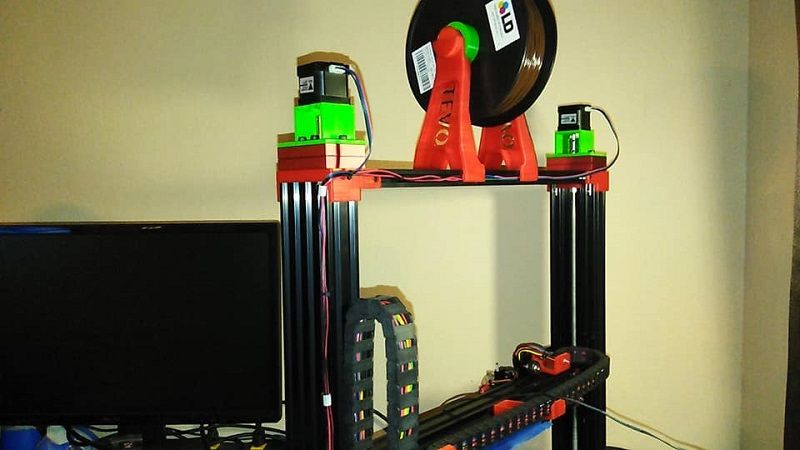
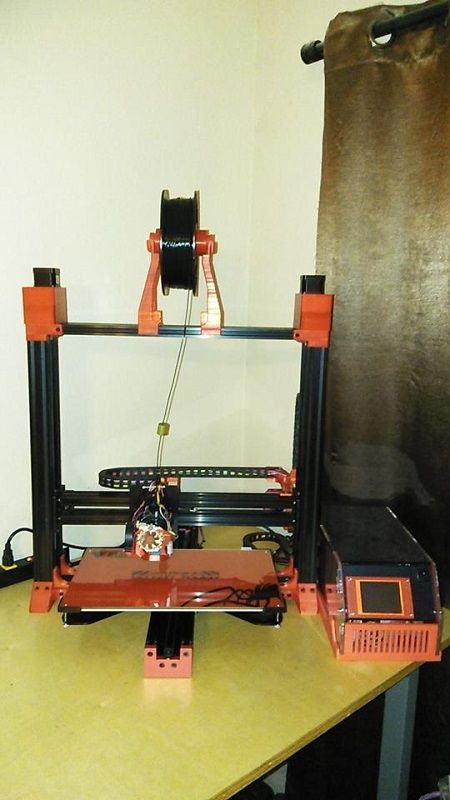
It's been a long road this Black Widow and me. But i think it is finally taking shape. I have also been re printing parts in black and translucent red to try to bring back the store bought or kit look. Instead of such a multi colored thing. Here is where I am at so far..
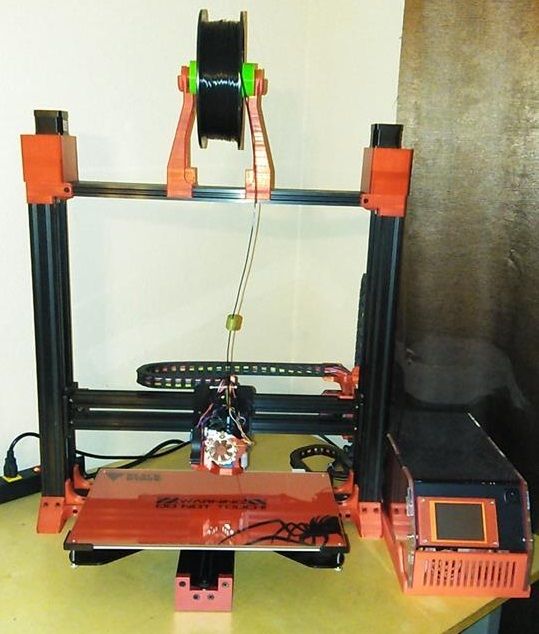
I still have to remake the spool sleeve in red and make a cover to go on the gantry and hide the wires. And also I have every intention of running the outer Z mod just as soon as I can locate a kit. And also I have fiberglass reinforced gt2 belts on the way to install. So I am still not done with the upgrades. But I am getting there.
-
07-08-2018, 11:39 PM #66Staff Engineer
- Join Date
- Jul 2016
- Location
- South Florida, USA
- Posts
- 1,244
I printed the new black faceplate for the control box face down on the glass without hairspray or gluestick. This made for a nice gloss finish that matches the acrylic lid and sides of the control box..
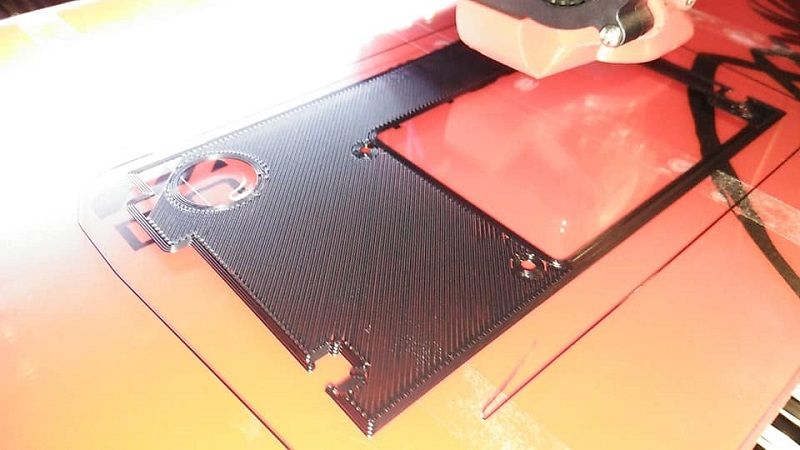 Getting that first layer right is a must if you're gonna print things face down..
-
07-10-2018, 12:04 AM #67Staff Engineer
- Join Date
- Jul 2016
- Location
- South Florida, USA
- Posts
- 1,244
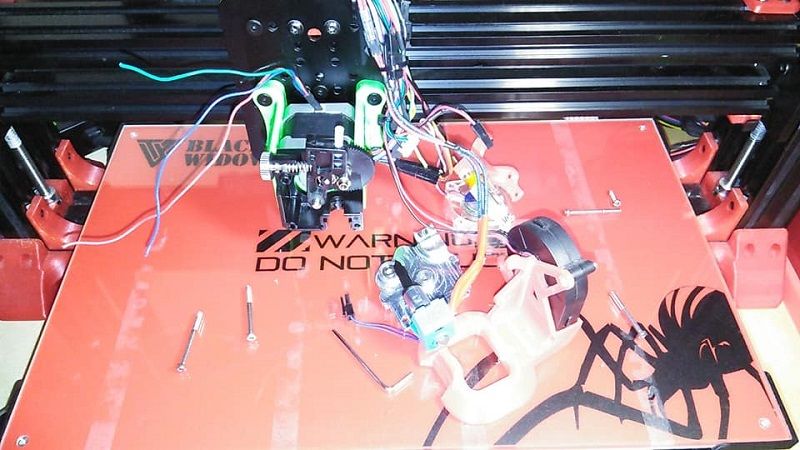
I am proud of this extruder configuration. Here is the front..
 The right side..
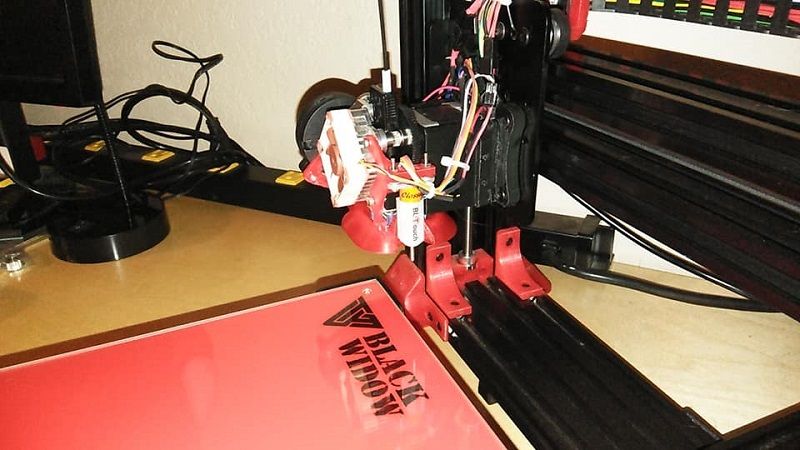 And the left..
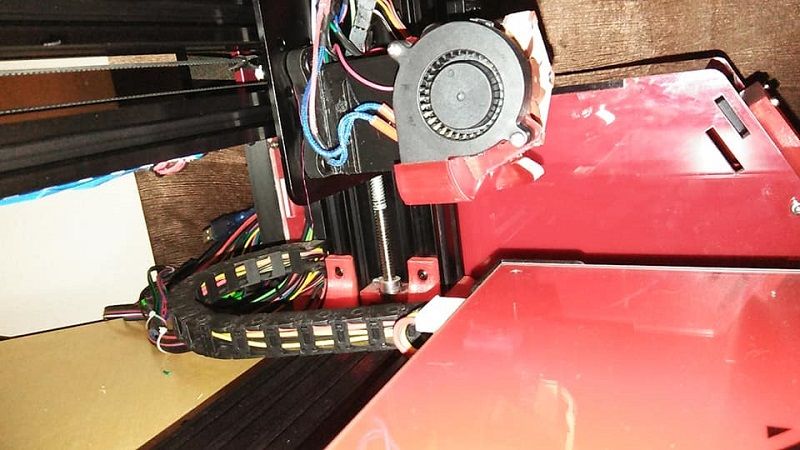
-
07-15-2018, 03:50 PM #68Staff Engineer
- Join Date
- Jul 2016
- Location
- South Florida, USA
- Posts
- 1,244
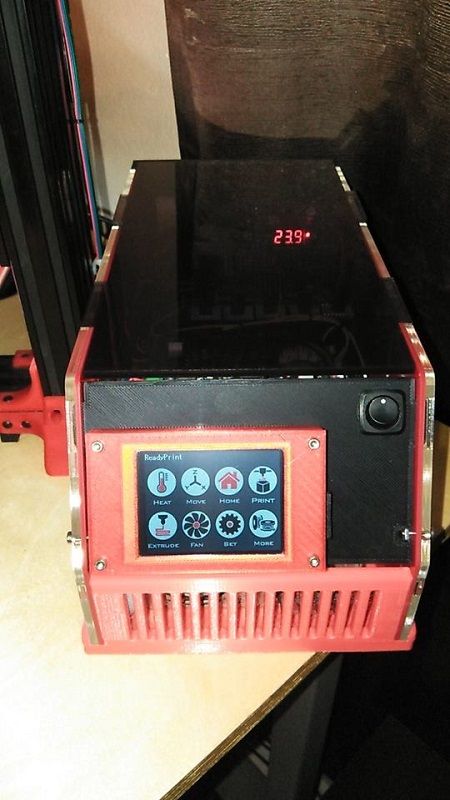
I added a dc - dc step down converter, a LM2596 with a lcd display, to my control box. I needed to create 12v to run the silent noctua fans and these have a voltage gauge that can be toggled between input and output voltage. I got mine with a red display that matches the theme of my printer but i saw them on ebay in red, blue, and green..
-
07-15-2018, 03:57 PM #69Staff Engineer
- Join Date
- Jul 2016
- Location
- South Florida, USA
- Posts
- 1,244
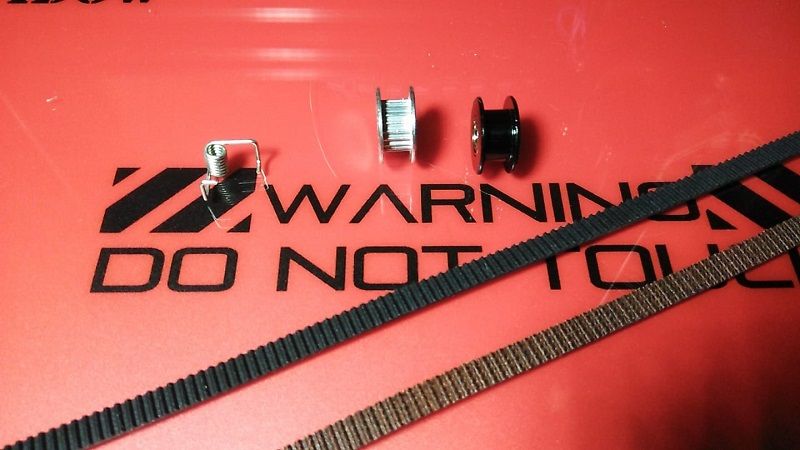
I am also upgrading the belts. I am fond of Gates fiberglass reinforced belts and I wanted to change the idler from a smooth to a toothed pulley because that is the side of the belt that rides on the belt. I will never know why all these printers ship with smooth pulleys when they ride on the toothed side of the belt. Toothed idler pulleys are not hard to come by and they are the same price everywhere as the smooth pulleys. I am actually performing this same upgrade on both axes on all 3 of my printers..
-
07-15-2018, 11:59 PM #70Staff Engineer
- Join Date
- Jul 2016
- Location
- South Florida, USA
- Posts
- 1,244
My next big mod for this printer is already in the pipeline. I have already ordered the outer Z wheel kit from 3dvice.co right here:
https://3dvice.co/products/tevo-blac...er-z-wheel-kit
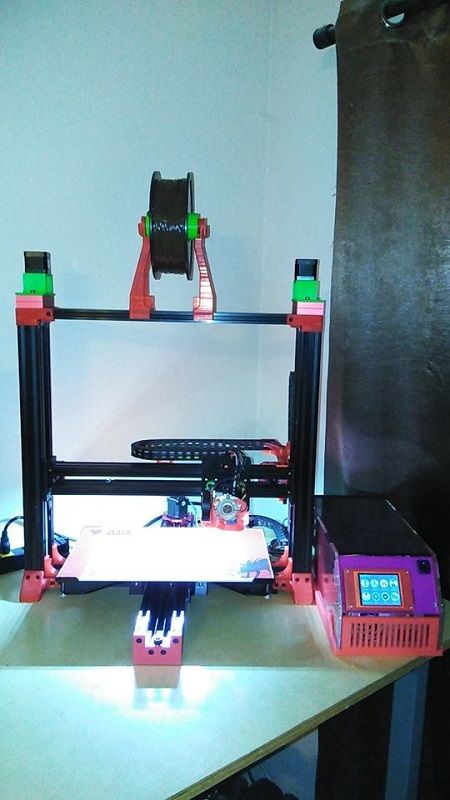
In the meantime Here is a current picture of my Tevo Black Widow..


 Reply With Quote


Design not printing solid
09-17-2024, 06:12 AM in 3D Modeling, Design, Scanners