


Results 121 to 130 of 255
Hybrid View


-
11-12-2014, 11:33 PM #1Student

- Join Date
- Jun 2014
- Location
- Dearborn, MI
- Posts
- 23
I got the 10" i3v with the relay and it only takes about 4 minutes for the hotend and between 10 - 15 (110) minutes for the bed. I take the hotbed to about 106 because the bed struggles to keep a 110 temp. If you have any air blowing over these parts, they will take a lot longer to heat up. Originally Posted by usarmyaircav

Last edited by RaySuave; 11-12-2014 at 11:41 PM.
-
11-13-2014, 11:20 AM #2Technologist
- Join Date
- Aug 2014
- Location
- Oklahoma
- Posts
- 191


Another question I have is it seems like the spool holder rubs on the makerfarm filament roll, enough that I am pretty sure it isn't going to turn by being pulled from the extruder. Thoughts?
-
11-13-2014, 11:24 AM #3Engineer-in-Training
- Join Date
- Mar 2014
- Location
- USA
- Posts
- 388
It should be fine as is. If you want to reduce the friction slightly try this: http://www.thingiverse.com/thing:326641
-
11-13-2014, 11:34 AM #4Technologist
- Join Date
- Aug 2014
- Location
- Oklahoma
- Posts
- 191
I should have clarified, that it seems to be rubbing on the sides at the bottom of the spool, because mine seems to be narrower at the bottom than the top, and there really isn't a way that I could have put it together wrong. (or so I think. Originally Posted by gmay3
 )
)
On a side note, I have that thingi liked and saved in a collection.
Last edited by usarmyaircav; 11-13-2014 at 11:35 AM. Reason: edited to add about thingiverse item.
-
11-13-2014, 11:41 AM #5Staff Engineer
- Join Date
- May 2014
- Location
- Highlands Ranch, Colorado USA
- Posts
- 1,437
I have three rolls of filament from MakerFarm - all three have different types of spools. Someone else reported that the filament they got from MakerFarm had a spool too wide to fit the spool holder. Is that what you mean? That would be a problem. Otherwise, something like gmay3's suggestion would help. At least one person is sure his extrusion jams/stoppages were due at least in part to the spool hanging up on the stock mount. Ray Suave has a thread showing use of a wood stick and bearings instead of the wood cross piece. I moved away from the stock mount when I was having stoppages, but I think my problem was ultimately repetitive retractions in the particular print I was working with. Originally Posted by usarmyaircav
EDIT: Posted before seeing the reply to gmay3Last edited by printbus; 11-13-2014 at 11:54 AM.
-
11-13-2014, 12:05 PM #6Technologist
- Join Date
- Aug 2014
- Location
- Oklahoma
- Posts
- 191
Printbus, you have it correct the spool is too wide for the spool holder. I will have to figure out how I can do this. My current location gives me no where to put the spool. I will have to consider where I can move the printer to, or another way I can mount it above the printer.
-
11-13-2014, 12:09 PM #7Engineer-in-Training
- Join Date
- Mar 2014
- Location
- USA
- Posts
- 388
That's pretty disappointing, I have 4 spools and they have all been the same so far and have fit in the stock holder, which is very lucky I guess! They were all products with this style picture as an example: Originally Posted by printbus
http://www.makerfarm.com/index.php/a...-filament.html
-
11-13-2014, 12:22 PM #8Staff Engineer
- Join Date
- May 2014
- Location
- Highlands Ranch, Colorado USA
- Posts
- 1,437
Digging the MakerFarm filament out for measurements, I may only have two spool styles. Two rolls are on spools about 245mm x 56mm. One (1.75mm black PLA) is 205mm x 73mm. The latter is advertised as such on MakerFarm (well, they say it is 200mm x 73mm - close enough), and I remember Colin confirming via email that I'd be OK with that spool before he shipped it. I don't believe that would fit the stock filament mount.
Last edited by printbus; 09-13-2016 at 03:06 PM. Reason: grammar
-
11-30-2014, 09:25 PM #9Staff Engineer
- Join Date
- May 2014
- Location
- Highlands Ranch, Colorado USA
- Posts
- 1,437
NOV 2014 BENCHMARKS USING MAKE:2015 TEST MODELS
Here are details related to my attempts at printing the test models used in the MAKE: 2015 Shoot Out of several 3D printers. Make: has provided the test models and a partial explanation on the performance grading process at http://www.thingiverse.com/thing:533472. Note that the scoring criteria currently provided on the instructions page at Thingiverse totals differently than the scores in the Make: Shoot Out comparisons.
The intent of the Make: Shoot Out was to evaluate the results of experts running standardized prints using the default software and recommended settings suggested by the respective printer manufacturers. My intent was different. I wanted to evaluate how well I could print with the dialed-in MakerFarm printer I have, my software suite, and the tweaking of print settings that my level of experience would know to do. I also wanted to use printing these test models as a way to learn. So, when I had an idea on how to improve on print results, I ran another with different settings. For example, I took great liberty in deciding when to apply print cooling airflow, often manually adjusting the airflow throughout a print. After all, that is how I go about printing.
All test prints were performed through Repetier-Host v1.0.6 using the integrated Cura Engine slicer. The final prints used MakerFarm black 1.75mm PLA filament. The extruder steps per unit was calibrated prior to the tests, and Cura was adjusted for the measured diameter of the filament. Elmer's Washable School Glue Stick (disappearing purple) and a 70-degree C bed were used for adhesion. Due to the low bed contact area of the bridging performance test, a brim was added to that print as a precaution. All prints started with a 220-degree nozzle temp. That may seem high for PLA, but this PLA seems to prefer it. I've seen this filament stop extruding when I've dropped to "normal" PLA temperatures. On test prints where I knew I would have print temperature issues, I manually decreased the nozzle temp to 215 degrees after initial layers were down.
NOTE: After initial completion of the prints in yellow ABS, I realized that the Combine Everything (Type A) option was enabled in the Repetier-Host Cura settings. I believe this is a default setting, likely invoked when I recently upgraded Repetier-Host. Unfortunately, that setting seemed to have a bad effect on print quality. So, the prints have all been redone. Information here and in the subsequent post has been revamped to reflect the final prints.
For my future reference as much as anything, here's a summary of key configuration aspects in place as of these updated prints. Note that this is simple text with comments; it is NOT code or an ini file that can be used as is. I'm sure there'll be a point where I look back at these settings and have a good laugh. They're just where I'm at today.
DIMENSIONAL ACCURACYCode:Printbus configuration summary 3 Dec 2014 *** MARLIN DETAILS *** dacb fork for MakerFarm as of Sept 28 2014; my personal motion related changes: HOMING_FEEDRATE {100*60, 100*60, 100, 0} mm per minute DEFAULT_AXIS_STEPS_PER_UNIT {80, 80, 4000, 900} DEFAULT_MAX_FEEDRATE {150, 150, 2, 22} mm per second (Z motors observed to skip at Z much more than 2) *** REPETIER-HOST v1.0.6 CONFIG PRINTER SETTINGS - Printer dialogue *** Travel Feed Rate: 6000 mm/min (100mm/sec) Z-axis Feed Rate: 100 mm/min (1.67mm/sec) Manual Extrusion Speed: 2 to 5 mm/sec (120 to 300 mm/min) Manual Retraction Speed: 2 mm/sec (120 mm/min) *** REPETIER-HOST v1.0.6 CONFIG PRINTER SETTINGS - Extruder dialogue *** Number of Extruder: 1 Extruder 1 diameter: 0.4 mm *** REPETIER-HOST v1.0.6 CURA ENGINE - Print Speed & Quality dialogue Print speed: 40 to 100 mm/sec (this is available range; actual print speed set by slider in print settings) Travel speed: 100 to 150 mm/sec First layer speed: 30 to 50 mm/sec Outer perimeter speed: 30 to 80 mm/sec Inner perimeter speed: 40 to 80 mm/sec Infill speed: 60 to 80 mm/sec Layer height: 0.2 mm (only a 0.2mm quality has been defined) First layer height: 0.35 mm First Layer Extrusion Width: 100% *** REPETIER-HOST v1.0.6 CURA ENGINE - Print Structures dialogue Infill shell thickness: 0.8 mm Infill Top/Bottom Thickness: 0.95 mm Infill overlap: 10% Infill pattern: Automatic Infill Solid Top and Solid Bottom: both checked Skirt Line Count: 2 Brim Width: 3 Skirt Distance: 3 mm Minimum Skirt Length: 150 mm Raft settings (undetermined; raft never used) G-code Flavor: RepRap (Repetier/Marlin/Sprinter) *** REPETIER-HOST v1.0.6 CURA ENGINE - Print Extrusion dialogue Spiralize Contour: unchecked (have not seen good results with this) Minimize Crossing Perimeters: checked Enable Retraction: checked Retraction speed: 10 mm/sec Retraction distance: 1.5 mm (but still seeing very fine strands remaining) Minimum travel before retract: 4 mm (depends on print) Minimum Extrusion Before Retract: 0.02 mm (depends on print) Z Hop: 0 mm (Z hop adds considerable print time on a lead screw system) Cut Off Object Bottom: 0 mm Nozzle Diameter: 0 mm (0 means use value from printer settings) Multi Extruder Settings: (undetermined; multiple extruders not present) Cooling fan full at height: 0.5 mm (applies only when print settings has cooling enabled) Minimum speed: 0 mm/sec (print dependent, varies with layer size and cooling approach) Cool head lift : unchecked (print dependent; often used on very small prints to help maintain a minimum print speed) *** REPETIER-HOST v1.0.6 CURA ENGINE - Print Advanced dialogue Mesh Errors: All unchecked (Combine Everything type A observed to have bad effects) *** REPETIER-HOST v1.0.6 CURA ENGINE - Filament dialogue Filament diameter: 1.74 mm (filament dependent) Filament flow: 100% Print emperature: 220 degrees C (filament dependent) Bed temperature: 70 degrees C (filament dependent) Cooling Min Fan Speed: 5 % Cooling Max Fan Speed: 25 % Minimum Layer Time: 2 sec (print dependent; varies with layer size and cooling approach) *** REPETIER-HOST v1.0.6 CURA ENGINE - Print Settings Adhesion type: none (print dependent; Brim used on prints with low bed surface area) Quality: 0.2 mm (only a 0.2 mm quality has been defined) Support type: none (print dependent) Speed: Slider usually set for 75mm print speed; this results in outer perimeter speed 59 mm/sec and infill speed 71 mm/sec Infill density: 25% (print dependent after gcode evaluation in gcode.ws viewer) Enable cooling: unchecked (manual controls normally used for varying print cooling speed) Filament settings: Extruder 1 (set to whatever filament definition is to be used)
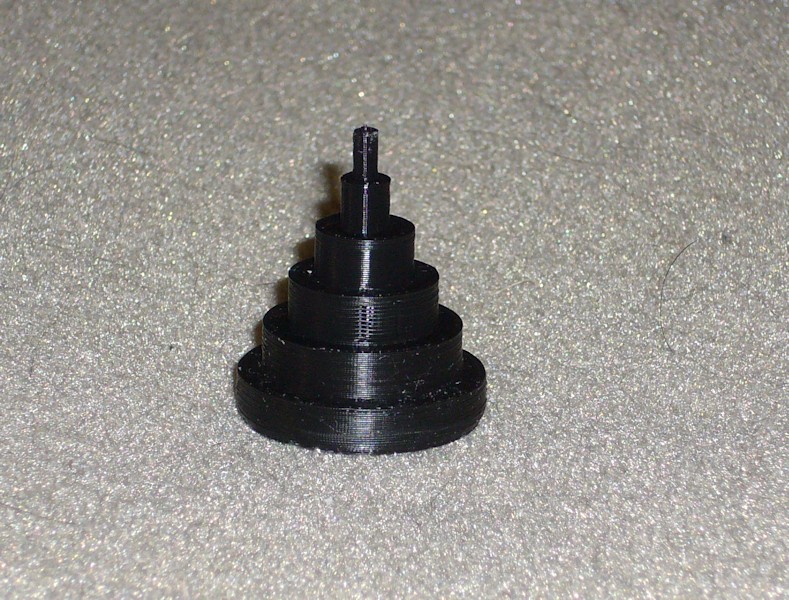
I found it easy to get good results from this one. Airflow from the print cooling blower was applied throughout the print, even though it would mostly only be required to ensure a clean uppermost post. Dimensional accuracy and X-Y difference lead to a score of 5 out of a possible 5.
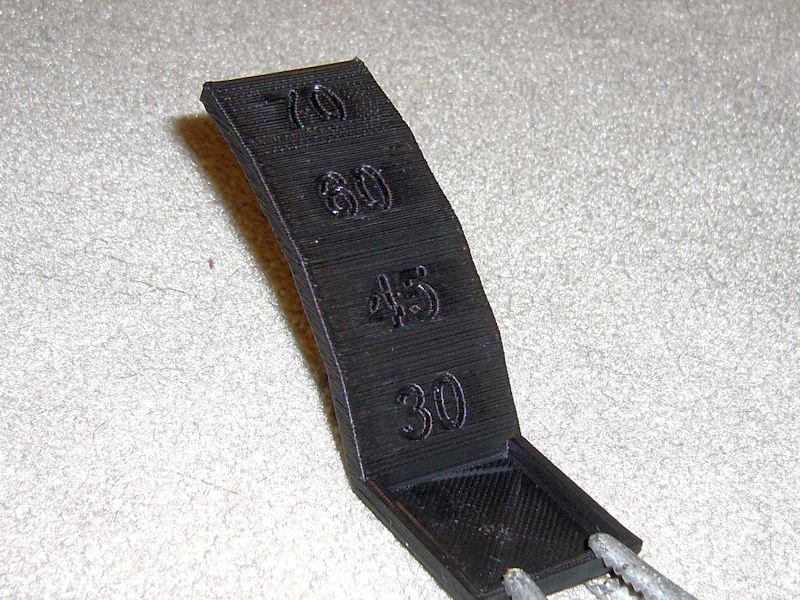
OVERHANG PERFORMANCE
I ended up printing this multiple times, with no dropped filament on any print. The Make: scoring criteria is vague on whether the variances on the top face or the underside face are what is important. All my prints had fairly consistent appearance across all angles viewed from the top. I took on improving the underside appearance as a challenge. The underside appearance varied significantly with print cooling airflow. The best results were obtained with the print oriented so that airflow is applied on-edge to the arch, with the amount of airflow manually incremented at each angle until the blower was running at 100% for the 70-degree slope. My rationale for the airflow orientation is that the air coming out of the cooling blower is very focused, and orienting the print so that airflow hits the wider print face or underside was actually leaving much of the print outside the airflow as the nozzle moved around the layer being printed. With no dropped filament and no discernible difference across the angles on both the top and underside faces, I score this a 5 out of 5.
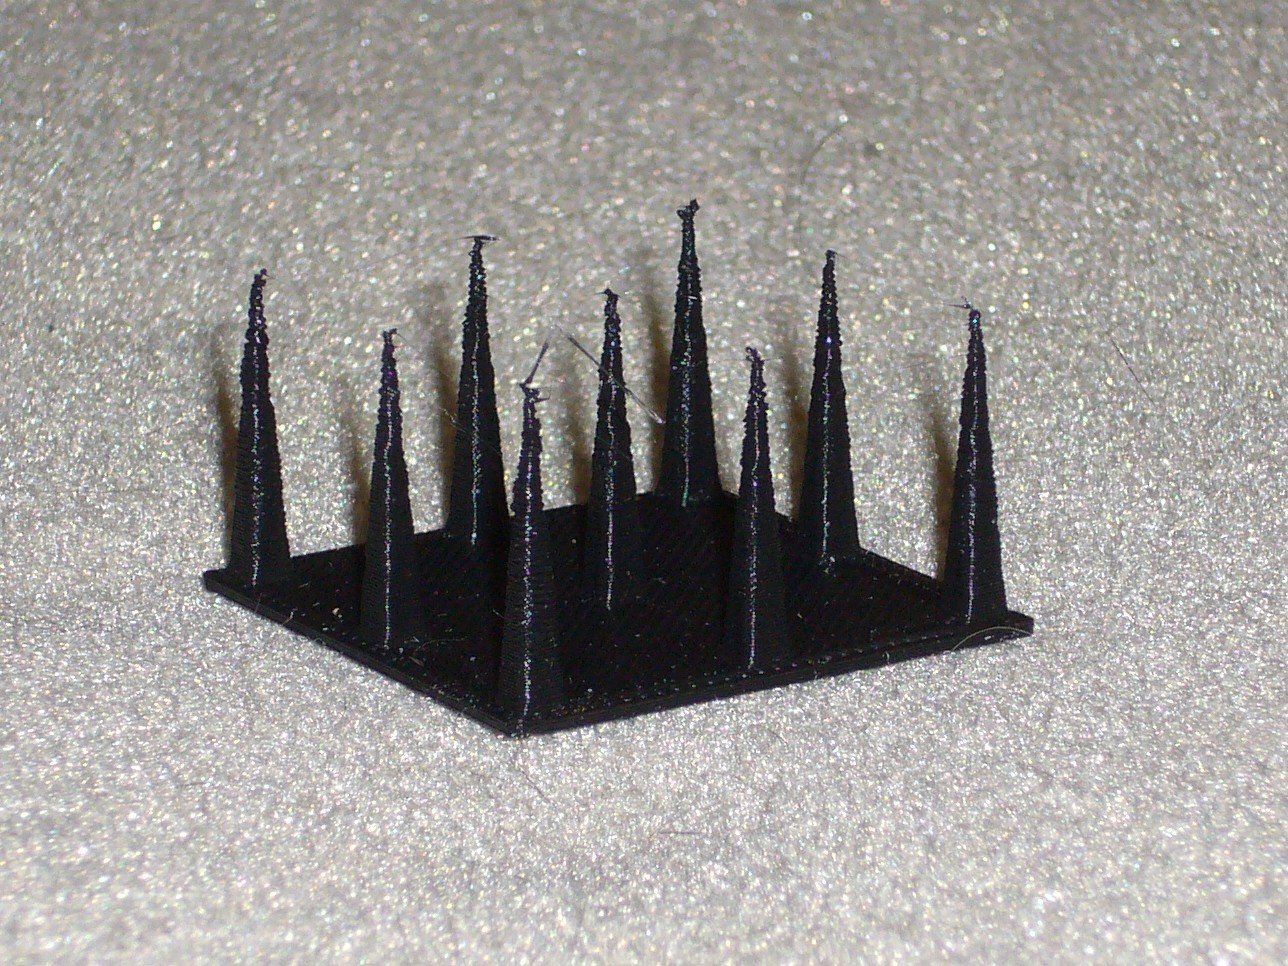
FINE POSITIVE SPACE FEATURES
A lot of factors came into play on this model. The spires are 15mm apart, so my typical setting of 4mm for minimum travel before retraction was fine. The tips of the spires narrow to 0.4mm, so I ended up tweaking the minimum extrusion before retraction down to the 0.02mm default Cura setting (I've been printing with this at about 1.2mm). Then, the retraction distance was tweaked to minimize remaining stranding between spires - I ended up at 1.5mm. Print cooling airflow was used to help maintain the shape of the spires. Quality of the very tips of the spires was also improved by effectively removing the minimum layer print time constraint, something only possible with the use of the print cooling airflow. The final print had only a few extremely fine strands between some spires that might have been removed with an additional reduction in retraction distance. Presence of the strands lead to a score of 4 out of a possible 5.
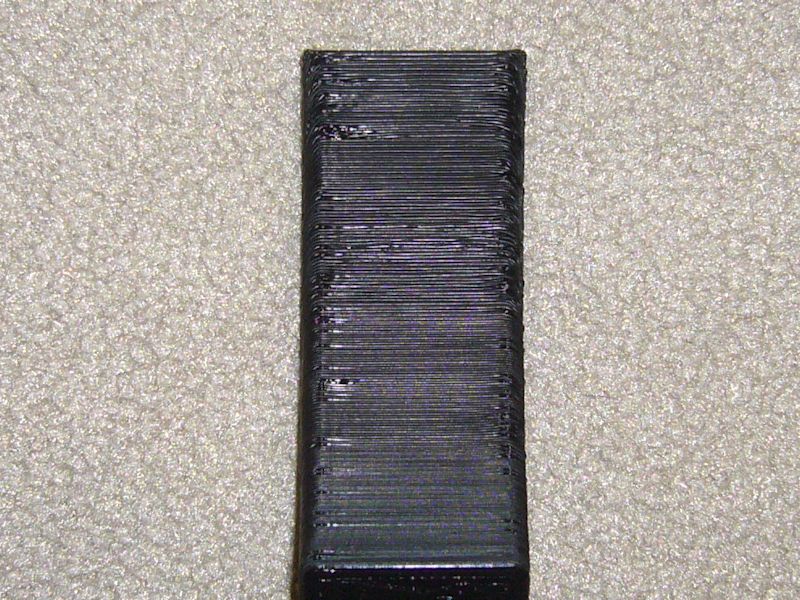
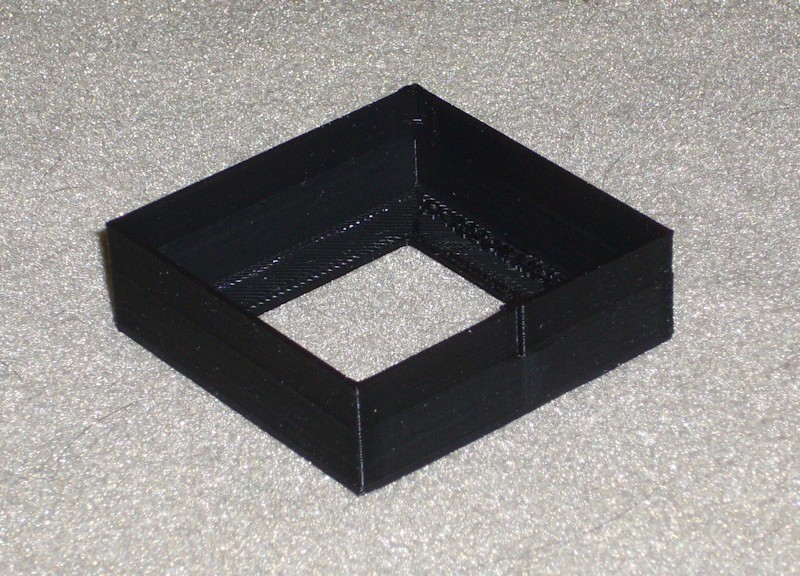
MECHANICAL RESONANCE IN X-Y
The step and notch on the front wall was troublesome in my initial round of prints. Multiple attempts at the print all led to more of smoothed over bump than a step and a notch. Unchecking the Cura Combine Everything Type A mesh correction that I didn't realize was enabled seemed to be what fixed that. The step on the inside of the print is now pretty clean, as is the notch on the upper half of the outside. Without a perfect print to compare to, I don't think I see any ripple on print corners or at the notch, so I give the final print a 2 out of 2. Printing again with infill percentage set to 0 would eliminate a very slight amount of a repetitive vertically oriented pattern showing under the right light on the top half of one wall.
Results for the Mechanical Resonance in Z, Negative Space Tolerances, and Bridging Performance tests are in the next post.Last edited by printbus; 05-02-2015 at 10:38 PM. Reason: migrated to offsite image storage due to 3DPrintBoard issues
-
11-25-2014, 08:00 PM #10Staff Engineer
- Join Date
- May 2014
- Location
- Highlands Ranch, Colorado USA
- Posts
- 1,437
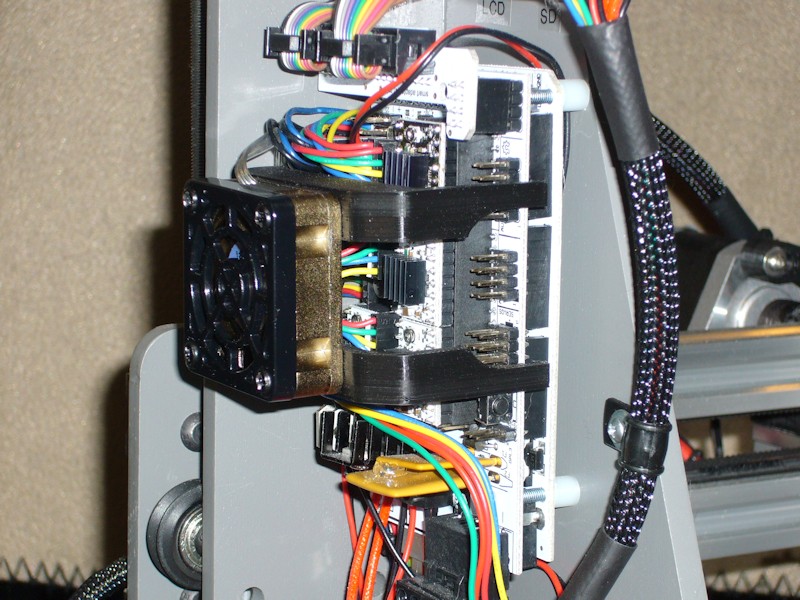
RAMPS STEPPER MOTOR DRIVER COOLING FAN
I had printed a pair of these RAMPS 40mm fan brackets a while ago, and finally got around to installing the fan. There are various similar brackets on thingiverse, but I liked how the thinner legs on this one had less of a chance at interfering with something on the RAMPS board.
I hadn't noticed any issue with the stepper motor drivers running hot, so this is just a preventive measure. The fan I used is a Silenx 40mm fan I had from experimenting with various print cooling schemes. At 14 dBa for 5 CFM airflow, it is extremely quiet. The fan was installed so that the airflow direction is down onto the board. A fan guard was installed simply because I had one available.
Since I have a heat bed relay, there isn't much heat being dissipated in the MOSFET for the RAMPS D8 output. So, I positioned the fan assembly above the center of the four stepper driver boards.
Last edited by printbus; 09-23-2016 at 11:00 PM. Reason: deleted old broken thumbnail link

 Reply With Quote


Please explain to me how to...
Yesterday, 12:15 PM in 3D Printer Parts, Filament & Materials