


Results 1 to 10 of 255
Threaded View


-
05-30-2014, 12:14 AM #4Staff Engineer

- Join Date
- May 2014
- Location
- Highlands Ranch, Colorado USA
- Posts
- 1,437

X Motor subassembly
X MOTOR
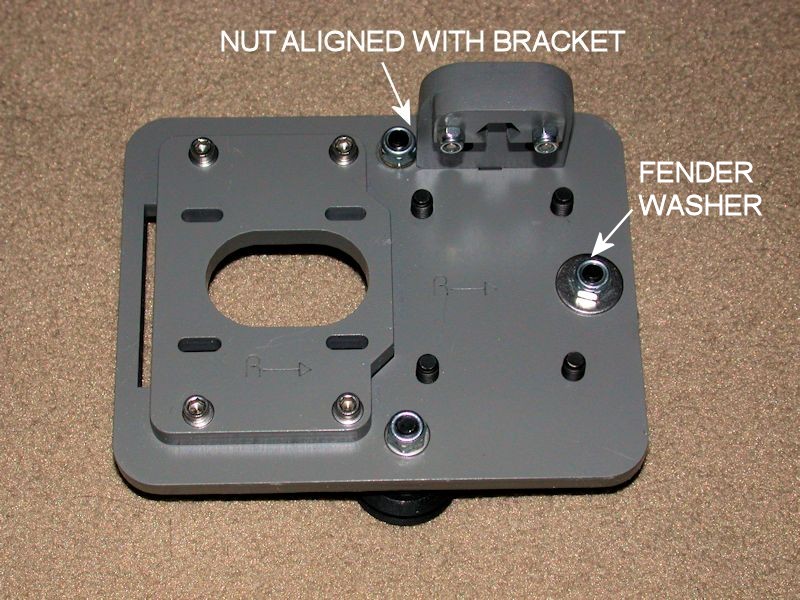
I added a fender washer to the nut on the bolt for the eccentric spacer. This will help keep the nut from tearing into the wood as the eccentric spacer is adjusted.
When attaching the v-rail wheels, I suggest temporarily inserting the bracket that holds the nut for the Z-axis threaded rod. This allows you to fit check the bracket; I found it necessary to orient the nut on the adjacent wheel bolt so a flat is up against the bracket. In my case, the two brackets were sized slightly different - likely just the tolerance on the laser cut. I picked the preassembled bracket that fit the best on the X Motor subassembly and then kept it with the X Motor until permanently installed.
For appearance, I experimented with reversing the wheel bolts so the bolt heads faced the front of the printer. This is troublesome in that there isn't enough clearance for the lock nut and any bolt excess on the rear of the plate. The standard nuts I experimented with would occasionally rub on the frame. For this bolt reversal to have worked, thinner jam nuts would have to be used and the bolt would have to be shortened so the threaded end is flush with the jam nut. I decided this wasn't worth the added effort.Last edited by printbus; 05-02-2015 at 11:36 PM. Reason: migrated to offsite image storage due to 3DPrintBoard issues


 Reply With Quote


Please explain to me how to...
Yesterday, 03:08 PM in 3D Printer Parts, Filament & Materials