


Results 1 to 10 of 255
Threaded View


-
05-30-2014, 12:24 AM #8Staff Engineer

- Join Date
- May 2014
- Location
- Highlands Ranch, Colorado USA
- Posts
- 1,437

X Idler subassembly
X IDLER SUBASSEMBLY
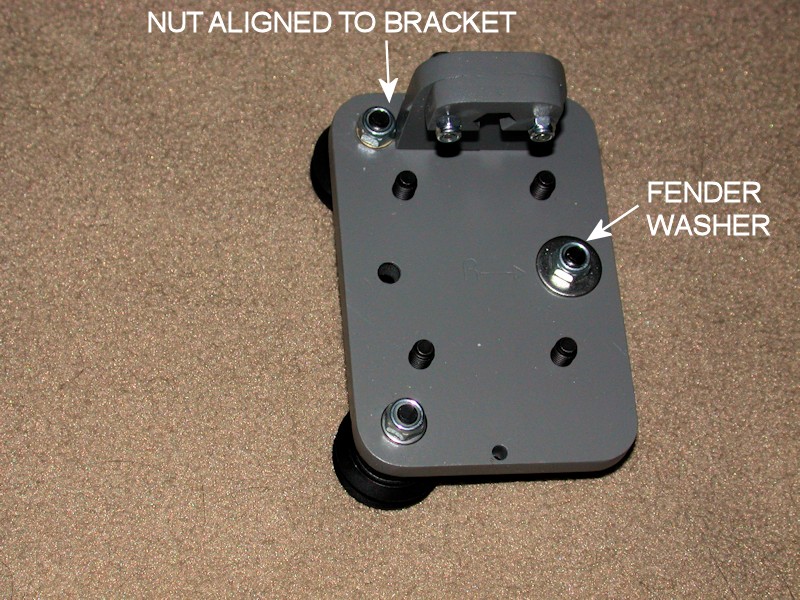
As on the X Motor subassembly, I added an M5 fender washer to the bolt for the eccentric spacer, and the bracket for the nut on the Z-axis threaded rod was temporarily installed for fit check and nut alignment. The bracket used in the fit check was kept with the X Idler so it would be the one permanently installed later.
FOLLOWUP COMMENT: I later added a small block of scrap wood to the bottom of the X Idler to improve the mating surface with the Z endstop switch. See the later ENDSTOP INSTALLATION post for a picture.
FOLLOWUP COMMENT #2: Even later I opted to change the Z endstop switch approach, so the small block of wood eventually became unnecessary.
FOLLOWUP COMMENT #3: During final adjustments, how the belt rides on the idler bearings can be adjusted by moving the idler bearing bracket slightly on the v-rail. I later incorporated a custom belt guide design. I installed it after using the printer a while simply because it's a better design approach that won't allow the belt to rub on the wood brackets. Although the thingi is intended for the i3v Y idler, it works for the X-idler too.Last edited by printbus; 05-02-2015 at 11:38 PM. Reason: migrated to offsite image storage due to 3DPrintBoard issues


 Reply With Quote


Ender 3 Neo - Jam Problem
05-08-2024, 03:06 PM in Tips, Tricks and Tech Help