


Results 2,911 to 2,920 of 4110
Thread: Qidi Tech 1 - Replicator 1 clone
Hybrid View


-
10-17-2016, 11:16 AM #1Super Moderator

- Join Date
- Jun 2016
- Location
- Oklahoma
- Posts
- 904
How did you wire up its power supply? Originally Posted by Warren O'neill

-
10-19-2016, 01:04 AM #2Student
- Join Date
- Mar 2016
- Posts
- 29
i have added extra led's to the inside of the printer so i just wired it up to the same 12volt power supply i use for them Originally Posted by wirlybird
-
01-04-2017, 10:50 AM #3Super Moderator
- Join Date
- Apr 2014
- Location
- KS
- Posts
- 907

How are things working out on this upgrade Warren?
I more of these kits available if anyone is interested. Thanks goes out to the early adopters of this upgrade. Dave, CNC Artist and Warren, and me.
The production pieces are a little different, but functionally they are the same. Due to the cost being essentially the same, the Z guide rods are now 12mm. I don't see much difference in the stiffness between the 10mm and 12mm rods though. Compared to stock, it is night and day, this is mainly due to the precision bearings being used and the custom top and bottom brackets that are 4x more stable than the stock pieces.
Originally Posted by Warren O'neill
-
01-08-2017, 01:09 AM #4Technologist
- Join Date
- Mar 2016
- Posts
- 168
Warrens kit looks great and definitely jfk, I've been printing away using the upgrades and have been happy with the overall improvement in quality of the prints and ease of leveling. Originally Posted by jfkansas

Currently at ~3700 hours of print time and hoping to get the extruder kit installed sometime early this year.
-
01-08-2017, 06:37 AM #5Super Moderator
- Join Date
- Apr 2014
- Location
- KS
- Posts
- 907
\\\ Originally Posted by cncartist
Good to hear. Now just gotta get some instructions and or video done so can get these moving. :-)
-
10-09-2016, 11:51 AM #6Super Moderator
- Join Date
- Jun 2016
- Location
- Oklahoma
- Posts
- 904
I forget and can't find any posts but has anyone here used Hatchbox wood filament? Wondering on basic settings.
-
10-09-2016, 12:04 PM #7Technician
- Join Date
- Sep 2016
- Posts
- 80
Continuing my saga, I have the nozzle off and I still have a piece of filament stuck in here, and am unable to get a grip on it with tweezers or pliers.


-
10-09-2016, 06:13 PM #8Super Moderator
- Join Date
- Jun 2016
- Location
- Oklahoma
- Posts
- 904
Ok, time for wood. First a calibration cube to see what happens. Same rough edges I always get!
Then something real and it worked pretty good.
[IMG]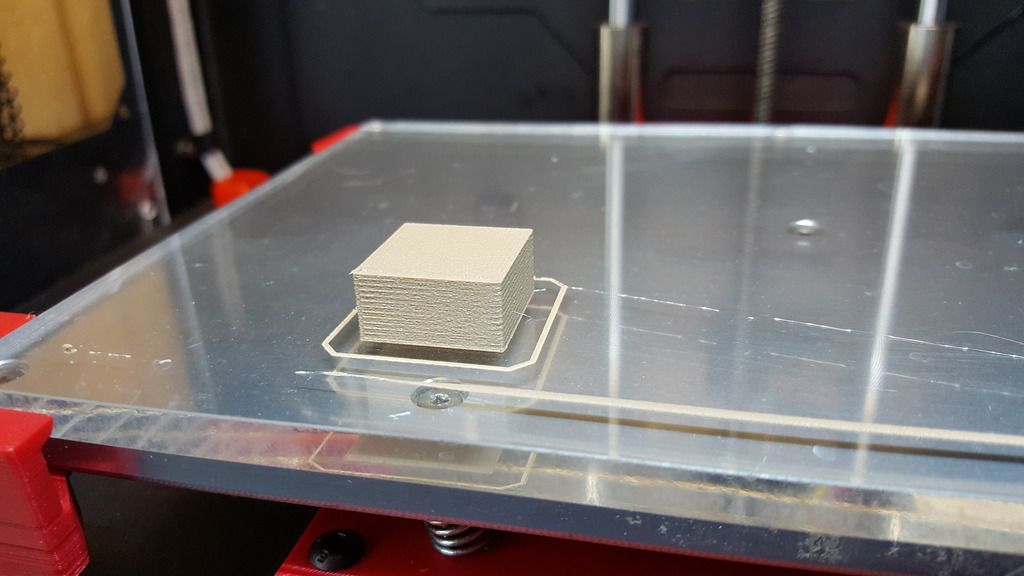 [/IMG][IMG]
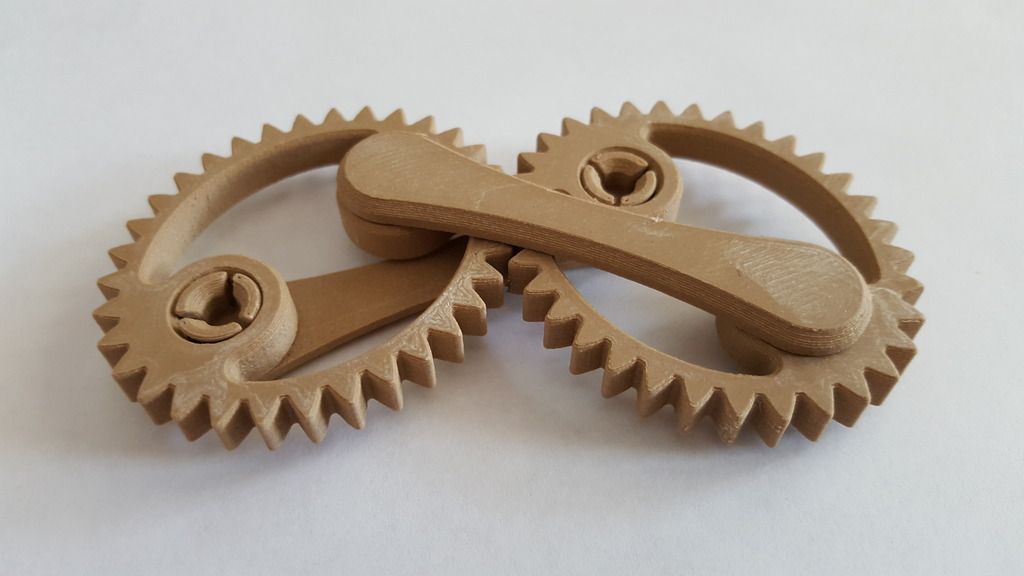 [/IMG]
-
10-09-2016, 06:53 PM #93DPrintBoardPro Member
- Join Date
- Aug 2016
- Posts
- 262

Nice!
What is the gear form? I think I have seen it somewhere but I am not sure where.
Originally Posted by wirlybird
Editor in Chief
Bitsonline
Tips Appreciated But Not Expected
BTC: 16wxHvKd3oU6SVjv6FrenqhkvRmc8t7sPy
DASH: XqyaWxH896j9YeV1M35Gzb5gmRPmPbNDGq
-
10-09-2016, 07:03 PM #10Super Moderator
- Join Date
- Jun 2016
- Location
- Oklahoma
- Posts
- 904
It's just an item from Thiniverse, "elliptical gear". It spins pretty cool.

 Reply With Quote

 [/URL
[/URL


New to 3d printing looking for...
Yesterday, 12:56 AM in Tips, Tricks and Tech Help