


Results 11 to 20 of 33
Thread: Desperate for bed adhesion !!!!
-
01-19-2015, 04:41 PM #11Engineer

- Join Date
- Sep 2014
- Posts
- 629

How big of a print are we talking? I've printed large blockish items on an 8" (200mm) square bed with the purple gluestick with good results (100c give or take, I don't have control of that). I lay it on thick on the corners, seems to hold well. Then when I have to remove the item, if it's being obstinate, I'll soak the edges with a little water, and that loosens up the glue. Make sure the bed is completely cooled first. I can then remove the glue from the part with some water and cloth.
-
01-19-2015, 08:11 PM #12Engineer
- Join Date
- Jan 2015
- Posts
- 445
Trust me, i have exhausted glue stick... 10+ prints of this model with glue sticks, with glue sticks dissolved in water and painted on (amazing by the way). It isnt strong enough. Originally Posted by Marm

If the brim circles i just did are not strong enough to hold this print down, glue sure isnt haha.
Im making an even bigger brim now...
-
01-20-2015, 11:30 AM #13Engineer
- Join Date
- Jan 2015
- Posts
- 445
Originally Posted by dunginhawk
custom made rectangle brim seemed to do the trick..
-
01-20-2015, 02:02 PM #14Staff Engineer
- Join Date
- Nov 2013
- Location
- Atlanta, GA
- Posts
- 1,084


Nice.
7890
-
01-20-2015, 02:17 PM #15Engineer
- Join Date
- Jan 2015
- Posts
- 445
not so fast my friend... even with the large brim, the corner of the print itself actually pulled away from the brim... this print is insane lol.
I may need to slow way way way down. like 20mm/s first layer and 30 or something for the rest...
-
01-20-2015, 02:43 PM #16Engineer
- Join Date
- Sep 2014
- Posts
- 629
Post up a pic.... There may be another option other than adhesion.
-
01-20-2015, 03:38 PM #17Engineer
- Join Date
- Jan 2015
- Posts
- 445
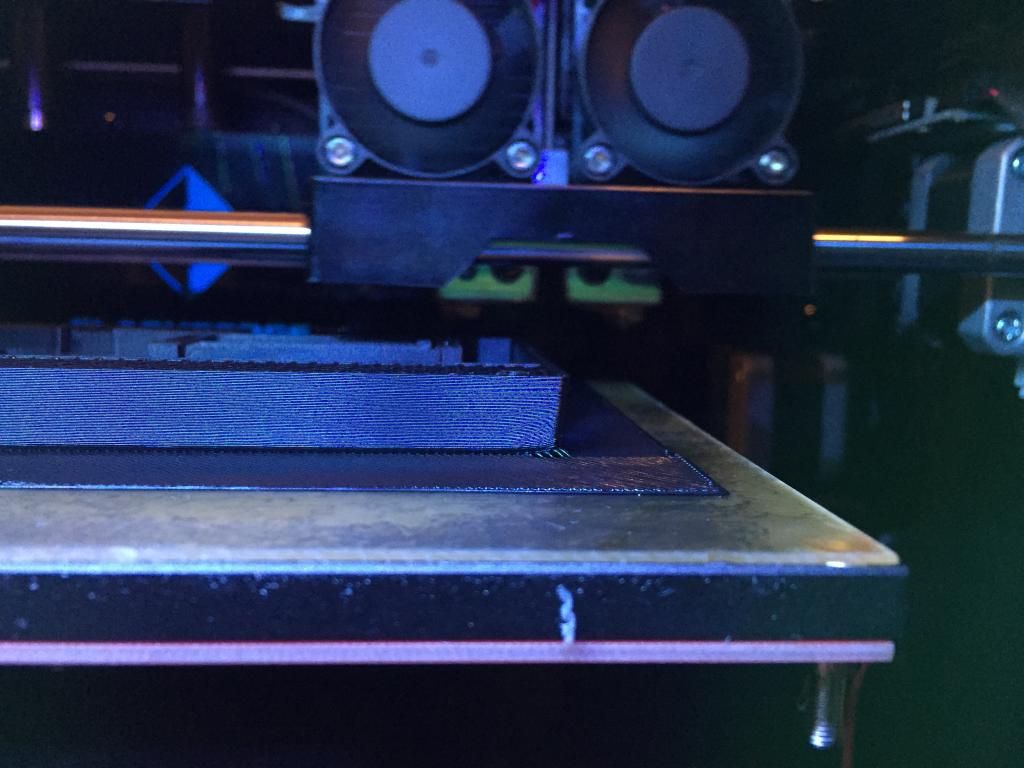
not the best pic, but here it is.
I watched the entire first layer go down and it was perfect... as good as ive seen/done.
Its actually pulling away from the brim.
Crazy thing is, this PEI i print on (its amazing btw, like REALLY amazing). holds this part so hard, that i have to level the bed every print... I is insanely hard to get off , but corners once in a while pop.
-
01-20-2015, 04:51 PM #18Engineer
- Join Date
- Jan 2015
- Posts
- 445
as the print goes on, its pulling away slowly a little bit more.. only this corner though...
-
01-20-2015, 11:21 PM #19Engineer
- Join Date
- Sep 2014
- Posts
- 629
Gat temperature readings on that corner compared to others. May have a cold spot.
-
01-20-2015, 11:44 PM #20Engineer
- Join Date
- Jan 2015
- Posts
- 445
so im running literally 10mm/s for the first layer and 20mm through the entire print.. 14 hours.. if it comes up from this.. its definately something else
 maybe a cold spot as you say.


 Reply With Quote


Extruder not feeding during print,...
04-24-2024, 01:59 AM in Tips, Tricks and Tech Help