


Results 21 to 30 of 54
Thread: simplify3d
-
01-18-2015, 05:27 PM #21Super Moderator

- Join Date
- Jul 2014
- Posts
- 8,818
it's not bad - but the infill leaves gaps and isn't strong enough for some of the models I use.
And dual extrusion is a bit crap at the moment.
But on the whole it's pretty good.
I'm hoping future improvements will justify it's cost :-)
-
01-18-2015, 08:26 PM #22Engineer
- Join Date
- Oct 2013
- Location
- new jersey
- Posts
- 752
caa, have you messed with the infill extrusion width setting in the new update. you wont get a stronger infill now with that. bump it up to 200% and watch what happens. the infill is super thick and completely solid from top to bottom. you'll need to also increase your outline overlap a little when you do this. bump that up to 30-40%. night and day difference.
as for dual ext. i dont do dual or have any experience with any of the settings but i have talked to guys that are running e3d hot end which have a short and sharp hot zone and they are printing with a tool change retraction real high. around 13-15mm for that hot end which is basically pulling the filament completely out of the heat. they are having next to zero oozing, keeping the hot end up to temp and not using any wiper walls. if your hot end has a longer hot zone then it will need to be retracted more. the idea is for you to completely remove the filament from heat. just passing along along info on that.
here is a pic i borrowed showing the infill.Last edited by jimc; 01-18-2015 at 08:35 PM.
-
01-26-2015, 09:59 PM #23Super Moderator
- Join Date
- Nov 2013
- Location
- Baltimore, MD
- Posts
- 897

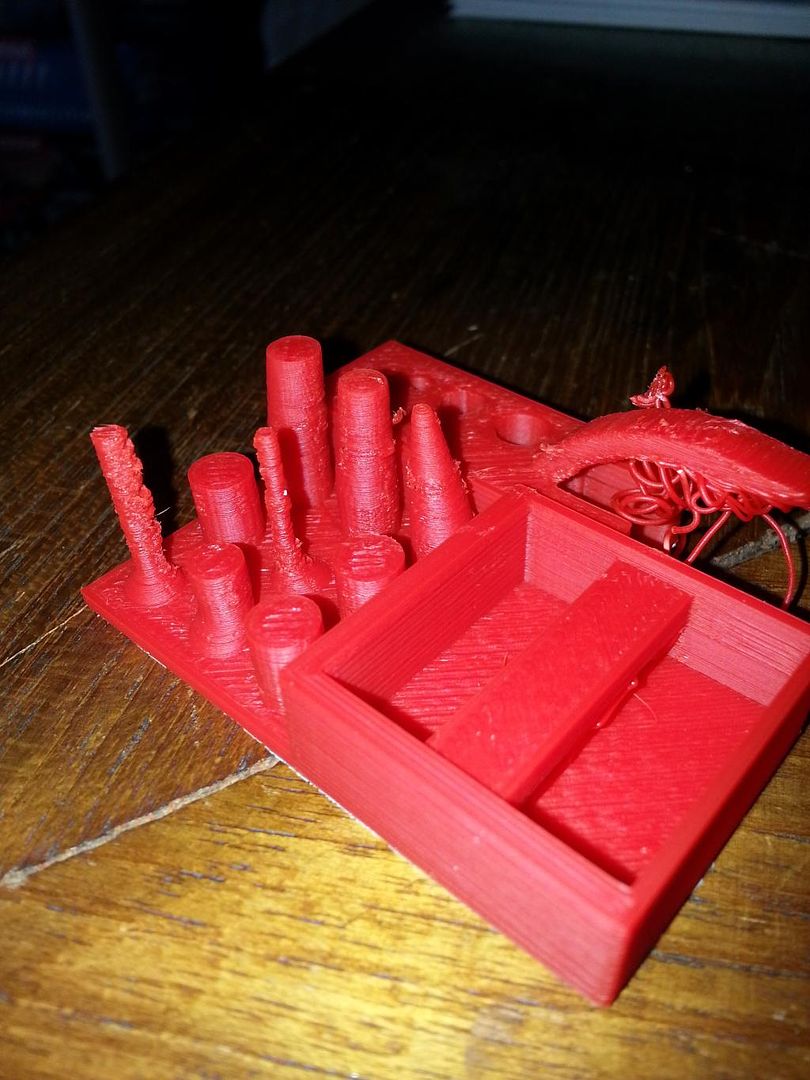
Test Prints with IttyBitty and S3D
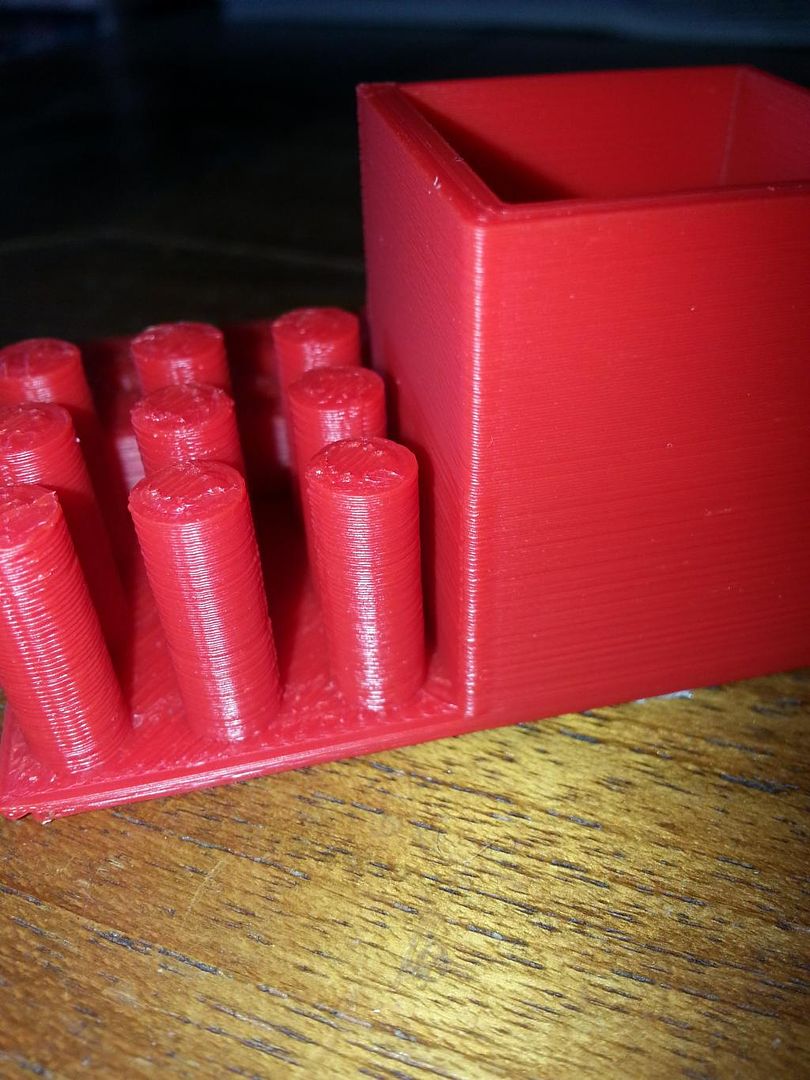
I've been working to dial in my Itty Bitty for PLA and have finally gotten my oozing and stringing under control. Here's a torture test print that is a modification of one that's common on Thingiverse. I know it's a little wobbly looking but keep the scale in mind. That little tower is 18mm tall and 1mm in diameter. I never expected to be able to print that with a .4mm orifice hotend. I also got a nearly perfect bridge inside the box. The many and small imperfections seen here look rough, and also shot with a macro lens, but again, the scale is really small. On a normal print that is 5" across they wouldn't even be seen.
Bambu P1S/AMS
NVision4D http://nvision4d.com
-
01-27-2015, 09:58 AM #24Engineer-in-Training
- Join Date
- Feb 2014
- Location
- CT
- Posts
- 345
How about posting the STL for the torture test.
-
01-27-2015, 10:30 AM #25Super Moderator
- Join Date
- Nov 2013
- Location
- Baltimore, MD
- Posts
- 897
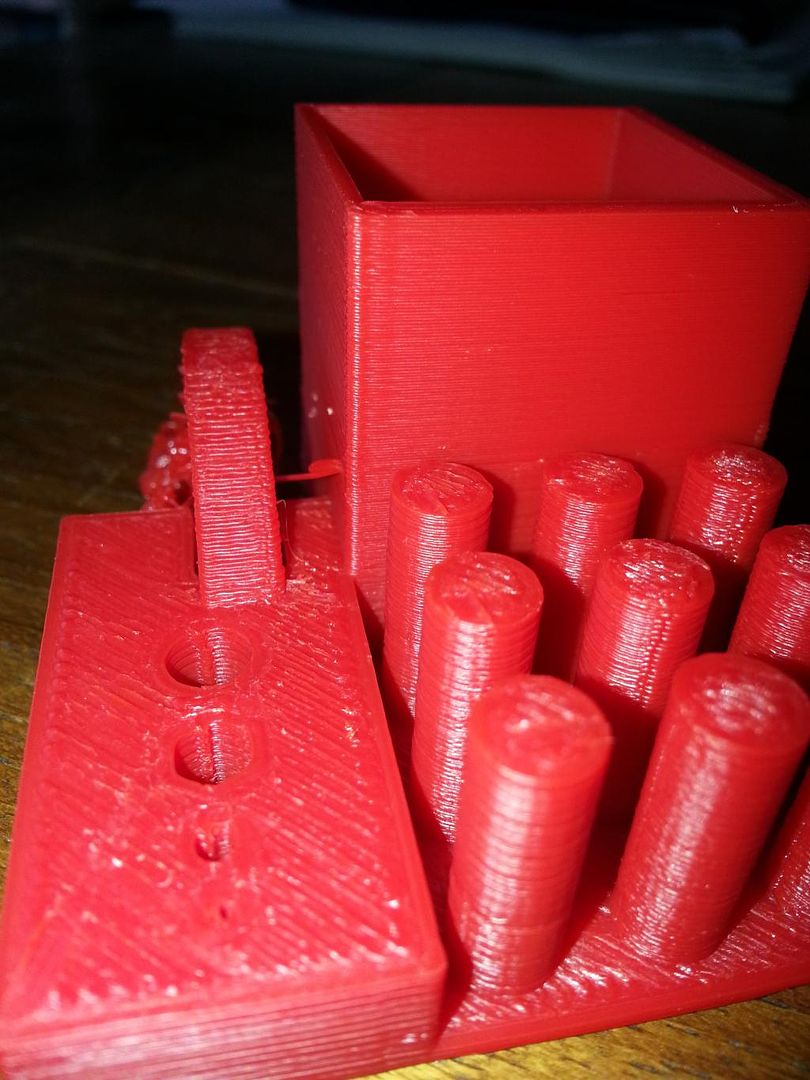
I couldn't get the arch to print either for the same reason so I modified the model to have a larger foot to stick that end down. I also shortened the whole thing so as not to waste too much plastic and then I modified the columns to force other tortures. Lastly, I added the bridge inside the box. I believe the original model was just a box with no bridge. The secret to the bridge is testing, testing, testing. I use Simplify3D as my slicer and I've set my bridging parameters to this: 'Bridging extrusion multiplier = 80%' and 'Bridging speed multiplier = 150%'. So I'm pulling a thinner filament at a faster speed, like drawing a thin guide wire across a canyon. The reduction in flow and the stretching makes for a lighter strand that cools faster and doesn't sag under gravity as much. It gives me a nice bridge. I've made bridges 75mm long. Originally Posted by TopJimmyCooks

Here is my bridge test model if you want it: 5-10-15-20-30-40mm_BridgeTest.STL
Sure, here it is. Post your prints so we can compare and tweak more.Torture_ColumnBridgeArch_Test_RH Version_04_SHORT.stl Originally Posted by beerdart
Bambu P1S/AMS
NVision4D http://nvision4d.com
-
01-27-2015, 12:46 PM #26Engineer-in-Training
- Join Date
- Feb 2014
- Location
- CT
- Posts
- 345
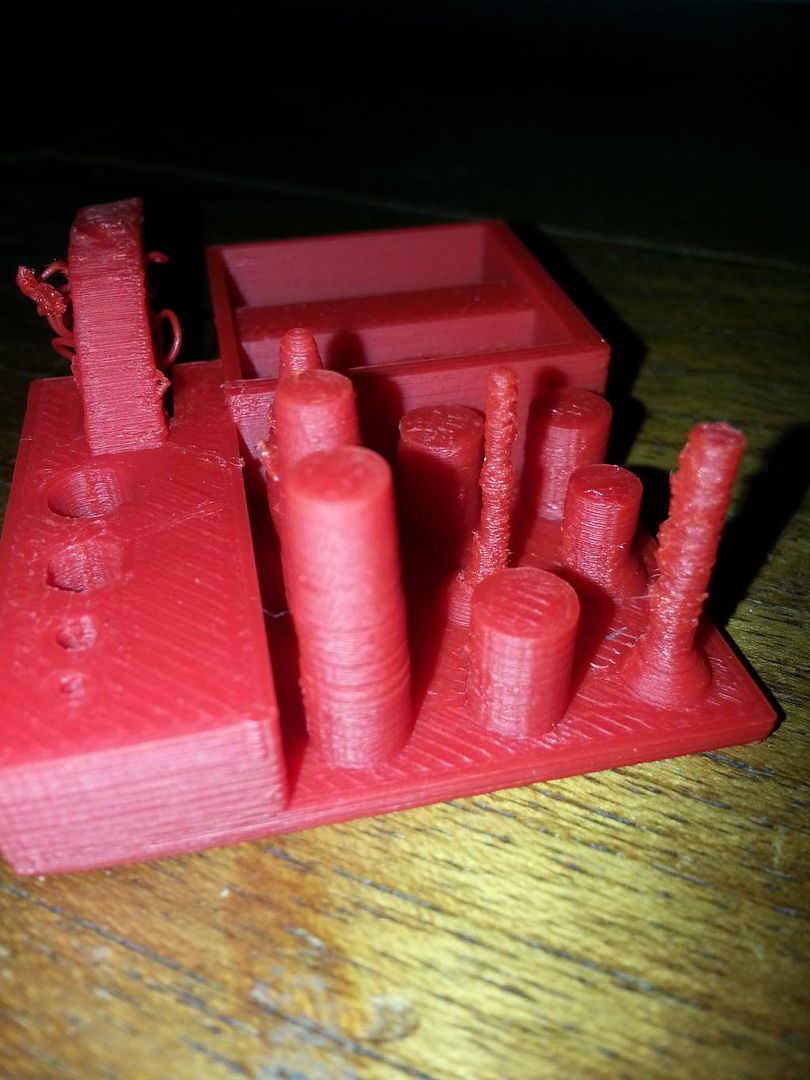
Printed the stock Thingiverse TT with S3d stock setting high res. Results pictured. Printing Robs modified TT with Multiplier 70% and speed 200%.

-
01-27-2015, 01:42 PM #27Super Moderator
- Join Date
- Nov 2013
- Location
- Baltimore, MD
- Posts
- 897
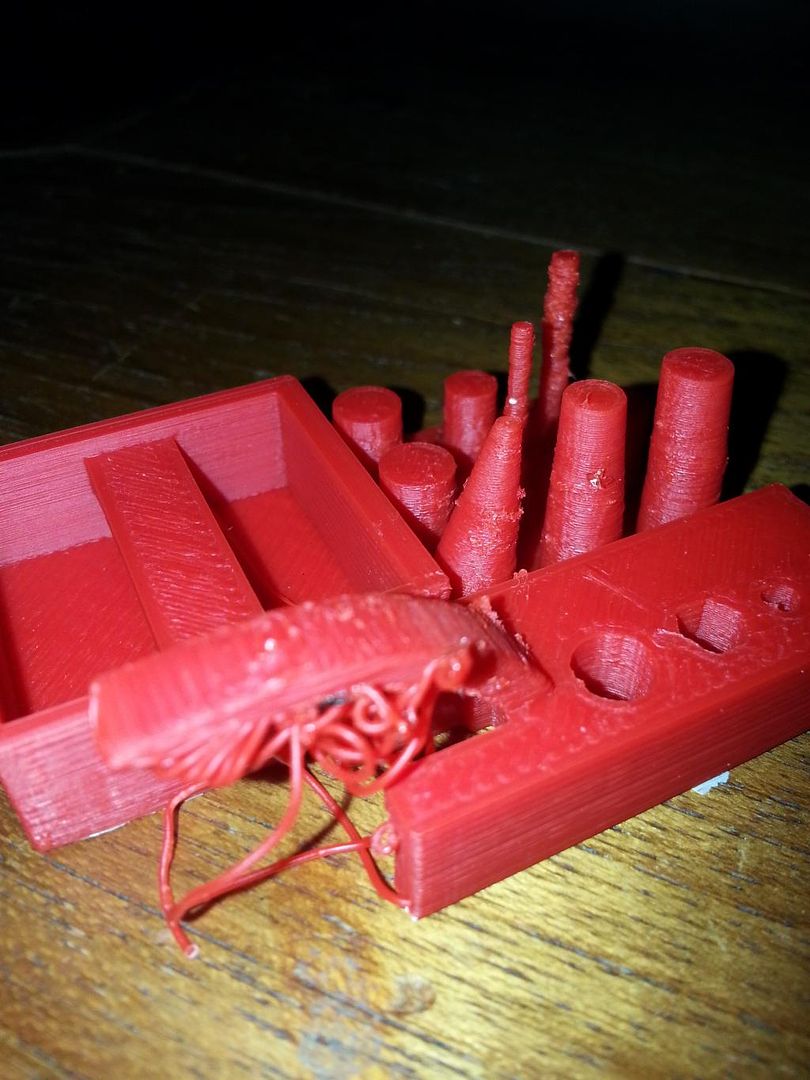
Nice clean print. Want filament? No strings or blobs except where the arch foot failed to attach. Good print.
Bambu P1S/AMS
NVision4D http://nvision4d.com
-
01-27-2015, 03:19 PM #28Engineer-in-Training
- Join Date
- Feb 2014
- Location
- CT
- Posts
- 345
Robs TT the arch still failed but the box bridge is fine. The filiment is Push Plastic ABS.
-
01-27-2015, 03:33 PM #29Super Moderator
- Join Date
- Nov 2013
- Location
- Baltimore, MD
- Posts
- 897
Excellent. We are getting about the same results. The 1mm tower is a bit crunchy like mine but hey, it's 1mm. What slicer are you using?
Bambu P1S/AMS
NVision4D http://nvision4d.com
-
01-27-2015, 03:38 PM #30Engineer-in-Training
- Join Date
- Feb 2014
- Location
- CT
- Posts
- 345
S3d.......


 Reply With Quote


Extruder not feeding during print,...
04-24-2024, 01:59 AM in Tips, Tricks and Tech Help