


Results 1 to 10 of 26
-
10-19-2021, 09:31 PM #1Staff Engineer

- Join Date
- Jul 2016
- Location
- South Florida, USA
- Posts
- 1,248

Reality Thread - What printers can Actually do
It is a good time to start this thread as 3 of my 4 rigs are up and running with the 4th soon to be. The purpose of this thread is to find out how our custom printers stack up and compare. To each other and to stock printers.
Done right this thread should be both a good time for the participants and also aid in the fine tuning of our respective robots, their firmware, and slicer settings through constructive discussion.
So join the conversation any and all 3d printer owners. Post up some pictures of your print with some detailed specs about your printer and slicer settings used and share that file so the rest of the group can print the same thing and begin the discussion.
-
10-20-2021, 11:00 AM #2Super Moderator
- Join Date
- Jul 2014
- Posts
- 8,818
Okay, well I've got 2 'calibration' prints i use.
Both useful to keep and great to give away.
And I will say that a printer needs to be dialled in well to produce both.
So the first is this phone/tablet stand.
It's 2mm thick, has (takes one out of pocket to count) 6 print in place hinges. Fits a normnal wallet and will hold up to a ipad pro (biggest I've tried).
https://www.thingiverse.com/thing:3334689
I'm pretty sure I've printed one at 100mm/s on the twotrees sapphire pro2. But 75 gives a better result.
My other calibratuion print would be this iris box: https://www.thingiverse.com/thing:1817180
I have printed these at up to 150mm/s
But I did cheat on my delta :-) and used -0.1 mm for internal compensation.
On the sapphire pro I used 0.85 extrusion ratio.
Useful for items with a lot of close together nested layers.
I also use simplify3d as my default slicer.
Standard pla settings:
200c
65c bed
3 walls, 3 top and bottom layers and 15% triangular infill.
-
10-20-2021, 06:08 PM #3Technologist
- Join Date
- Apr 2021
- Posts
- 186
I'm running a custom CoreXY, and a pair of (somewhat modified) Prusas.
Slicer is PrusaSlicer, with Cura as a backup (though becoming less of a backup as I haven't run it for ages and can't be bothered revisiting its profiles)
CoreXY is running Marlin 2.0.8.2. I'm keeping an eye on 2.0.9.x, but at this stage there's no benefit for me.
One thing I am focussed on is standardised profiles. I have a series of print profiles, a series of filament profiles, and a profile for each machine. Each of these is interchangeable, so any filament profile can be combined with any print profile and run using any machine profile (see attached).
One challenge we'll have here is that the CoreXY and one of my Prusas are running hardened 0.6mm nozzles, which will occasionally present some challenges with models designed for a 0.4mm nozzle. Likewise, the 0.4mm machines may often be slower than the 0.6mm machines.
Anyway, one print that I printed ages ago, and need to make again is this:
https://cults3d.com/en/3d-model/tool...limited-radius
It was originally printed on a Wanhao i3+ in ABS.
I'll print it again on the CoreXY. Haven't decided on the plastic yet, but probably ABS again.
It needs support from the build plate only.
-
10-21-2021, 11:21 AM #4Super Moderator
- Join Date
- Jul 2014
- Posts
- 8,818
you've kind of missed the point martin.
The idea is to find something that can be printed as a 'benchmark' model. That is - and i cannot state this firmly enough - NOT a sodding, useless waste of space and plastic, bloody benchy :-)
We don't all need or want a router guide - neat though it is.
-
10-21-2021, 03:16 PM #5Technologist
- Join Date
- Apr 2021
- Posts
- 186
But likewise, we don’t all need or want phone holders and iris boxes. I don’t think we’ll find too many prints that everyone actually wants. Originally Posted by curious aardvark

Chip clips may be a good option though.
https://www.prusaprinters.org/prints...print-in-place
Generally useful. Quick to print. Work on both 0.4 and 0.6 nozzles, IIRC.
-
10-21-2021, 05:01 PM #6Staff Engineer
- Join Date
- Jul 2016
- Location
- South Florida, USA
- Posts
- 1,248
The Iris box is a test print that has a very small window for success in temp and retraction settings. Generally it brings great joy when you can print it at 1:1 scale and have it work smoothly.
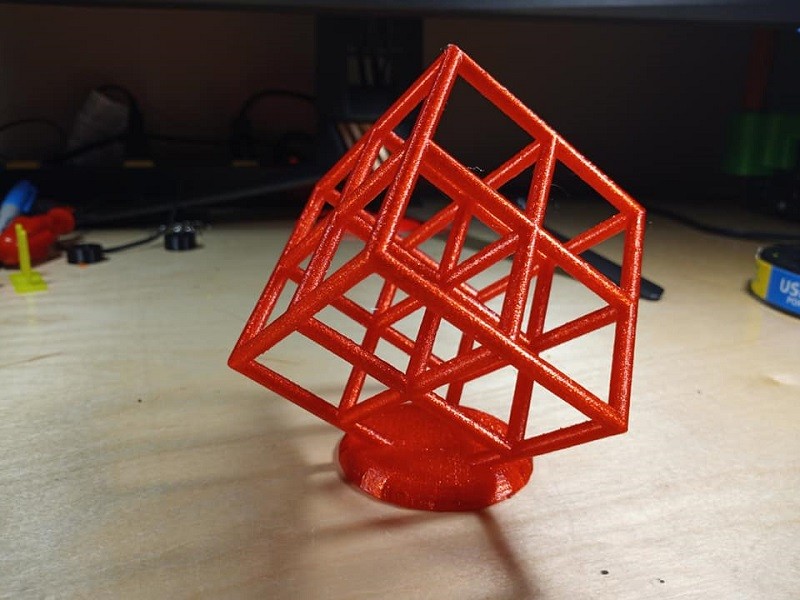
Another option is the lattice cube. I know we already did these but maybe they should be the start to set a defined bar somewhere. And then we will go from there.
So here is a link to the lattice cube: Lattice Cube 3D Printer Torture Test (Overhangs and Dual-Extrusion) by Lazerlord - Thingiverse
I printed it with this rig: GEEETech i3 32bit Rework (3dprintboard.com)
These are the results I got with PETG filament using a 0.4mm nozzle..
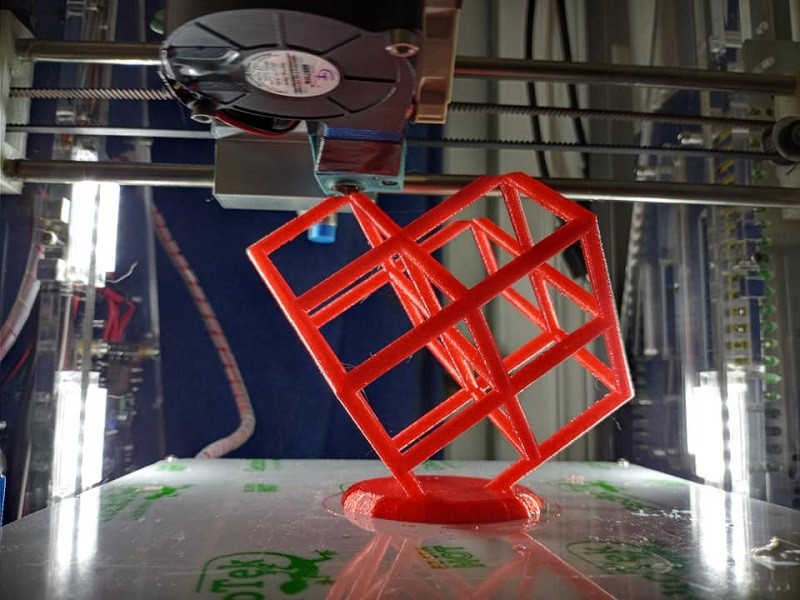
I do not have further specs on the slicer for this print as it was a while back. But I am not against doing this again. It did not use a lot of filament. And that is the thing with these test prints Martin. We should try to find things that do not use a lot of filament because we understand we will likely toss our refuse when we are done with it. I personally do not mind printing larger things in the name of this thread just because the filaments from ebay are so damn cheap.
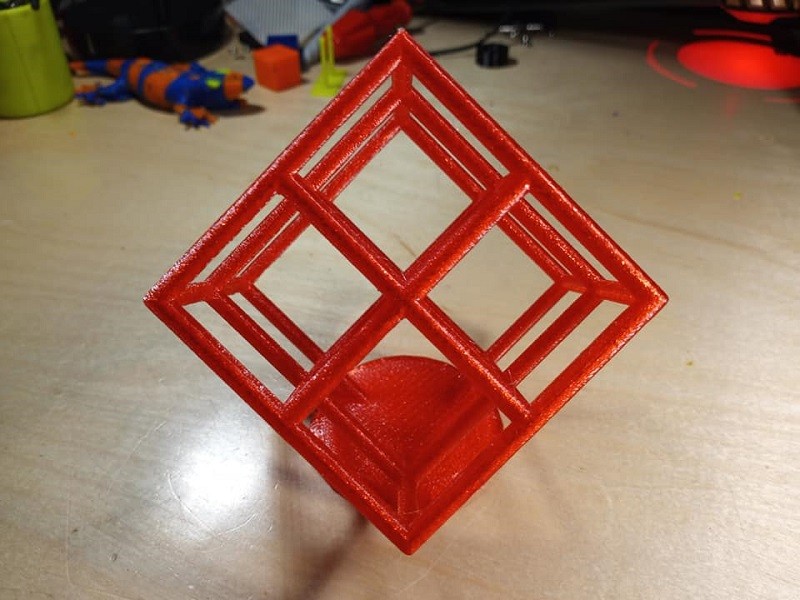
You can easily see how this lattice cube tests retraction settings. And printed right it looks cool, too. I can show you these pictures and you and CA can assess them tiny hairs and see if you can get it better. Or try to point out other flaws with the picture I am posting and if possible post it along with an honest suggestion about your ideas on how to resolve the issue you noticed. With tuning first if possible. Remember this is supposed to make us all better printers and make our robots more capable.
Try to print this or the iris box. Play with your settings and get it to print the best you can on your own. Then post up your results with as much detail about the final specs used and lets start discussing how each of us can up our game. Then you should find something with like a 1 layer wall thickness that is tall or something with reaching overhangs or something else to further test and tune our retraction settings with.
And I will print out the link you provided just because you posted it up here and to keep all this on a happy constructive note.
-
10-22-2021, 06:01 AM #7Technologist
- Join Date
- Apr 2021
- Posts
- 186
I have done a couple of iris boxes in the past. This one was done on the CoreXY back in April. I can't recall the settings off the top of my head, so I'll reprint it next week. The other was done on my 0.4mm Prusa, but was scaled down. I think it is ~40mm across. I'll grab a photo next week.
-
10-22-2021, 07:10 AM #8Staff Engineer
- Join Date
- Jul 2016
- Location
- South Florida, USA
- Posts
- 1,248
We need to see a picture of that iris box closed, please. That is how we know it is functional. It prints out open and the only way to tell if we found the joy is when it closes.
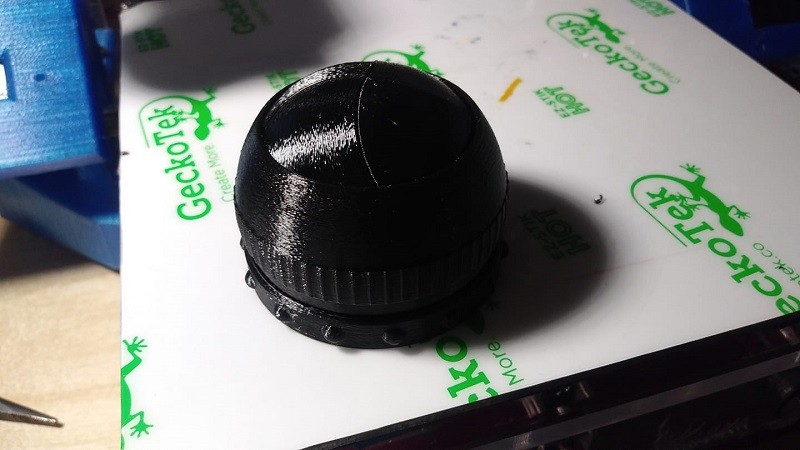
Because it is round and a cup there will be no stringing in a place where we would see. Also do you use S3D? and if not what slicer(s) are you using? CA and I both have S3D but i guess we could use Prusaslicer if you like that better. But I would like to get us all on the same slicer for some of these when we get into comparisons. If we get this that far. So far nobody has printed anything for this thread, yet. My weekend is almost here.Last edited by AutoWiz; 10-22-2021 at 09:15 AM.
-
10-22-2021, 02:03 PM #9Technologist
- Join Date
- Apr 2021
- Posts
- 186
PrusaSlicer for me.
-
10-23-2021, 03:00 AM #10Technologist
- Join Date
- Apr 2021
- Posts
- 186
Here we go.
~80mm one printed on the Core XY a while back with 0.6mm nozzle.
~40mm printed on one of the Prusas
Benchy for scale.

 Reply With Quote


Do bed magnets deteriorate.
04-29-2024, 01:35 AM in General 3D Printing Discussion