


Results 21 to 30 of 4110
Thread: Qidi Tech 1 - Replicator 1 clone
-
09-09-2015, 01:54 PM #21Student

- Join Date
- Aug 2015
- Location
- Orlando, FL USA
- Posts
- 38
Yes! Plus I also changed brands from what the printer came with... did not have good results with the ABS roll that came with the printer... as soon as I switched to the Hatchbox filament, everything started printing great. I have not tried using PLA... I should try that roll next. Originally Posted by curious aardvark

Went crazy and ordered a few rolls of Hatchbox ABS filament in several different colors, lol.
-
09-09-2015, 04:40 PM #22Student
- Join Date
- Aug 2015
- Location
- Orlando, FL USA
- Posts
- 38
I have to give credit to the support team for this printer... parts arrived. I swapped the Z-axis motor/rod assembly and everything is working as expected!! And they included a few extra parts as a bonus... excellent!!
Photo of damaged Z-Axis assembly:
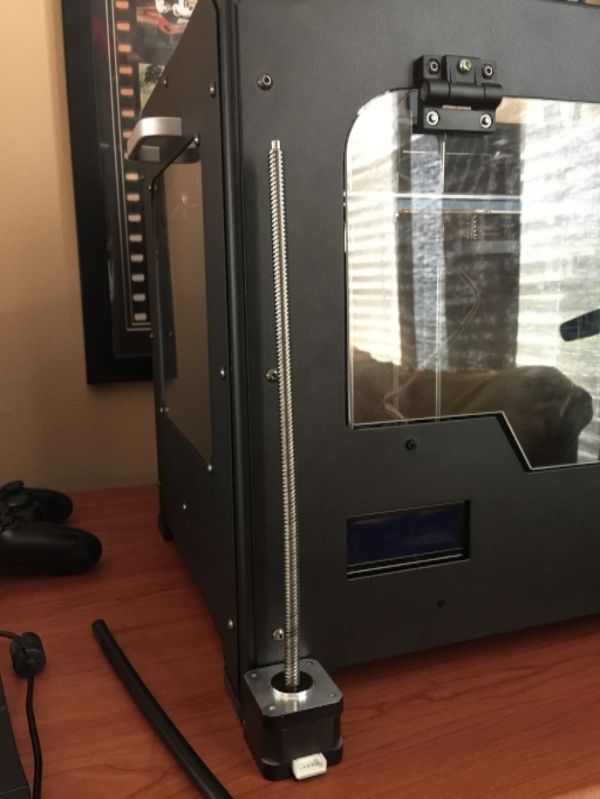
Now, to solve the issue with Simplify3D...Last edited by wachuko; 09-09-2015 at 08:15 PM.
-
09-14-2015, 08:19 AM #23Student
- Join Date
- Aug 2015
- Location
- Orlando, FL USA
- Posts
- 38
OP, if it is okay with you, I will continue to post on this thread my experience with this printer...
I have been watching videos and reading other threads, just to learn how to better leverage the printer and improve on usage. One thing that I came across was to use glue sticks (Elmers glue sticks), and spread a little of that on to the print plate (I am using painters tape over mine, so I used the glue over the tape). Wow, any minor lift on the corners is completely avoided.
Problem with this approach is that I can't use the tape as much as before. Some parts would pull out the tape when you try to remove them... having to remove/replace with a new sheet of tape.
There was one print I made, where I did not use a raft (I wanted to test without it), and when I tried to remove the part, it took the painters tape and the kapton tape under it!!
I had bought extra sheets of Kapton tape... so got the chance to remove and replace it. I removed the print plate from the printer to make it easier to install... with some extra hands to help, it was an easy task.
Plate installed with the new sheet of Kapton
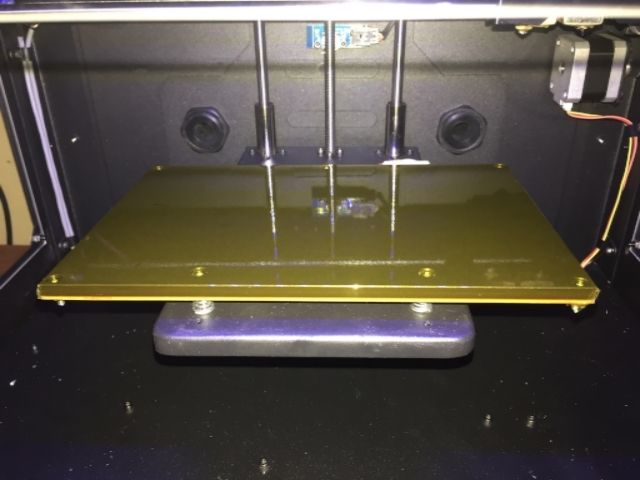
I should have installed the painter's tape while I had the plate out... I got the sheets that are already cut to size. Makes it easy and provides an even surface from the get go...
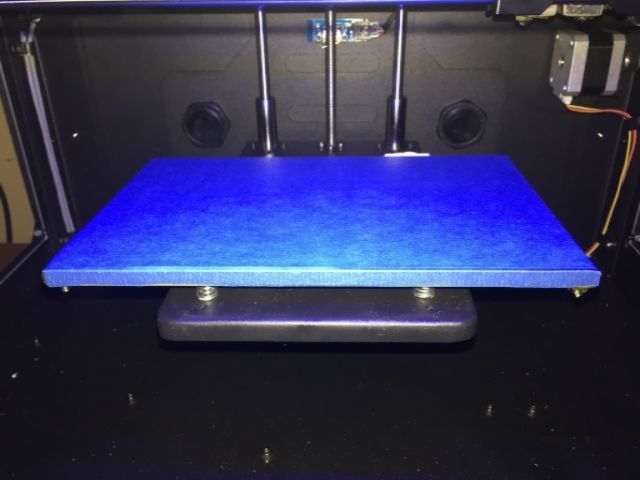
Leveled the plate and continued printing... I will be more selective on when to use the glue stick and when not to use the raft option, lol...
-
09-14-2015, 10:15 AM #24Student
- Join Date
- Aug 2015
- Location
- Orlando, FL USA
- Posts
- 38
Oh, and I also ordered additional nozzles and a complete print head setup, and a few other spare parts... going to print using filaments with wood and metal and wanted to make sure that I had extra parts in case anything goes wrong with using those filaments.
Having a lot of fun with this new printer...
-
09-14-2015, 02:10 PM #25Student
- Join Date
- Aug 2015
- Location
- Orlando, FL USA
- Posts
- 38
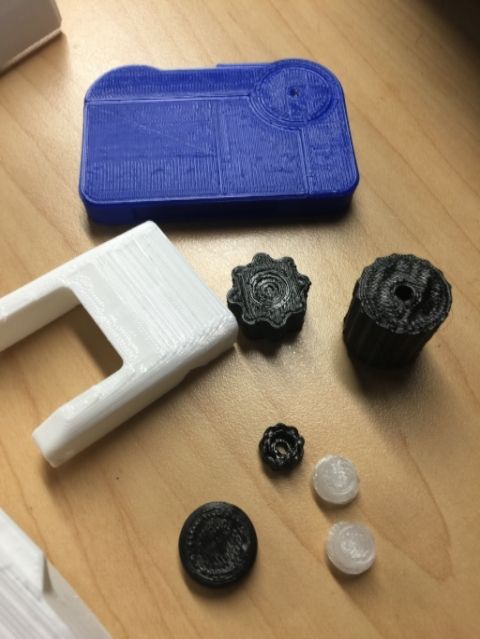
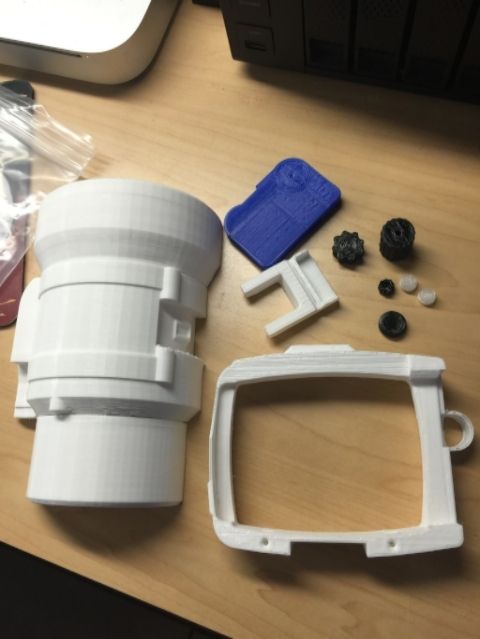
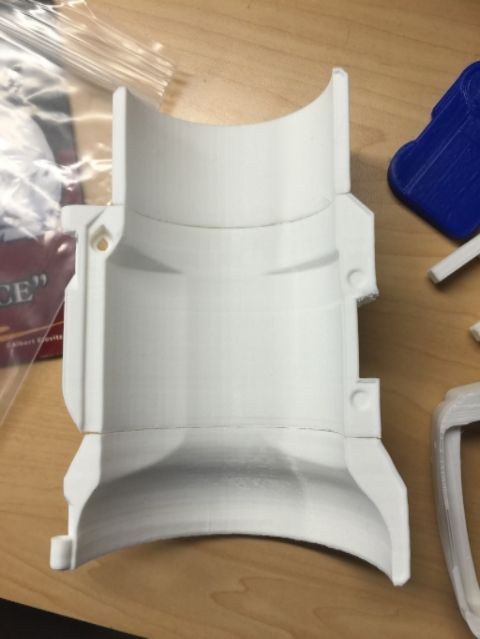
A few more prints. Used some clear (the two small pieces you see there), black, blue, white filaments.
-
09-16-2015, 04:32 PM #26Student
- Join Date
- Aug 2015
- Location
- Orlando, FL USA
- Posts
- 38
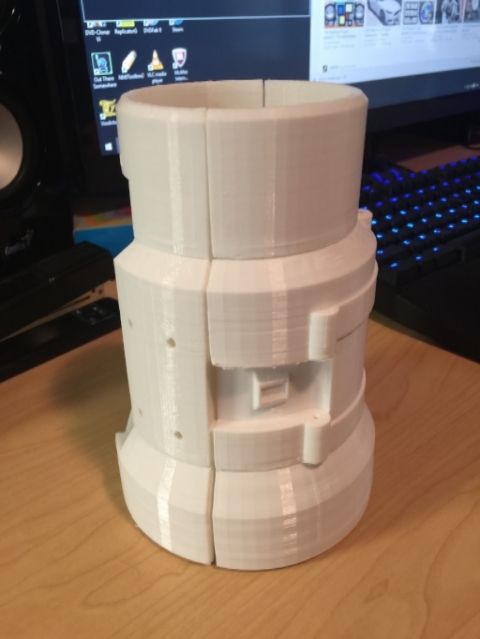
Completed this print... well, the main/larger parts. Still printing the smaller parts
-
09-24-2015, 11:21 PM #27Student
- Join Date
- Sep 2015
- Posts
- 1
I ordered one of these babies for my office. And so far I am very impressed and very frustrated.
At first the prints were great at small scale. no problems what so ever, but lately, I've been trying to extrude a file my coworker brought in.
It takes up the entire build surface + some (but I scaled it down to fit)
I've been tinkering with my settings a lot to find what works best for us and have continued to tinker with this build but I just can't seem to get it right.
I'm pretty confident it has to do with my slicer, or Gcode. maybe both, I'm under the impression that the two are closely related, as the slicer generates the Gcode. while watching it print it will start a base layer on one corner, builds it up two or three layers, then moves to the next section and prints at the now lower Z axis point.
I've tried different software to get my Gcode, but it calibrates the space differently and causes the Z axis to lower until it can't anymore then creates an awful sound.
Does anyone here have any advice?
Do I just have to edit the Gcode myself to fix the issue?
Is there somehow a better software out now?
Should I change the slicer I'm using?
Is it as easy as using a new program and copy pasting the Gcode setup and foot code in to the new program?
I'm not sure what info you folks may need to help so I will make an effort to respond quickly to any questions.
I've tried using Makerbot software, and ReplicatorG it came with. RepG is set to use Skeinforge (50) and I have never once tried changing it.
Machine type is set to The Replicator (Dual)
I've also tried to play with Cura, 123d Design, Makerbot Desktop, Craftware and Meshlabs.
Tried Duplicating the Replicator profile, named it QIDI, and I have made minor changes.
before testing the new profile I am exporting new Gcode using the experimental slic3r.Last edited by americanlzrorca; 09-24-2015 at 11:42 PM. Reason: update:
-
09-25-2015, 05:34 AM #28Super Moderator
- Join Date
- Jul 2014
- Posts
- 8,818
sounds like the model is wrong.
And part of it isn't actually touching the buildplate.
So it's printing the parts that touch and then trying to print the others.
At least that's what it sounds like.
-
09-25-2015, 08:18 PM #29Student
- Join Date
- Aug 2015
- Location
- Orlando, FL USA
- Posts
- 38
I had something like that happen with mine. And indeed, it was that the part was in the air... used the place on platform option, regenerated and it printed perfectly. Originally Posted by curious aardvark
-
09-30-2015, 11:30 AM #30Student
- Join Date
- Aug 2015
- Location
- Orlando, FL USA
- Posts
- 38
Finally did some runs with PLA... works great. Not sure if it is the difference in temp of the bed/platform (ABS=110, PLA=50) or what... but the parts come out much nicer. I printed a few parts in PLA that I had already printed in ABS to compare the two.


 Reply With Quote


Extruder not feeding during print,...
04-24-2024, 01:59 AM in Tips, Tricks and Tech Help