


Results 1 to 10 of 19
Thread: How would you rate this quality?
Hybrid View


-
05-19-2015, 08:54 PM #1Engineer

- Join Date
- Jan 2015
- Posts
- 445
How would you rate this quality?
So I started to get back in to printing a little bit after a break , and finished tweaking my ABL, took my cooling fan off (because it seemed to affect quality). etc.
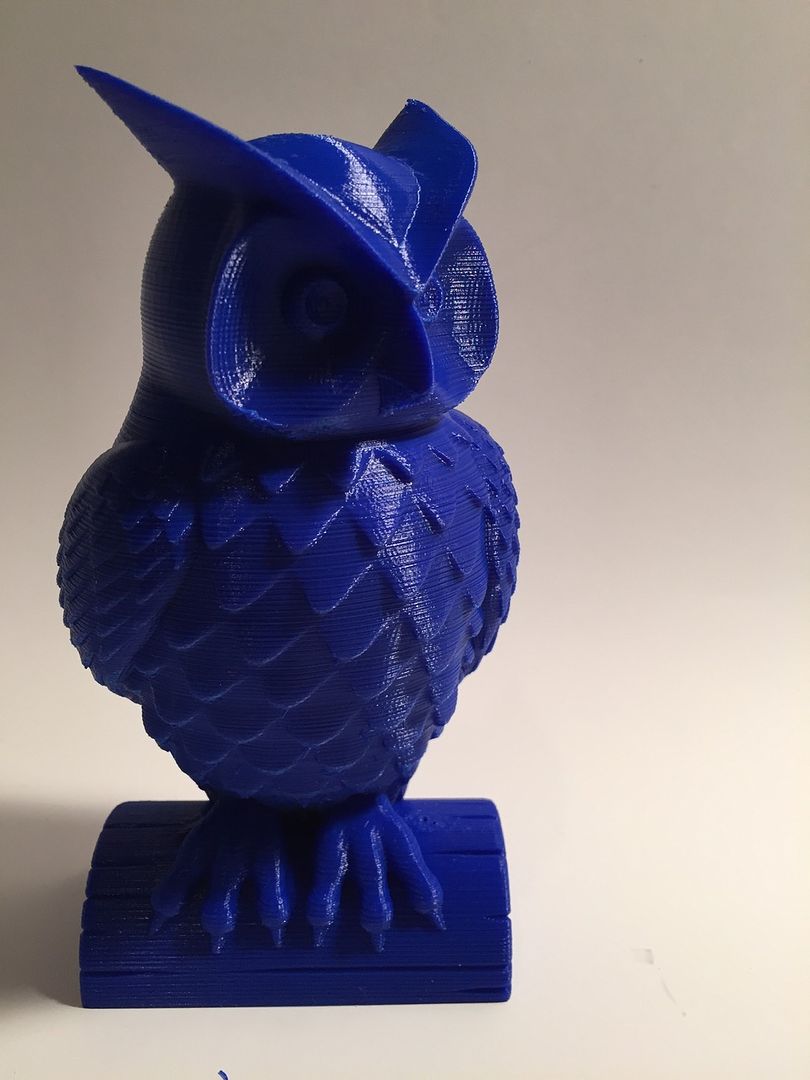
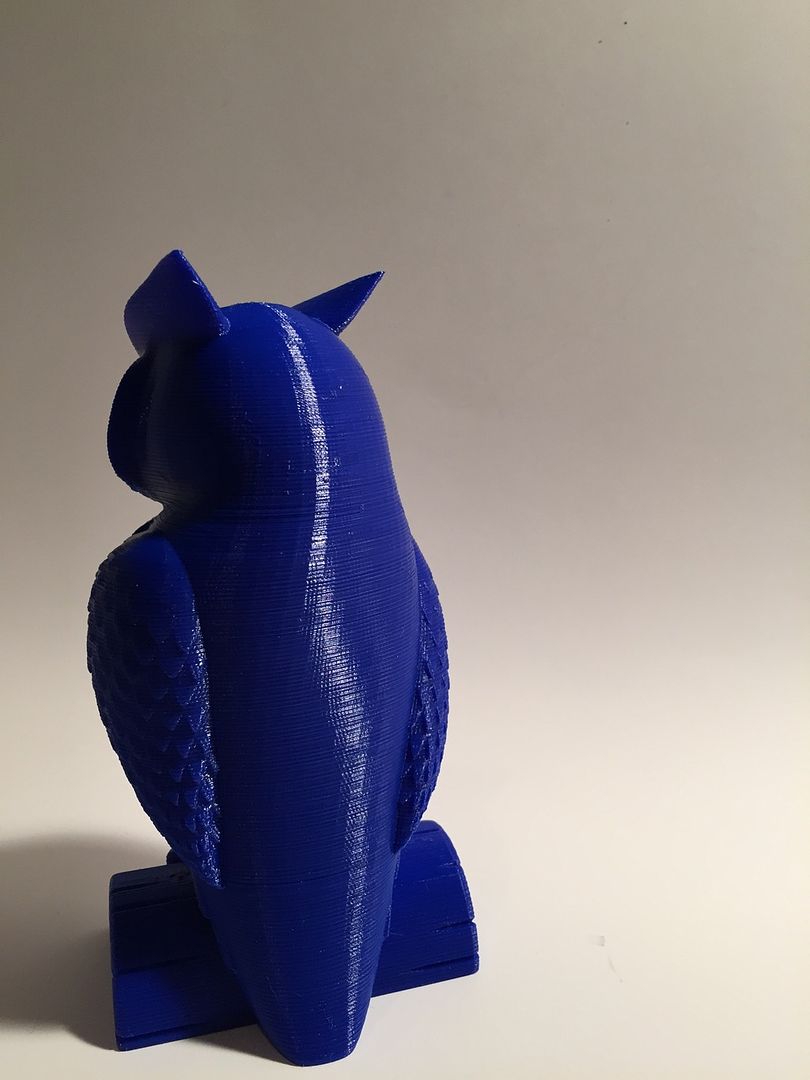
So my first large scale print is the owl.
I printed it at .1m and 50mm/s
How would you rate the quality????
There isnt really any artifacting, so the retraction etc is right. I think overall im not super thrilled with it.
Maybe im being overly optimistic about what I think it should do. Perhaps im spoiled by my Flashforge, that churns out literally STUNNING quality prints.
THis is at .1mm and it doesnt look bad to me but just not what I need/want.
Do you others with your prusa i3v expect more? are you getting more?
This print is with zero cleanup
Thanks for your help/comments. I really do appreciate you all and the work you put in to this forum to make it great.
-
05-19-2015, 09:04 PM #2Engineer-in-Training
- Join Date
- Jul 2014
- Location
- Ontario, Canada
- Posts
- 257
The layers look a little larger than 0.1 but I don't know the scale of this print, but wow...if your flashforge is out performing that then sign me up, as that looks like a really clean, really nice print to me!
-
05-19-2015, 09:13 PM #3Engineer
- Join Date
- Jan 2015
- Posts
- 445
maybe ill do the same print on my FF at 1mm to compare the 2... Maybe im hyping it more than it really should be, but i dont think so.
yeah, ill start that tonight.
This is definately a clean print, but yeah the layers do look bigger. but in actuality, i think what you are seeing is every other layer being represented as a thicker single layer.
-
05-19-2015, 09:42 PM #4Technician
- Join Date
- Nov 2014
- Posts
- 58
looks really clean to me , but for a 0.1 mm layer height it looks like some layers are dragging the previous one creating that "thick layer" effect . im having similar issues i have notice that randomly my Z axis don't go up consistently creating this banding effect . i haven't solve this issue yet . if anyone have some suggestions it will gladly appreciate.
-
05-19-2015, 10:05 PM #5Engineer
- Join Date
- Jan 2015
- Posts
- 445
If it is a z banding issue, then perhaps a fix might be different stepper motors with more precision? i dont know anything about swapping them, configuring them etc, but its a thought. Im not pissed at the quality, but im not happy either. Its not sellable to my clients.
-
05-19-2015, 10:22 PM #6Staff Engineer
- Join Date
- May 2014
- Location
- Highlands Ranch, Colorado USA
- Posts
- 1,437

Stepper motors are fairly standard, so there's no easy way to get more precision beyond the 80 steps per mm that you have on x and y. Z already has more resolution than can effectively be used. While 80 steps per mm isn't a lot, you should be able to do better than the earlier pics I don't have a link handy for it, but try searching for the thread on makerfarm prints of the make 2015 shootout models to see my results - focus on the Z resonance test. Originally Posted by dunginhawk

If you think belts are tight, try tightening them more. If you have printed idler pulleys installed on x and y, try removing them - poorly formed teeth on the idler pulleys could create problems. Recheck tightness of the pulleys on the x and y motors. If tubing is used as the couplers on the z motors, at least add zip ties to them to help ensure a consistently tight grip.Last edited by printbus; 05-22-2015 at 01:07 PM.
-
05-19-2015, 10:29 PM #7Engineer
- Join Date
- Jan 2015
- Posts
- 445
I will check all those things again printbus, I dont use the tubing, i use metal couplers, so im good on the z motor pieces.
I also found your pictures on the shootout page.. I think our results may be pretty comparable in the end. I am zoomed in pretty tight, this model is 7 inches tall.. either way, i think there is always room for improvement. if Flashforge would just come out with a 12x12x12 printer with the same quality haha
-
05-22-2015, 07:25 PM #8Staff Engineer
- Join Date
- May 2014
- Location
- Highlands Ranch, Colorado USA
- Posts
- 1,437
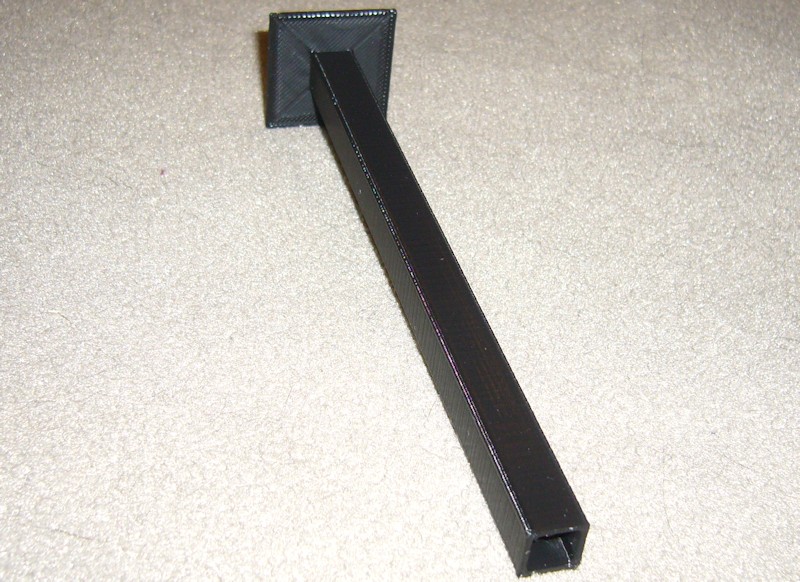
For clarity, here's a picture from my build thread that shows my print of the Make: 2015 shootout Z axis resonance test. This is the test model specifically intended to show Z-axis issues. I just don't see the same amount of Z-axis issues you are fighting. Originally Posted by dunginhawk
Regardless, for what they are worth, here are some additional thoughts -
Have you tried printing with filament from another source? I just returned some filament from a new source that wasn't printing as clean as I'm used to, and having more Z-axis artifacts was one of the issues with it. I suspected that the filament was extruding with different viscosity characteristics, and at least a few attempts at different print speeds and temperatures weren't looking promising.
Similarly, I'm not sure what to draw from your FFCP comparisons. None of this class of printer is all that accurate when it comes to temperatures, and for all I know the difference in results is because the hot end temperatures are farther apart than you think.
I'm always intrigued by people that say their PLA print quality goes down when they apply print cooling airflow. The only reason that makes sense to me is if the hot end temperature is borderline too low to begin with, and the additional cooling makes things worse by bringing the nozzle down a few more degrees.
Are you printing with external perimeters printing first or last? Printing them first should lead to a better exterior finish.
In addition to the axis leveling BLKKROW mentioned in another thread, I'd check the three idler wheels on the X motor mount and the X idler. IMO, the two outer wheels one both should have the same resistance when an attempt is made to manually rotate them. I've helped with cases where the user found one of the outside wheels was actually not engaged with the v-rail at all due to the plate not being adjusted to the vertical v-rail before the horizontal v-rails are tightened to the plate. These leaves the possibility that the plate isn't as secure on the vertical rail as it could be.
Likewise, check the front and rear pairs of Y-bed wheels. I make sure these also have the same amount of resistance to manual rotation to help ensure the front and rear are both equally adjusted to the y rails.
With the extruder raised off the bed, do you notice any slop when gripping the nozzle and manually manipulating it? It's not unusual to find some slop caused by poor fit of the bearings in the wade's body, poor fit of the hot end in the extruder base, etc. I figure any slop there can lead to issues in how accurately the hot end is positioned or with how repeatable the hot end positioning is.
One design aspect of the MakerFarm i3v printers I haven't liked is the use of the 6mm panel for the Y idler mount and, to a lesser extent, the Y motor mount. I added reinforcement plates to both to help minimize flex in the plates that could lead to tension in the Y-belt changing when the motor direction is reversed or quickly accelerated. More info here.
-
05-23-2015, 09:57 AM #9Engineer
- Join Date
- Jan 2015
- Posts
- 445
printbus... great tips...
i certainly think you could be on to something with the cooling fan and the actual temps.
With the filament. I chose the same filament for both tests, so temperature could of course make a difference, but i dont think filament should.
Also, ive always read that doing the outer permiter last was better.. that is not true? I do the outer first on my FFCP and it looks great of course... Ill try that too.
I will recheck all the idlers again (i had it really dialed in before i changed the x carriage to cloughs printed one for ABL etc.
Lots to look at here.
I just wish Flashforge made a bigger one
-
05-23-2015, 11:39 AM #10Staff Engineer
- Join Date
- May 2014
- Location
- Highlands Ranch, Colorado USA
- Posts
- 1,437
It depends what is important to your print. Whether external or internal, the first perimeter printed will go down the most accurate and cleanest since nothing hinders the extrusion on either side. Depending on your extrusion settings, subsequent perimeters will push against the existing perimeter and could squish off to the open side a bit. So, printing external perimeters last is best for controlling hole sizes and inside dimensions for parts that need to dovetail. In the case with the owl, you don't have any concern with inner dimensions or hole dimensions, so printing external perimeters first would likely be preferrable. Originally Posted by dunginhawk


 Reply With Quote


Do bed magnets deteriorate.
04-29-2024, 01:35 AM in General 3D Printing Discussion