


Results 1 to 10 of 10
-
09-27-2021, 02:22 PM #1Staff Engineer

- Join Date
- Jul 2016
- Location
- South Florida, USA
- Posts
- 1,248

Dual Z Auto Align Setup In Marlin
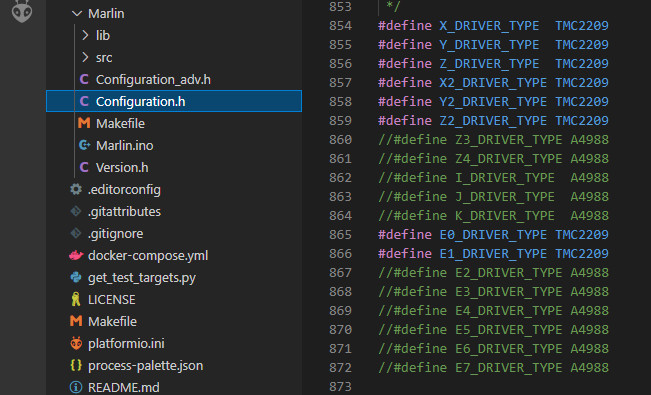
Hello all. This process applies to the latest Marlin 2.0.9.1 and I make no promises about how this will take on any other version. Independent Dual Z steppers along with a Z probe is the right way to go. It is not uncommon for a 3d printer to have 2 Z stepper motors and it also is not uncommon for a 3d printer to have an unused stepper driver or driver socket. And so a lot can do this with very little effort or investment. Some for free and in the span of minutes. To setup dual Z steppers in Marlin we first need to choose the steppers we are going to use in configuration.h. NOT necessarily by the label on the mainboard but rather by the definition of that stepper. Marlin leaves options to enable the stepper for the function you are going to use it for aside from the label on the mainboard (for your second Z stepper you will enable Z2 here even if your mainboard socket says E1). The below pictures are from my custom IDEX build. It uses all 8 stepper sockets in the Octopus and has 2 X steppers, 2 Y steppers, 2 Z steppers, and 2 E steppers. Here is how I configured the stepper driver selection..
-
09-27-2021, 02:34 PM #2Staff Engineer
- Join Date
- Jul 2016
- Location
- South Florida, USA
- Posts
- 1,248
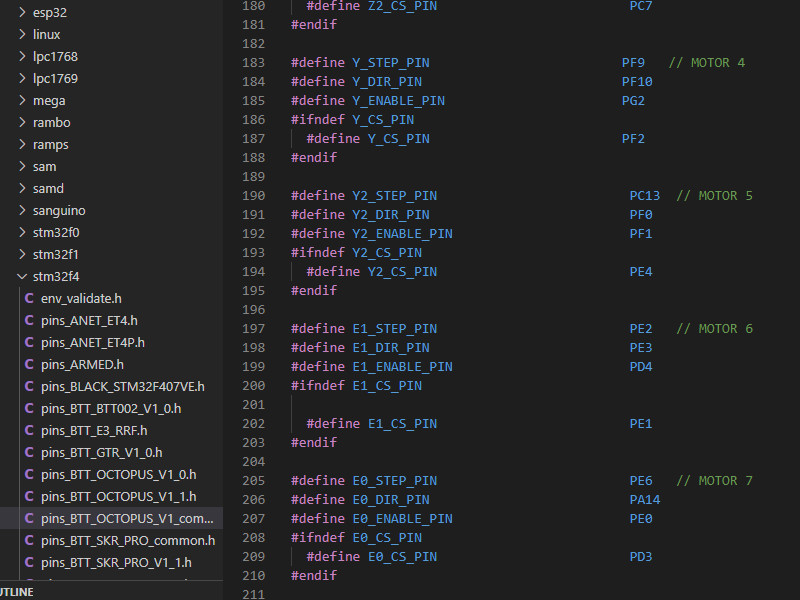
Once all the steppers are identified we can go look at the pins file. For this we need to click on the src tab under Marlin, then click the pins tab, then find your board. For me it was under stm32f4 and because there are 2 versions of the BTT Octopus there are multiple pins files. There is a seperate file for each version and then there is a common file. We want the common file. And in it we will find a legend that identifies what pin everything goes to. We want to find the steppers. On the Octopus the motor connectors on the mainboard are not labeled with axes. Rather they are simply labeled motor 0, motor 1, motor 2, etc..

Here is where we will relabel our axes so that the pins are labeled to what they are. I have already configured these for my IDEX. Please note where I only changed the letters on each axis to achieve my programming goals here. Simple and easy. This is how Marlin will know what Z2 is. If you are plugged into E1 on tha mainboard you will just change all of it's labels from E1 to Z2 as you see here..
-
09-27-2021, 02:39 PM #3Staff Engineer
- Join Date
- Jul 2016
- Location
- South Florida, USA
- Posts
- 1,248
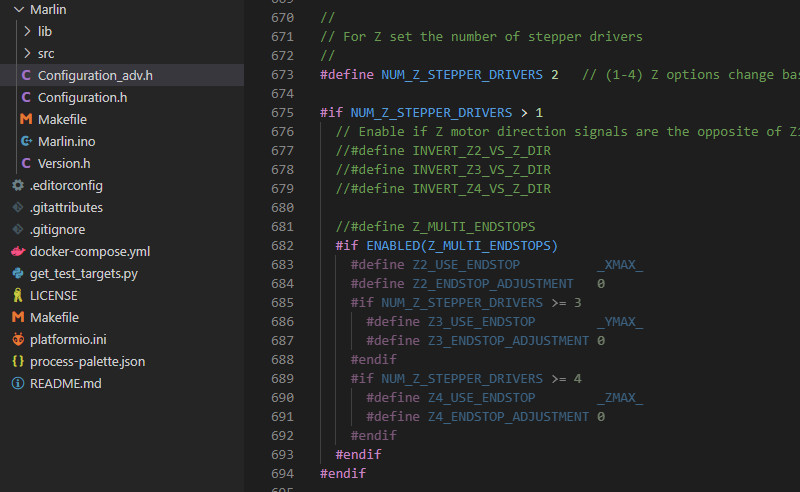
So now that Marlin knows what stepper drivers it is going to use and what they are we can go over to configuration.adv and find the section for dual steppers and set the number of Z steppers to 2 or 3 or 4..
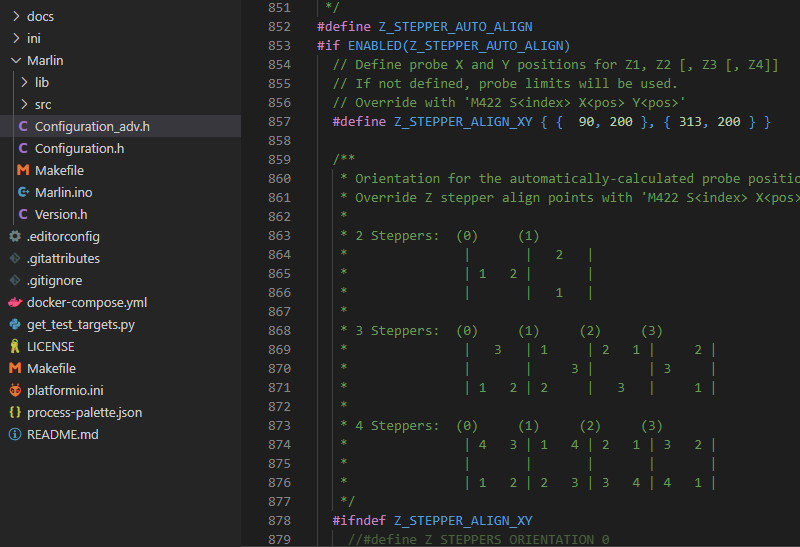
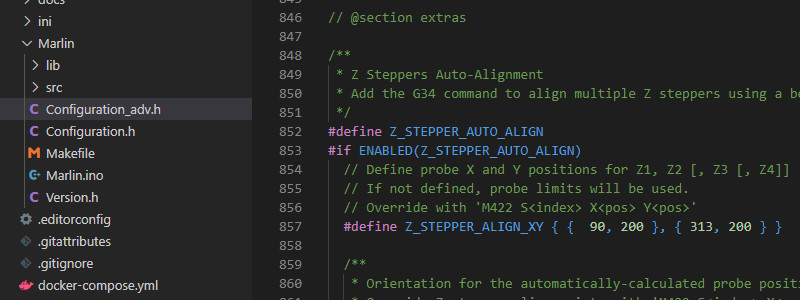
Then a little further down we can enable the Z stepper auto align, set the probe points, and tell Marlin the Z stepper orientation..
-
09-27-2021, 02:45 PM #4Staff Engineer
- Join Date
- Jul 2016
- Location
- South Florida, USA
- Posts
- 1,248
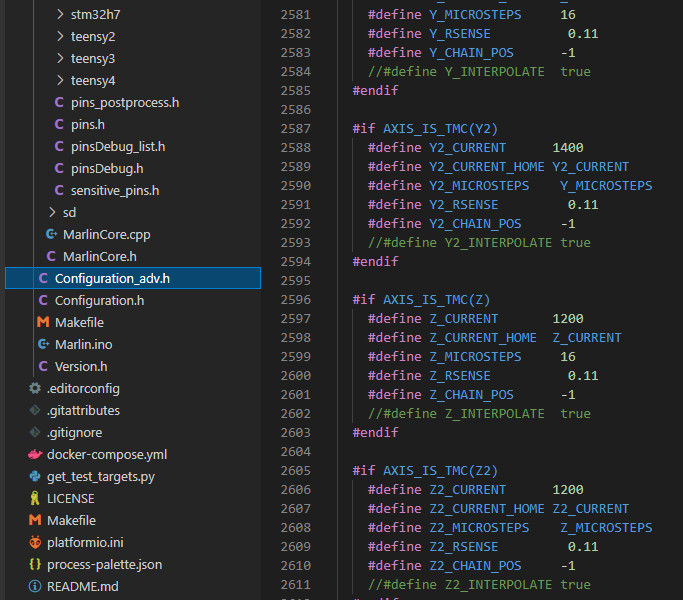
Also do not forget to set your stepper drivers. If it is in standalone mode you will need to do this with a multimeter and a small screwdriver. Otherwise you will need to head over to here in configuration.adv and make sure you have everything set for each stepper you are using. Either way both steppers need to be set identical so both motors will perform the same..
-
09-27-2021, 02:46 PM #5Staff Engineer
- Join Date
- Jul 2016
- Location
- South Florida, USA
- Posts
- 1,248
Once everything is done this is what you should get when you send the G34 command: IDEX Dual Z Auto Align - YouTube
-
09-28-2021, 09:35 AM #6Staff Engineer
- Join Date
- Jul 2016
- Location
- South Florida, USA
- Posts
- 1,248
At line 857 of the configuration.adv tab in Marlin 2.0.9.1 we find Z_stepper_align_XY. And this is where we set the probe coordinates which are expressed as { X, Y}. Because this feature will support 2, 3, or 4 steppers controlling Z Marlin come pre configured for middle of the road with 3 sets of coordinates. If we are using 2 steppers we can only adjust for one axis and so we only need 2 probe points and can just delete the third set as I have done below..
I am setting up a 4 Z stepper motor CoreXY and that will use 4 probe points so that would look like {{50, 50}, {460, 50}, {460, 460}, {50, 460}}. Because my print bed is 510x510 and I want to leave a bit of a buffer for the Z probe offset. Each probe point is a place to make a correction with a stepper motor. So the amount of probe positions should always mirror the amount of independently controlled stepper motors in use.
-
10-05-2021, 11:00 AM #7Super Moderator
- Join Date
- Jul 2014
- Posts
- 8,818
what sort of probe are you using and could this be done with sensorless homing and the right stepper drivers ?
-
10-05-2021, 02:22 PM #8Staff Engineer
- Join Date
- Jul 2016
- Location
- South Florida, USA
- Posts
- 1,248
For this to work we need a Z probe mounted to the hotend carriage. So we can probe at different points on the bed. Pretty much any Z sensor will work.
In theory I guess sensorless homing would work if you had it setup on Z. It will have the ability to probe different positions on the bed.
It is really just switches mounted to frames or gantries for Z that cause a problem here. Because they will always trigger at the same place no matter where X or Y is.
I have a video on Dual Z Auto Align with a BLTouch right here: (3) IDEX Dual Z Auto Align - YouTube
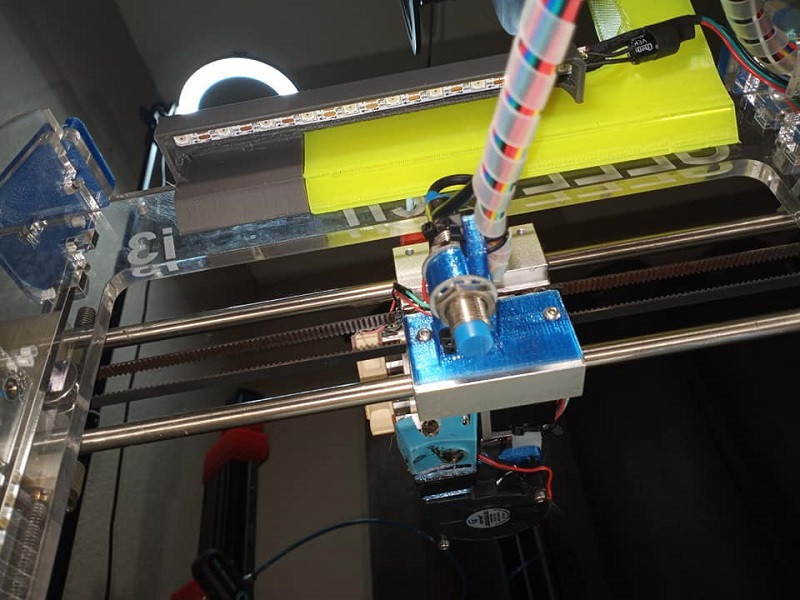
And a video with a $2 6-36v npn proximity sensor sourced from ebay right here: (3) Dual Z Auto Align Geeetech i3 Pro B - YouTube
While the first video clearly shows the BLtouch front and center, the second video is a bit harder to see the Z sensor as it is mounted on the backside of the extruder carriage. Here is picture of that Z sensor..
Hell a cheap old school 2 pin micro switch could very much work if we just mounted it to the hotend carriage and had it triggered by the surface of the bed.
-
10-06-2021, 09:32 AM #9Super Moderator
- Join Date
- Jul 2014
- Posts
- 8,818
Now that i can do :-)Hell a cheap old school 2 pin micro switch could very much work if we just mounted it to the hotend carriage and had it triggered by the surface of the bed.
-
04-16-2022, 03:37 AM #10Staff Engineer
- Join Date
- Jul 2016
- Location
- South Florida, USA
- Posts
- 1,248
Here is Quad Z Auto Align up and running on my CoreXY: https://www.youtube.com/watch?v=dEfiw820nO0

 Reply With Quote


Extruder not feeding during print,...
Today, 01:59 AM in Tips, Tricks and Tech Help