


Results 81 to 90 of 174
Thread: My First CoreXY
-
04-21-2021, 04:18 PM #81Staff Engineer

- Join Date
- Jul 2016
- Location
- South Florida, USA
- Posts
- 1,248

That is a great idea CA. But you are right that would be too easy. Hey look what FEDEX brought me today. I took the picture with the other one so they could be together. BMG-M with regular mosquito and 0.6mm vanadium nozzle. The new setup for the TronXY is a LGX with Mosquito Magnum and 0.8mm vanadium nozzle. OMG at the price of all this but my gosh is it a nice part to use. In every possible way..
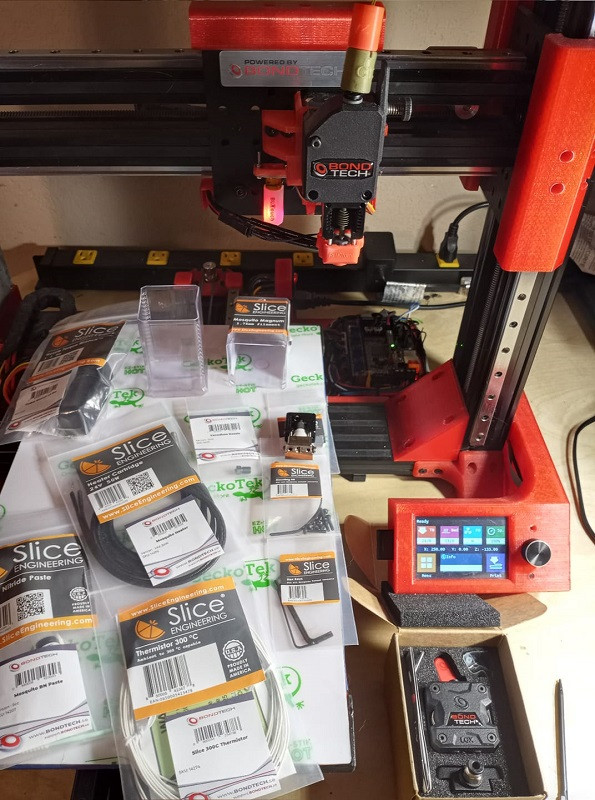
I'm gonna have to make a bracket to mount it to the TronXY in a similar fashion as what I have done with the BMG-M.
-
04-29-2021, 09:50 AM #82Super Moderator
- Join Date
- Jul 2014
- Posts
- 8,818
Okay I really have to post the 'difference between us' photo's at some point lol.
There's you buying the latest all singing and dancing, extruder and there's me just having stripped an old mk8 out of my original flashforge creator - 'cos with a couple tiny bits of ptfe (which it already has), it will outperform the sapphire's current bondtech for flexible filaments and I doubt it will be any worse for harder filaments either :-)
Just got to design and print a mount for it and I'm good to go. lol
In the meantime a little epoxy putty has modified the existing bondtech to work really well with modern - stiffer then ninjaflex - tpu's.
At some point I'll use some more putty and hopefully get it working with the really floppy stuff.
Pretty much only because I still a roll of filaflex and a roll of original ninjaflex that i have never been able to use properly. Mainly because it's so bloody elastic and until last week my knp used rear mounted spools and the pull to get it into the extruder just stretched the soft stuff too much. It now has top mounted spool holders and (huh, okay I'm an idiot) would probably work - and I haven't tried yet !
lmao
Guess what I'm about to do lol
I think, to be justifying your approach, at some point, I want to see you printing at a true 100mm/s (at least) with a 0.8 or 1mm nozzle and at least 0.5mm layer heights.
If you can't beat my cobbled together machines and old school buck-store mods with your futuristic, state-of-the-art machines - it would be quite tragic.Last edited by curious aardvark; 04-29-2021 at 09:57 AM.
-
05-02-2021, 04:51 PM #83Staff Engineer
- Join Date
- Jul 2016
- Location
- South Florida, USA
- Posts
- 1,248
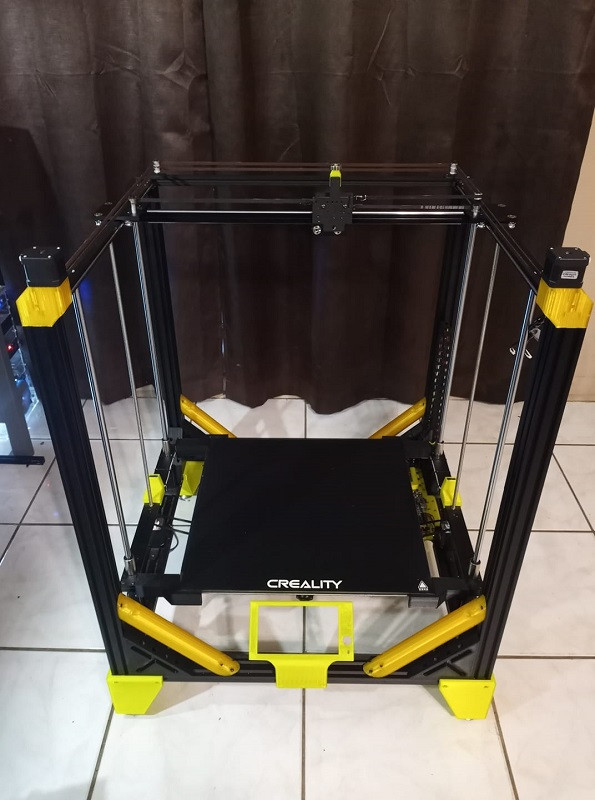
Ya futuristic and state of the art. My TronXY is advanced. Or it will be. One day. One sweet day. But not today. No not tomorrow, either. Very likely not this summer. But hopefully before my children grow up and give me grand children I will have completed the assembly of my TronXY X5SA 500 Pro. Mission creep has set in on removing that top bar. I had to redesign my motor mounts for X and Y as my original design flexed under load. My new design and also my frame braces I made all are using 45 degree angles because triangles are our friends. And now that it is together the 100mm tall legs i designed earlier are just out of place. They look small, are a different color as I could not find that same color again, and they are not at 45 degree angles. So I think I need to redraw some new legs so I can have my 45 degree angle and also maybe be a little bit taller than 100mm lift. Here is how my printer sits right now..

I am also thinking about mounting the tft70 in the middle on the lower beam in between the two supports leaned back towards the glass bed. And I still have to draw up a mount for that LGX with mosquito. And I still have to draw up a bunch of other parts. I am a little ways away from being ready. But I am doing something for it everyday no matter how small so the end will come. And then we will see who is better. If I have to use photoshop we will see who is better.
-
05-03-2021, 07:53 AM #84Super Moderator
- Join Date
- Jul 2014
- Posts
- 8,818
removeable top cross-brace.
You can even print it in yellow :-)
Print on the bed at a diagonal and you can print longer than the gap is wide.
No amount of triangles will fully compensate for not joining two tall uprights at the top.
Make it tringular in cross section if you have to - toblerone:-) - but make a top brace.
Actually you could make an actual toblerone facsimile with either of the other two multi filament printers.
:-)
Have you actually printed anything on the bumblebee yet ?
-
05-03-2021, 09:07 PM #85Staff Engineer
- Join Date
- Jul 2016
- Location
- South Florida, USA
- Posts
- 1,248
Well I just hope the Tevo Black Widow community that shared your sentiment with my last build are paying close attention to this. All the translucent yellow and black PETG parts are being printed with the Tevo Black Widow a.k.a. Big Red. All the parts are strong, too as they are printed with a 0.6mm nozzle and either 0.3 or 0.4mm layer heights. And in PETG. And without a layer fan even. In the picture below the black corner was printed with 0.4mm layer height and the translucent yellow round support was printed with 0.3mm layer heights and it stands 300mm tall. All 4 of them printed flawless and I only had to print 4..

And there is no deformation in any of those prints. Because when we have a rigid gantry that is connected with linear rails the extruder is always riding the outside of a square. No matter where the Y may be. Or Z in the case of Big Red. But also what I find in practice is that as I go bigger on the nozzle and layer heights the printers movements need to slow down a touch not speed up.
-
05-03-2021, 09:28 PM #86Staff Engineer
- Join Date
- Jul 2016
- Location
- South Florida, USA
- Posts
- 1,248
No I have not printed anything with this yet. It has powered on and I started to setup marlin but then the printer started loosing the uphill battle with my mania. It's a hopeless war, TBH. I mean Jesus, man I am reworking a printer I was reworking on the initial assembly. It is very satisfying for me to just give into it. But the printer just gets farter and farther from completion as I realize new ideas before I finish fleshing out the old ones. Really that just saves me time from one rework to the next. lol.
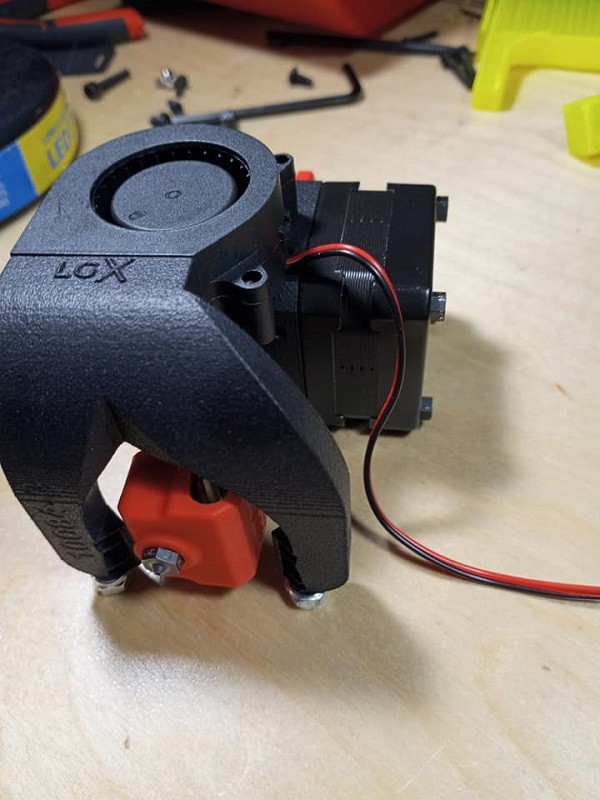
Anyways so I need a layer fan on this big printer. And I found that Bondtech makes a layer fan for the LGX with Mosquito for the Artillery sidewinder X1. So I ordered that and a 40x20mm fan like the one used on the x1 and here is what I got..
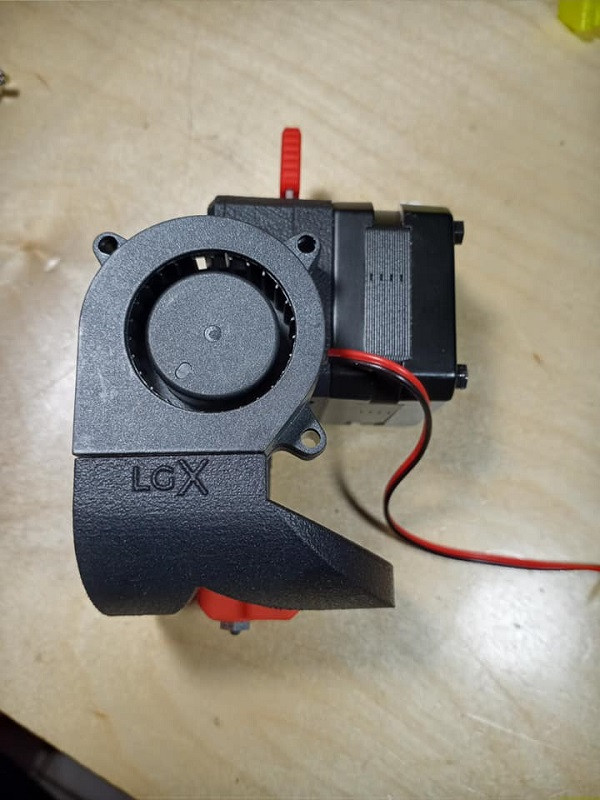
Trippy right? It looks just like the x1 extruder setup..
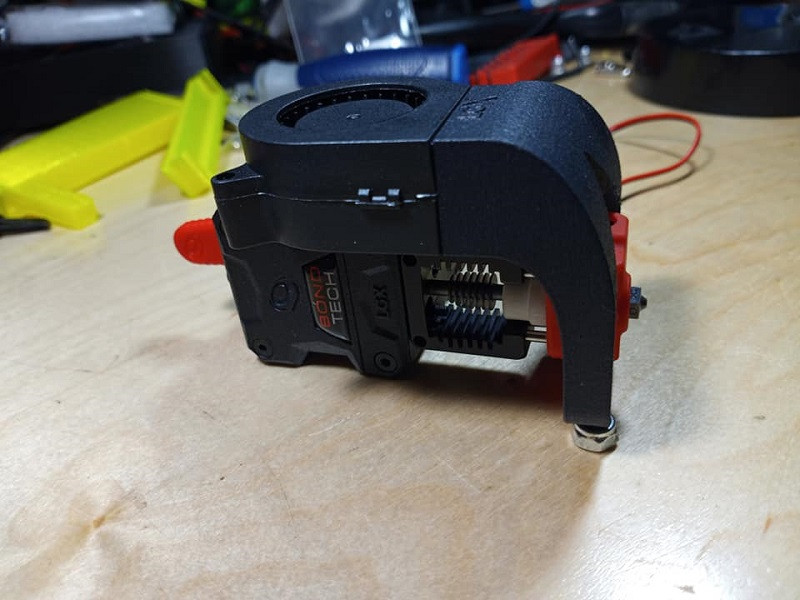
I really like the part cooling fan duct made by a manufacturer over something somebody made and shared on thingiverse. I will use that or make my own if I have to but I am just so happy I found this from Bondtech..
I also have a BLTouch 3.1 to mount with this and I want to get some white LEDs shining down on that nozzle connected to the extruder fan power so they turn on when the extruder gets hot and is in use only. You guys know I am drawing all these parts in Autodesk 123d design, right?
-
05-04-2021, 10:40 AM #87Super Moderator
- Join Date
- Jul 2014
- Posts
- 8,818
I use a similiar type duct on the rep clones.
Okay for everyday cooling - but for large beads and thick layers you really need a focused nozzle blowing from each side of the print head. That stuff needs cooling fast.
petg for structural parts ?
Hmm. I find it really soft.
If the parts don't get hot, I'd always go for pla. It's LOT more rigid and also has enough give to take pretty high stresses.
Mind you for stuff that needs to be both tough and rigid - PET is my current favourite.
Mainly because i can't afford ninjatek armadillo.
That stuff rocks !
Just don't see the appeal of pet-g for non-thermo purposes.
I did make a garbage gobbler cover out of pet-g and that gets the boiling water from veggies and pasta poured straight over it.
Holding up really well. I'd previously gone through 2 pla ones.
But for a bracket on a 3d printer - always pla.
And yeah, I did spot the fact that the carriage is always on a square.
But that square also relies on the end supports to keep the linear tracks level.
So any independant movement of the uprights will throw little inconsistencies into the print.
But you know: a removeable giant toblerone bar - come on, it's what the mumu was designed for !
We really need to get you another hobby - one that needs lots of big 3d printed things.
that way you might actually finish this beast and start using it ! :-)
Ask the kids - they probably have ideas for big things you can print for them :-)Last edited by curious aardvark; 05-04-2021 at 10:47 AM.
-
05-04-2021, 11:36 AM #88Staff Engineer
- Join Date
- Jul 2016
- Location
- South Florida, USA
- Posts
- 1,248
Well print a PETG cup and then print the same cup out of PLA. fill both cups and you tell me which holds water. Then take both cups and throw them at the ground as hard as you can and you tell me which one broke at the layers and which broke right through the layers. With PLA we have to try to get the filament to stay stuck to the bed, PETG on the other hand bonds so well it will break glass up from bed. PETG makes the more functional part. As far as rigidity goes there is a good reason all my printers are made from translucent colors. Hey have you tried a spool of translucent anything PETG?
PLA vs PETG, what is best? — 3D Printz LtdLast edited by AutoWiz; 05-04-2021 at 11:42 AM.
-
05-07-2021, 06:54 PM #89Staff Engineer
- Join Date
- Jul 2016
- Location
- South Florida, USA
- Posts
- 1,248
Well CA one big thing I want to make is bigger feet/legs so the printer can stand up taller without being on a table. Currently the feet/legs under it are 100mm and I am right now trying to print some that are the max dimensions of my Big Red printer. Just on the X but to keep my angles at 45 degrees max dimensions of my legs can only be the smallest axis. So I am replacing the 100mm tall legs with 240mm tall legs. Look how this fills the 400x250 build plate..
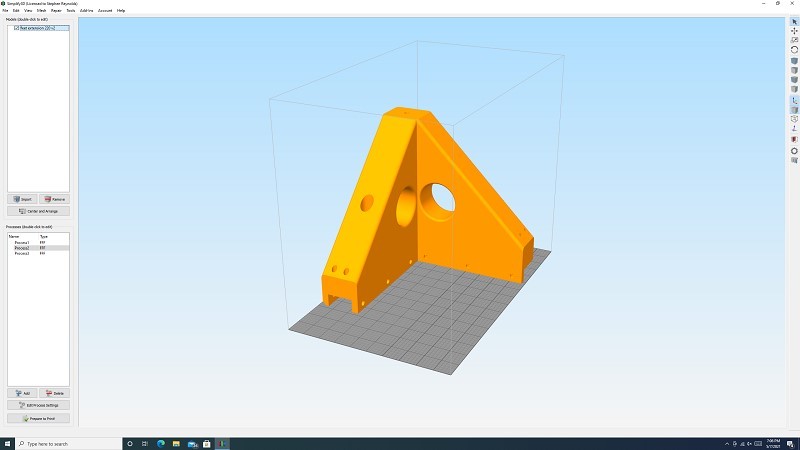
But I think after the 500x500x600 build envelope is ready to go I might make some really tall legs. But that is all for later. Right now those 240mm tall legs are gonna take 21hrs each to print with a 0.6mm nozzle and 0.4mm layer heights with PETG. So I have the next 84 hours to kill redesigning the screen mount. Here is where I want to put the tft70..
-
05-07-2021, 07:52 PM #90Technologist
- Join Date
- Apr 2021
- Posts
- 186
Be worth seeing if there's any wireless touchscreen options out there. Maybe even a standard tablet with octoprint. That would be ideal for such a machine.

 Reply With Quote


What's wrong with this prting?
Yesterday, 05:15 PM in General 3D Printing Discussion