


Results 11 to 20 of 22
Thread: PETG Printing Issues !!!
-
09-28-2015, 03:03 PM #11Engineer-in-Training

- Join Date
- Sep 2014
- Location
- Brummen, Netherlands
- Posts
- 265
Are you sure you have actual PETG and not another PET type (there are many different types of PET, PET-G is most suited for 3D printing) ?
I have printed a lot with 6+ colors (colorless, black, red, blue, green, yellow, translucent red etc) of PETG with exellent bonding. The parts are super-strong. The only problem I have is that it is virtually impossible to print supports in PETG as they are a PITA to remove as the bonding is so strong.
My settings are Flashforge Creator Dual, 225-230 C nozzle, 80 C bed (3Dlac spray on glass), 0.25 layer height, sliced with Simplify3D using slightly adjusted ABS settings (and without raft or other supports).
-
09-28-2015, 03:36 PM #12Engineer
- Join Date
- Jan 2015
- Posts
- 445
I was doing much taller layers .4 I believe, and wish no smoosh at ALL on the bottom layers im guessing the bonding was just bad from the start.
Yes im sure its petg, esun brand. Support being super strong will be an issue too because my customers parts have a lot of it, in some tight spaces haha.
-
09-29-2015, 02:34 AM #13Staff Engineer
- Join Date
- Jan 2014
- Location
- France, Aix en Provence
- Posts
- 1,139
One of my biggest issue with PET was when I left the fan on : contrary to PLA this is clearly detrimentary.
For my PB ceramic hot end, I print at 255°C the 1st layer, 5°C below for the next ones. But the reading may be a bit inaccurate. 230 looks low to me. I usually put the bed close to 60°C as well.
For the PB metal hot end the max retraction setting is 0,5mm but with my ceramic hot end I go up to 4mm depending on material. Depending if your hotend is all-metal or not, you could try with less than 1,7 mm.
-
09-29-2015, 05:23 AM #14Super Moderator
- Join Date
- Jul 2014
- Posts
- 8,818
well I haven't fitted an on/off switch to the fan yet - so that was on.
Like I said had no issues once I ignored the manufacturers recommemded temps and printed at 245.
I actually find that ALL manufacturers printing temps are way too low.
I guess it begs the question - do they test on enclosed printers and is that what makes the difference ?
-
09-29-2015, 07:12 AM #15Engineer-in-Training
- Join Date
- Sep 2014
- Location
- Brummen, Netherlands
- Posts
- 265
Funny,I actually find that ALL manufacturers printing temps are way too low
I find that the manufacturers recommended temps are too high....but I print at relatively low speeds (40-60 mm/s).
Having said that, it will also depend on the printing/extruding speed I guess. It takes time for the filament to get to the extruding temperature. At high printing speeds, the residendce time in the heated part of the nozzle is less, so the temperature differential (between extruder wall and filament core) will need to be higher to transfer the same amount of energy to heat and melt a given volume of polymer.
Attached a recent photo of a temperature test with two PETG types. Each block is printed at tha same speed settings (3200 mm/min), 0.25 layer height, but at decreasing temperature. This was done on a non-enclosed Flashforge Creator Dual (the old multiplex version). I can go down to 210 without much quality loss. Even the block at 210 is totally bonded. I can not break it off with my bare hands. Even with a pair of pliers it does not break off at a single layer but roughly slanted through multiple layers (it was 15% infill).
FF_PETG_TempTest_240_210.jpg
-
09-30-2015, 12:10 PM #16Engineer
- Join Date
- Jan 2015
- Posts
- 445
Alibert... can you post a link to this test STL? this seems like the perfect test to run to get the right temp on my filament.
-
09-30-2015, 02:53 PM #17Engineer-in-Training
- Join Date
- Sep 2014
- Location
- Brummen, Netherlands
- Posts
- 265
No probs.
It's the fourth one down: https://www.3dhubs.com/talk/thread/b...ibration-tests
You will have to choose a layer height and then calculate at which layer to switch the temperature. S3D can do this, I don' t know if other slicers can.
-
09-30-2015, 11:00 PM #18Engineer
- Join Date
- Jan 2015
- Posts
- 445
yeah i am printing the torture test first... Just got my new taz 5 in tonight (exchanged my old one, had some Z axis issues). First calibration cube was stunningly perfect. Torture test is running.
Definately have to bring that temp test in to slicer and figure out how high the first part is, and the second and so on. I wish there was a guide on that page saying at 100% size. .2mm layers, change temps at 45 layer, 90 layer, etc.
-
09-30-2015, 11:27 PM #19Engineer-in-Training
- Join Date
- Sep 2014
- Location
- Brummen, Netherlands
- Posts
- 265
Basically it is the (optional) number of raft layers, with 2.0mm for the base, then 10.0 mm for the the 7 blocks on top of that. With .2 or .25 mm layer height just calculate. Then print one and be present to watch the temperature changing in the display when going from block 1 to block 2 to check. You may need to add/substract a layer for precise tunign to your slicer.
For anyone going to the TCT in B'ham today, maybe I'll see you there!
-
10-03-2015, 11:07 PM #20Engineer
- Join Date
- Jan 2015
- Posts
- 445
ok. so i worked it out.
Here are some images.
Starting at the bottom.
First point = 260c
2nd - 255
3rd - 250
4th - 245
5th - 240
6th - 235
7th - 230
I definitely dont like it at 260, too cloudy and almost gritty.
However, anything 250 and below seems to be ok. I think some of my previous issues were first layer problems, which caused some lamination issues later, as well as a much too low extrusion multiplier (74). I have the right number now around 88 i think.
Tips here curled a little bit due to how quickly the layers were being printed and no layer fan. bond seems very strong..
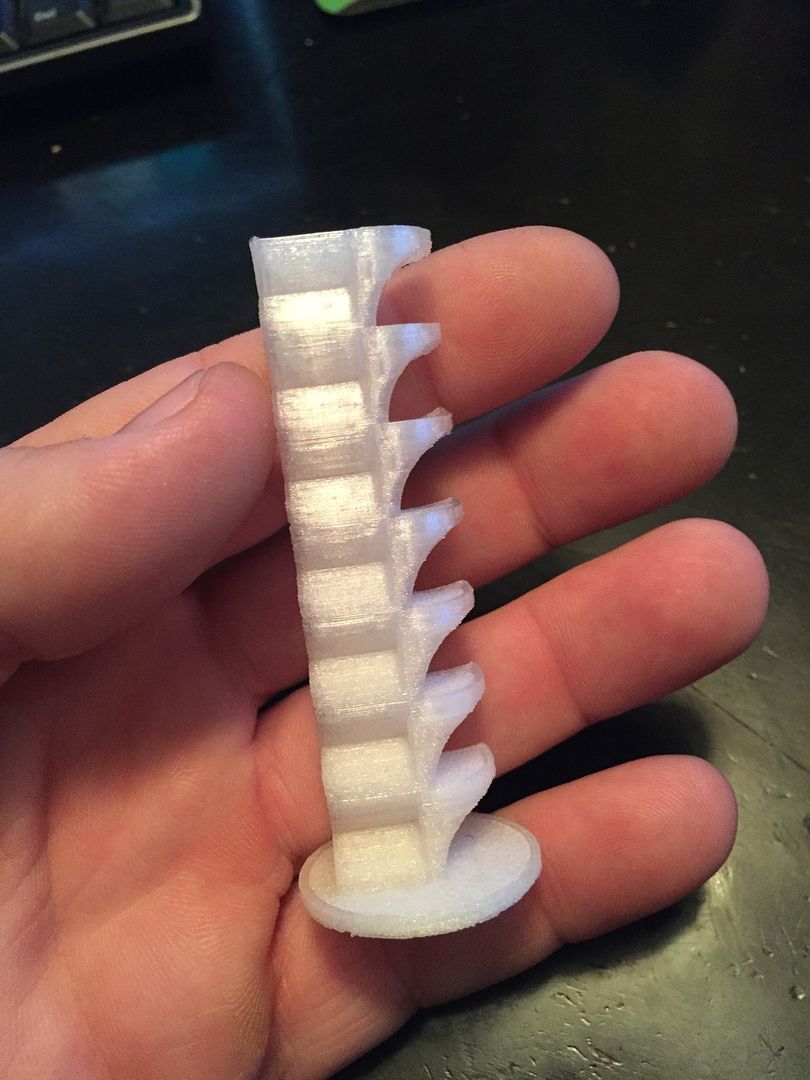
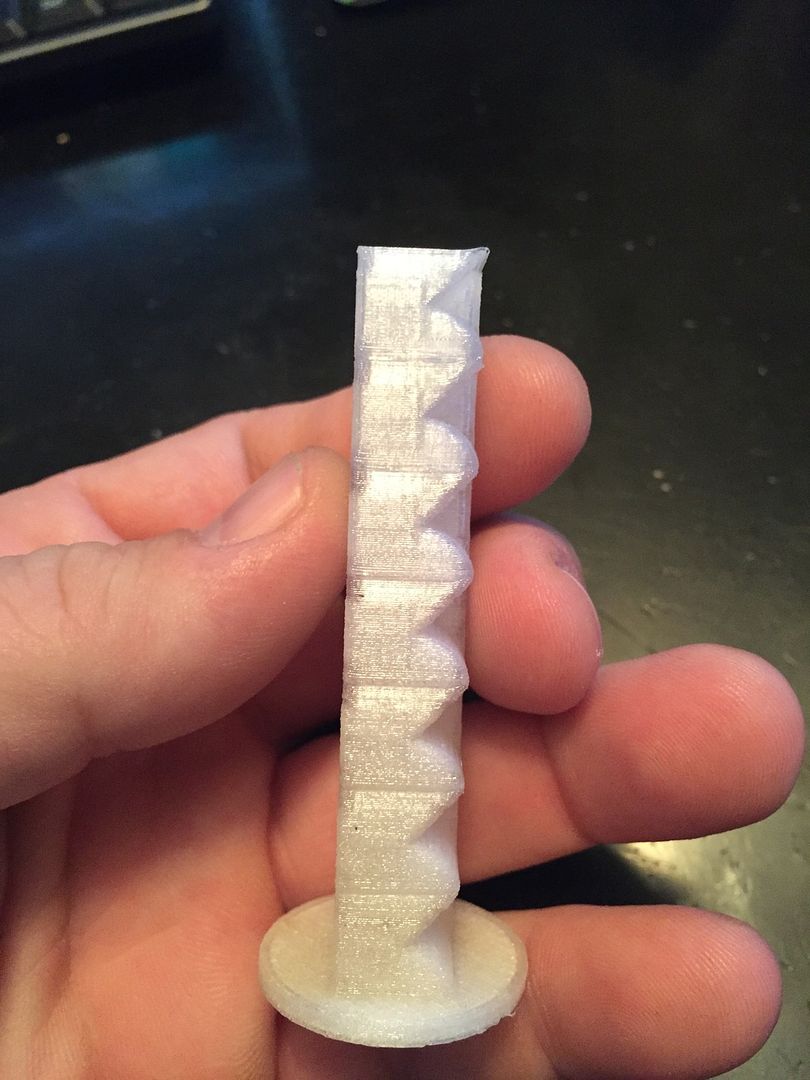
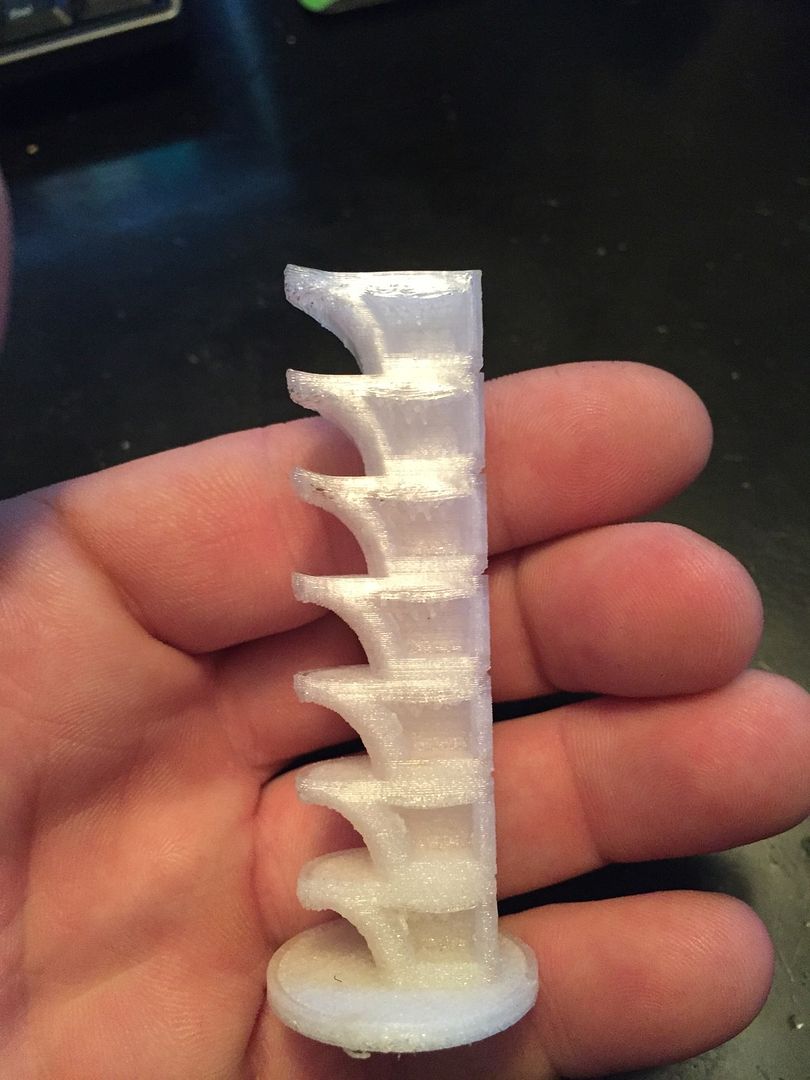
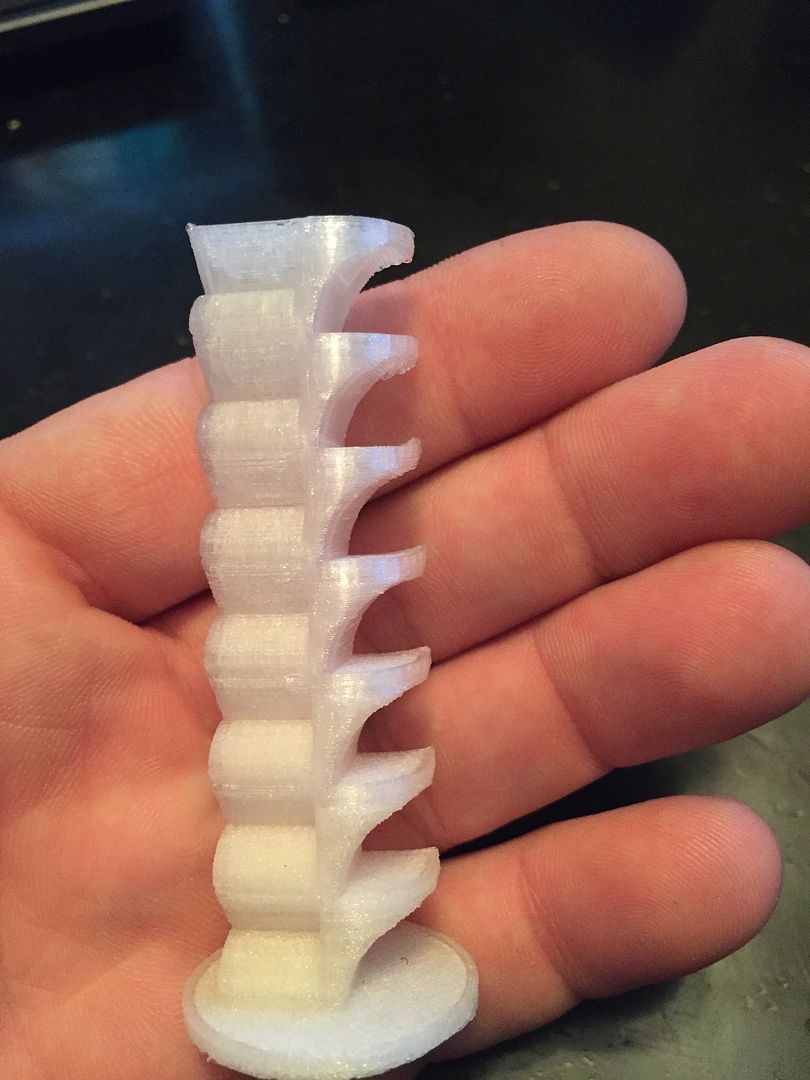
Let me know how this looks to the smarter folks out there
thanks

 Reply With Quote


Print not sticking to base plate?
Yesterday, 01:26 PM in General 3D Printing Discussion