


Results 1 to 6 of 6
-
12-04-2014, 04:59 PM #1Staff Engineer

- Join Date
- May 2014
- Location
- Highlands Ranch, Colorado USA
- Posts
- 1,437

MakerFarm benchmark results with Make: 2015 Shoot Out test models
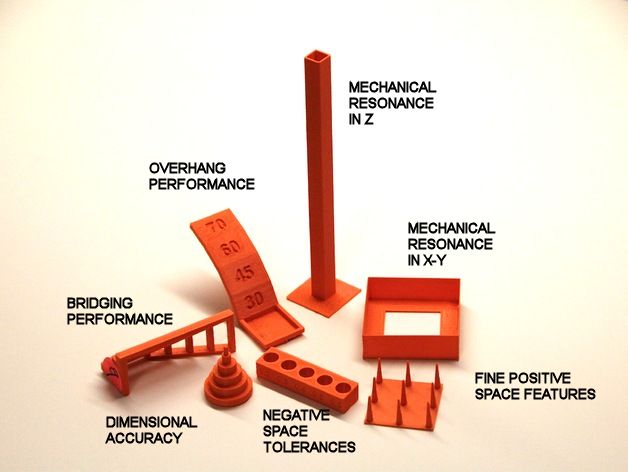
Capture notes and photographs of your prints of the test models from the Make: 2015 3d Printer Shoot Out here. The intent of the Make: Shoot Out was to use standardized test models to evaluate how several commercial 3D printers compare, when used with the host software and settings provided or recommended by the manufacturer. Test results were published in Make: issue 42, covering December 2014 and January 2015.
Brian Krassenstein first introduced 3D PrintBoard to the test models in http://3dprintboard.com/showthread.p...Print-Test-Kit. Make: has published STL files for the test models on Thingiverse at http://www.thingiverse.com/thing:533472. Information on how to score the print results is available through a link on the Thingiverse instructions page. Rather than combine multiple challenges into a single complex print, seven individual test models focus on particular print attributes.
Most of us have tweaked our MakerFarm printers, and many have moved away from the recommended Slic3r v0.9.9 and associated configuration files provided by MakerFarm. Rather than limit testing to a stock configuration, we can still use the Shoot Out test models to assess and compare our setups. IMO, this can include knowing how to optimize slicing parameters based on the nature of a particular print.
Including print photographs with print results is basically a prerequisite. Try to take good photographs that highlight the features applicable to the scoring criteria. Remember that posts are limited to five photographs, so combine prints in photographs or merge photos as necessary. Let's use the Shoot Out models as a way to share knowledge. If you managed stellar prints, explain for others how you managed to do so. If you have issues with your prints and are welcome to suggestions on improvements, go ahead and ask for advice. If you provide a numerical score for your prints, feel free to provide a bit of information on how you came up with the scores.
NOTE: As of this posting, the scoring information provided on the Thingiverse page is only a subset of the scoring categories used in the Shoot Out article. Be aware of that if you attempt to compare scores with those in the article.Last edited by printbus; 05-02-2015 at 10:19 PM. Reason: migrated to offsite image storage due to 3DPrintBoard issues
-
12-04-2014, 07:05 PM #2Staff Engineer
- Join Date
- May 2014
- Location
- Highlands Ranch, Colorado USA
- Posts
- 1,437
PRINTBUS RESULTS
Using the scoring criteria on the Thingiverse page, I came up with a self assessment of 24 points out of a possible 29. I lost three points for only being able to remove the two pins with the largest gap in the negative space tolerance print, one point for fine strands between spires remaining on the positive space features print, and one point for drooping beyond spec on the bridging performance test.
Additional photos and setup information is in my build thread starting at http://3dprintboard.com/showthread.p...ll=1#post37555. Repetier-Host v1.0.6 and integrated Cura Engine were used for the prints, with gcode.ws used as a gcode viewer in assessing infill and layer time attributes before printing. MakerFarm 1.75mm black PLA was used on the final prints. Everything was printed at a 0.2mm layer height.
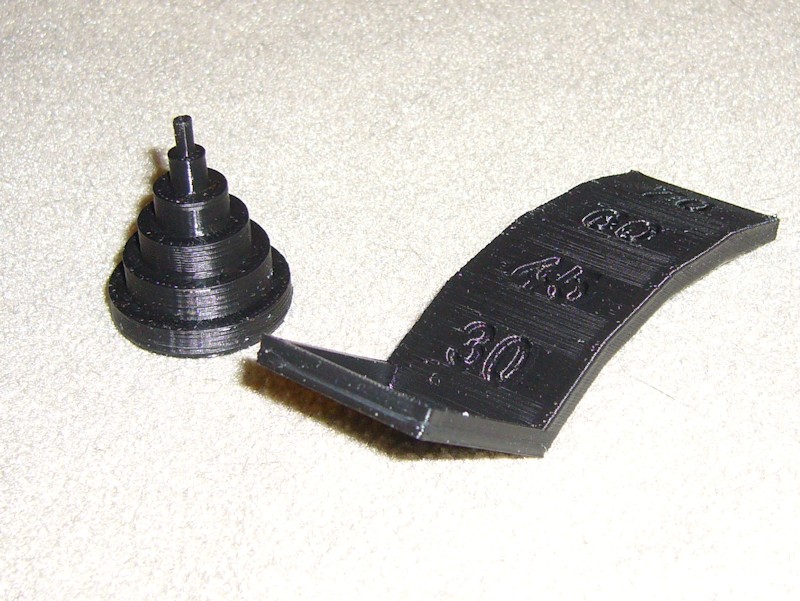
The dimensional accuracy print was pretty straight forward, but I did apply print cooling airflow in order to maintain a good narrow post at the top of the print. I made multiple passes at the overhang test, mainly experimenting with different print cooling airflow orientation. I found the print was best oriented so that airflow from my print blower hit the side of the arch.
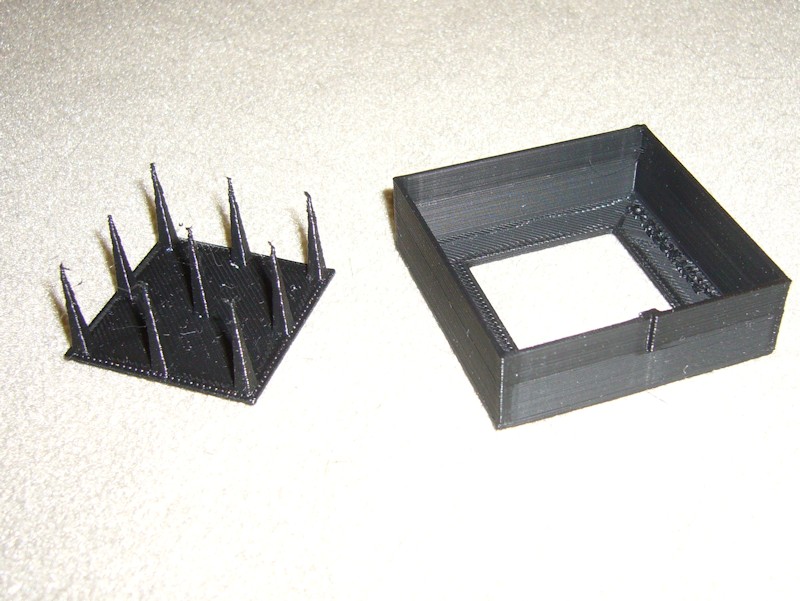
My best print of the fine positive space features model involved a combination of retraction settings, print time layer management, and print cooling airflow. I kept the nozzle moving fast so heat didn't soak into the spires as they got smaller, and ended up with retraction set to 1.5mm retraction distance and 0.02mm minimum extrusion before retraction. Another print at a slightly higher retraction distance might have eliminated the very fine strands between the upper part of some of the spires, but I didn't want to use up another length of filament for it.
All my initial prints got discarded after I realized the Cura Combine Everything Type A mesh error correction was enabled and seemed to messing up the fidelity of the resonance in XY print. Unchecking that resulted in a pretty fine step and notch on the one side of the print.
The tall resonance in Z print came out as good as I think it could. Layer time management and print cooling airflow were used to ensure the nozzle was always printing on solid material. Cura's desire to add dabs of infill between the inner and outer perimeter was eliminated by turning off infill for this print.
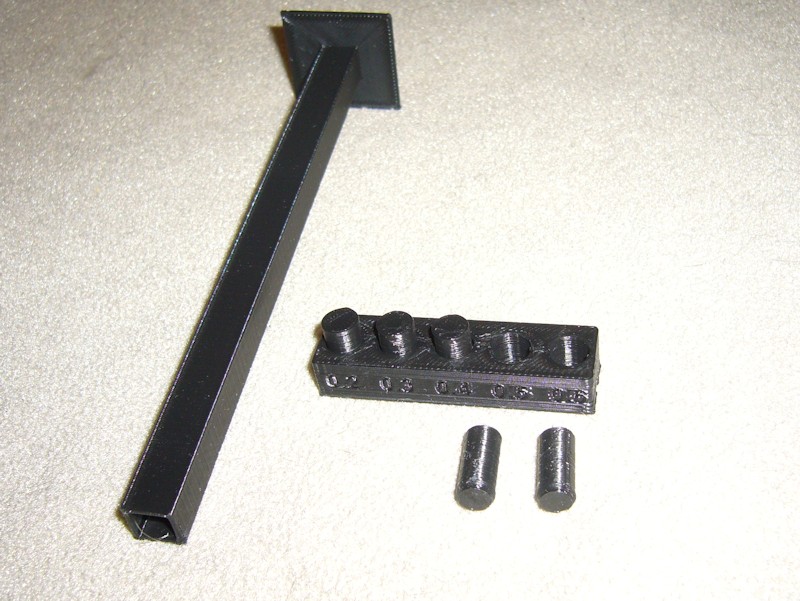
Hole clearance in the negative space tolerance test is my problem print. I could only remove the two pins with the largest hole clearance.
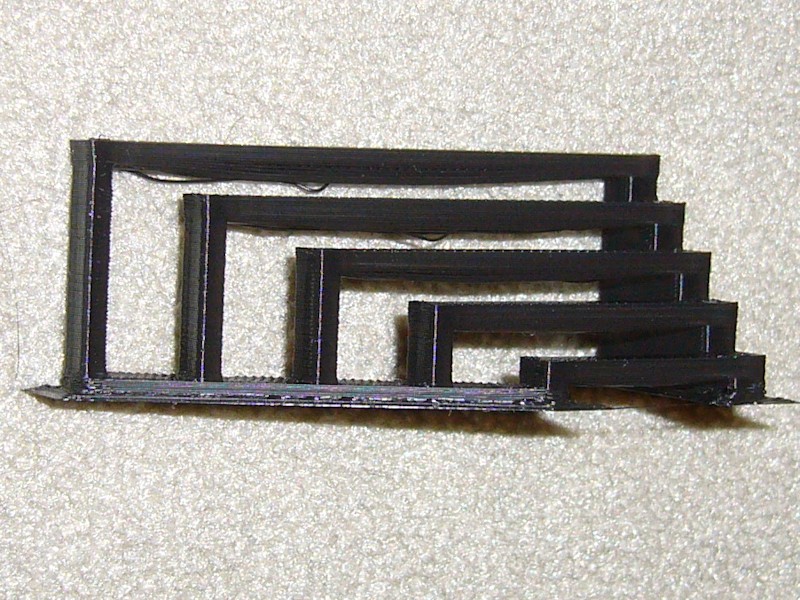
Considering Cura has no settings specific to bridging, I thought the bridging performance test came out surprisingly well, with no dropped filament over even the 60mm span. I hit this print with a hefty amount of print cooling airflow with the print oriented so the airflow was inline with the spans.
In summary, I thought experimenting with the test models was a good learning experience. I have a better understanding of retraction settings, print thermal management (layer time and print cooling airflow), and the value of previewing prints in a viewer like gcode.ws to observe the planned print speeds, layer time, and the effect of infill settings.Last edited by printbus; 05-22-2015 at 06:11 PM.
-
12-16-2014, 05:01 PM #3Staff Engineer
- Join Date
- May 2014
- Location
- Highlands Ranch, Colorado USA
- Posts
- 1,437
PRINTBUS FOLLOWUP
With essentially identical settings applied, I was able to pop one more pin out of the negative clearance print by using Slic3r v1.1.7.
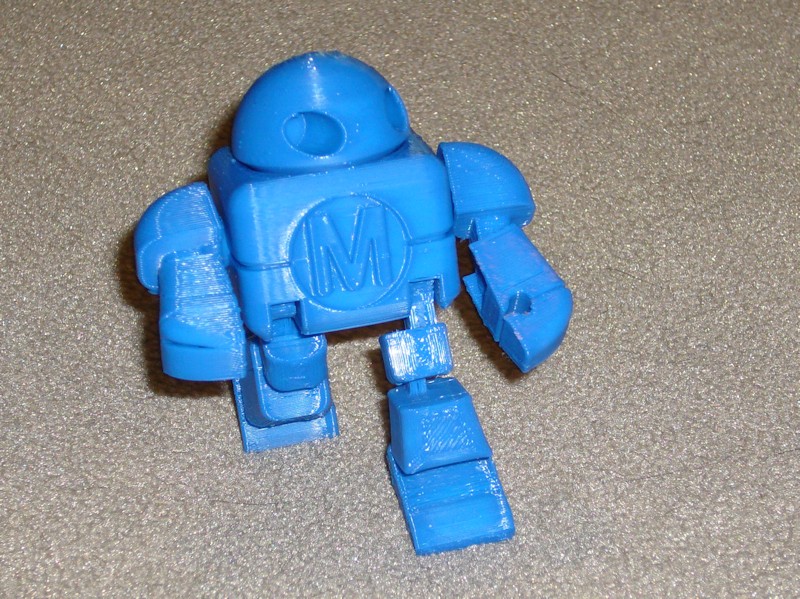
Slic3r also made it easier to complete the articulated Make: robot from http://www.thingiverse.com/thing:331035. They have another version with support added under the arms, but I printed the 65% scaled version without the support. My Repetier-Host v1.06/Cura Engine print had 6 of the 11 joints operable. Based on my experience and what I've read, Cura seems to always leave things with a tighter fit. All 11 joints (did I find them all?) are operable on the Slic3r print. Tricks applied include applying a hefty amount of print cooling airflow, print rotated so print cooling airflow goes across the body and both legs, keeping the extrusion temp pretty low, under-extruding just a tad, and retracting 1.5mm of filament for any travel distance over 1mm. Filament is MakerFarm blue 1.7mm PLA, on the printer for 3 hrs 33 minutes. EDIT: Bed adhesion is also critical. The first layer has a lot of small stuff on it that I found tough to print and stick on a warm glue-stick bed. I went cold bed, blue painters tape, cleaned with alcohol.
No scores were issued for this print during the 2015 Shoot Out, but it is a print that was done on all of the printers.
Last edited by printbus; 05-02-2015 at 10:25 PM. Reason: migrated to offsite image storage due to 3DPrintBoard issues
-
01-14-2015, 11:10 AM #4Staff Engineer
- Join Date
- May 2014
- Location
- Highlands Ranch, Colorado USA
- Posts
- 1,437
Due to the lack of other benchmark results being added, I requested this thread to be "unstickied".
-
01-14-2015, 12:32 PM #5Student
- Join Date
- Jan 2015
- Posts
- 48
I wanted to run these prints when I get my 12"er up and running. It hasn't shipped yet. I was hoping also to see other results as well

-
01-14-2015, 02:53 PM #6Staff Engineer
- Join Date
- May 2014
- Location
- Highlands Ranch, Colorado USA
- Posts
- 1,437
well, definitely add the print results when you get the printer up and running. Originally Posted by Cameron

I'll also re-emphasize that it isn't my intent for this thread to be a bragging contest. The intent is for us to collectively show what the MakerFarm printers are capable of using an established set of models that don't involve a large amount of filament. As I mention in the first post, it'd be great if those who get great prints share how they obtained them, and those with not-so-good prints are welcome to post what they've got and ask for suggestions.


 Reply With Quote


What's wrong with this prting?
04-14-2024, 05:15 PM in General 3D Printing Discussion