


Results 1 to 10 of 15
-
04-15-2016, 02:14 PM #1Student


- Join Date
- Apr 2016
- Location
- MI
- Posts
- 7
New to 3D printing, makerfarm 10"
Hi!
I didn't see an introduction thread anywhere, and only just found this forum so haven't had a chance to really search everything, so bear with me.
I bought, assembled, and have been running a MakerFarm 10" I3v for about a week now, I've been trying to make sure I've done my research, getting things setup correctly, etc. I have not made any changes or adjustments from the factory software settings at this point.
So far, I've "leveled" the bed, I used a 0.25" feeler gauge to level it, and knowing that my fine adjustment screw for the Z stop is an M3 x 0.5mm, I turned the adjustment 1/4 turn to in theory have a 0.125mm gap between the extruder and glass.
My first print, the 20 x 20 x 20 test cube, using sli3cer, was with filament in a box marked PLA, so I was using the default config for PLA. The prints would warp up after 2 or 3 layers and then get dragged off the bed as adhesion was lost. Otherwise, to an un-trained eye, everything else appeared OK. So I ended up with some aquanet hairspray, and made a successful print, with minor warp at the corners.
The first thing I've noticed is that compared to a lot of the other prints I've seen/photos, the surface finish on this is more of a matte or flat appearance. The gears that came with the printer for the extruder are a very glossy, and very clearly defined layers. I'll get some pictures up tonight so you can see what my print looked like. At first I thought it was because the material was PLA and it must print differently than ABS.
So I picked up a roll of ABS to try, mainly because I wanted to print a spare set of parts (extruder housing and gears) right away in case anything happened. When I removed my roll of "PLA" I discovered that the sticker on the spool did not match the one on the box, and it was actually already ABS... So lesson learned there.
I figured I should start over, and that at least a few of my issues might have been because of using all of the wrong settings. Because that always works, right?
So my first test print in the new ABS settings, printing a spare extruder mount (skipping the cube). Bed is the same glass sheet with aquanet hair spray coating. I took three measurements over the first 5 feet or so of the actual thickness of the filament, which came out to 1.77mm. The default heat settings are I think 240 nozzle 110 bed. I set it to use a 15mm brim. Initial layer thickness set to 0.3mm. While it starts to print the brim, I notice that the material comes out in more of a tear drop pattern with a matte finish, not a straight flat line with a glossy finish that I think I'm seeing in some of the videos and parts others have made. Once the first layer is done, and it steps up to the next Z, the material is thick enough that the nozzle drags over it. So I thought it was over extruding, and ended up having to turn the flow rate down to about 80% but I think that was a little under extruded, but still having a hard time understanding how it could be that far off. But the extrusion remained with a matte finish, it's got almost a kind of a mashed potato texture to it, and it makes me think it's overheating the filament. The other thing I noticed was if the material sits in the extruder for more than a few seconds at that temp it discolors. I was also still getting warp after about 7mm of printing, a corner will pop off the table once and after the extruder Z height get above the warp the remaining layers will print dimensionally correct without additional warp.
But I guess my biggest issue is that I can recognize what issues I'm seeing, but I have no reference to what is normal, nor what different issues mean. Is there a guide that illustrates some of these print quality issues and what they might mean in terms of setup? I've found a few guides that illustrate hardware issues and how they manifest in the parts, but the main issue here is lack of experience in terms of print quality and warp, seems like I they are related.
I've managed to find some information about how/why the extruder needs to be calibrated earlier today, something that I didn't see in the manual, so it makes me think that there are a bunch of other little things that I needed to know to get this setup right.
Funny part is with the first roll of filament, if I use the default PLA settings from slic3r with Cura, 60 bed and 190 nozzle, I get much cleaner/smoother flow and much less warp. I thought Which doesn't make any sense at all unless the first roll of filament I bought actually was PLA as was marked on the box, and not ABS as marked on the spool? I did have the nozzle clog up once with those settings though.
I'm sure there's more, but for now I'm going to get some of my pictures uploaded.
-
04-15-2016, 02:51 PM #2Technician
- Join Date
- Feb 2015
- Posts
- 70
ABS melts at a much higher temperature than PLA. If it is starting to get melty/soft at 170-180 then you likely have PLA.
ABS also dissolves when exposed to acetone. If you happen to have some, throw a test piece in and see what happens.
If your material is discoloring you are almost certainly overheating it. So it sounds like you probably have PLA.
-
04-15-2016, 02:56 PM #3Staff Engineer
- Join Date
- May 2014
- Location
- Highlands Ranch, Colorado USA
- Posts
- 1,437

Welcome to the MakerFarm community.
The parts you got from MakerFarm are likely PLA. PLA varies from manufacturer to manufacturer, and color to color. My experience with it has been that when I want a glossy finish with PLA, I need to print it on the higher temperature side. EDIT: Adding the fact that not all my PLA prints the same. Some I can print glossy, some I can't. I don't view ABS as glossy period unless you subject it to an acetone vapor bath.
Simplify3D has what I think it the most extensive print quality guide. Some of the recommendations may be specific to the Simplify3D slicer, but I think there's still generic value in a lot of it. https://www.simplify3d.com/support/p...oubleshooting/Last edited by printbus; 04-15-2016 at 03:08 PM.
-
04-16-2016, 04:44 PM #4Student
- Join Date
- Apr 2016
- Location
- MI
- Posts
- 7
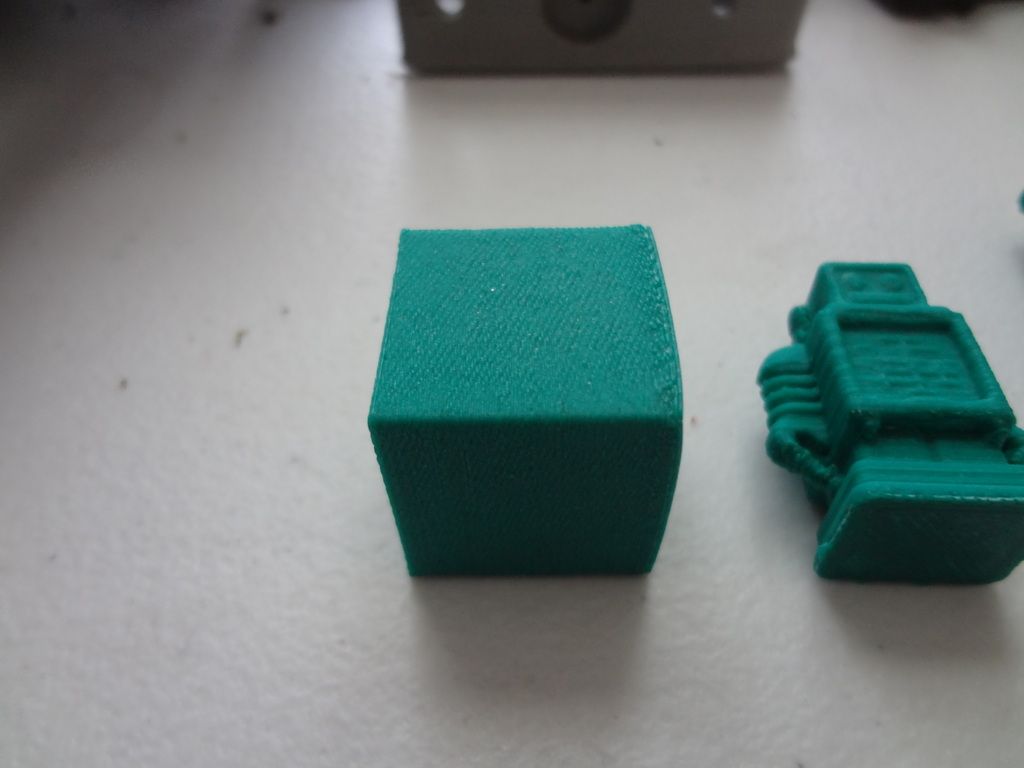
Ok, here are some of the pictures.
First print(s), the cube was with the slic3r profile, and the robot was with Cura.
Once I had got to a point where I was able to print without warp, which was 60 bed and 190 nozzle, I printed out a spare set of gears using Cura:

So of course, thinking I was using PLA, I switched over to a different roll of ABS. Using the default Slic3r settings for ABS I made this:
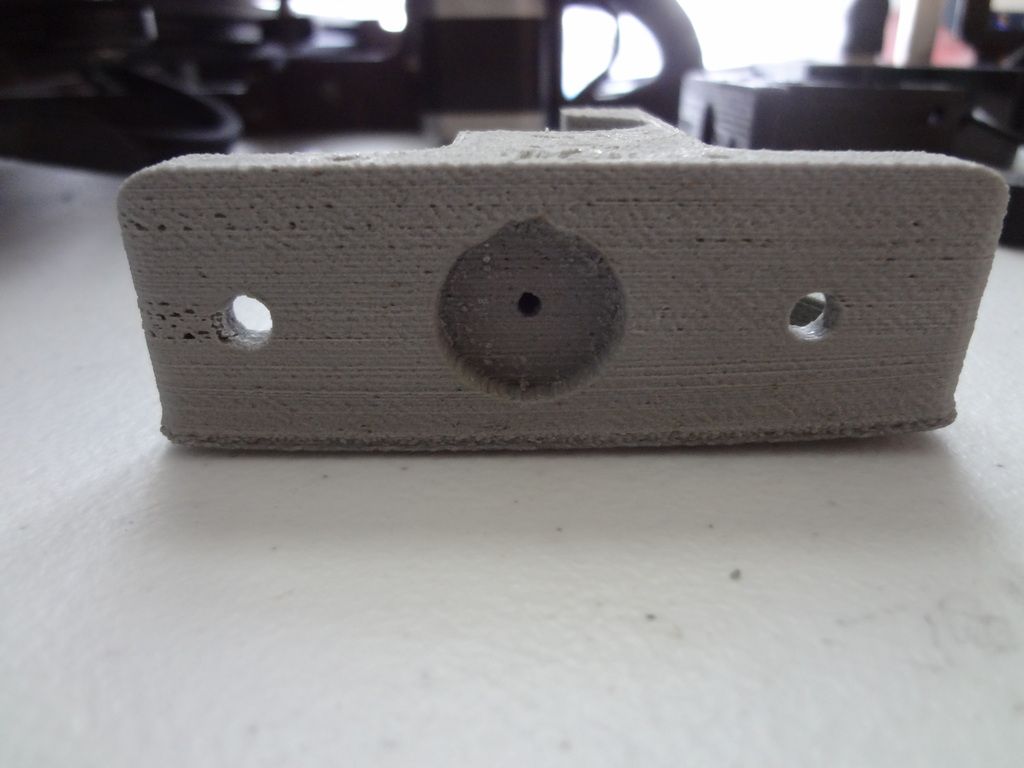
I knew it wasn't going to work after the first layer, so I took the opportunity to play around with settings to see what I could get.
For the moment I've stopped trying the ABS. I also put samples of both ABS rolls in some acetone in a container, so far it's looking like both the green and gray are ABS, as they are dissolving slowly. At least, they've sat in it for an hour and the forms have 'unraveled' and the acetone appears is cloudy with the color of the filament.
Instead I'm working with some PETG to print more spare parts, a new extruder housing, etc. So far I've also checked the bed level, and calibrated the extruder for the PETG roll. I'm about 90% of the way through a new extruder housing that is modified to work with soft filaments. So far it looks like it's going better than the ABS was, but I'll know for sure in an hour or so.
Also, thanks for the links/info, I've been reading all day!
-
04-17-2016, 09:14 AM #5Student
- Join Date
- Apr 2016
- Location
- MI
- Posts
- 7
Well, that was fun, the cartridge heater failed 7 hours into a print. I managed to otherwise get a non-warped PETG print though.
-
04-18-2016, 06:41 PM #6Student
- Join Date
- Apr 2016
- Location
- MI
- Posts
- 7
So I've noticed a new issue, but I think I should start out with some good news.
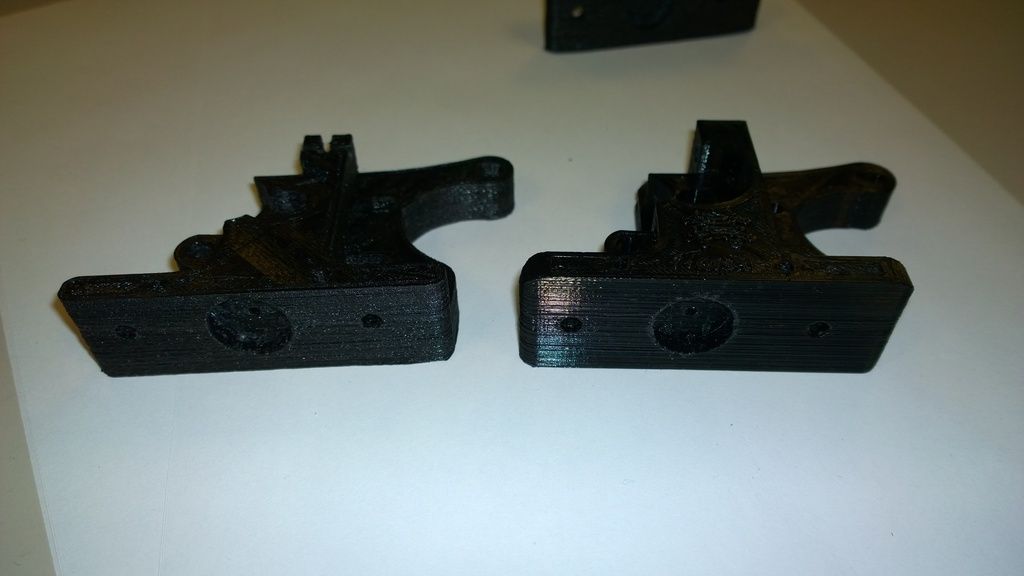
The one on the left was sliced with slic3r, the one on the right was sliced with Cura. The good news is that I managed to print a PETG part here, no warp. The one printed in slic3r was the one that the print stopped due to the heating element failing - which was my fault as I didn't know there was a set screw in the nozzle to pin the heater against the side of it.. But since Cura prints a much nicer appearance I've decided to use it instead of slic3r.
The issue I'm having with Cura is that layer one doesn't start anywhere near the correct Z height. After reading some more internet, trying to find a correlation between the G-code calculated start point Z and the Z gap I was setting up to, I concluded that the bed ideally needs to be set such that Z=0 is the exact point at which the nozzle touches the bed. So that's what I did. I used a 0.04mm feeler gauge to level the bed after a pre-heat, and tried a test print thinking I'd only need to fine tune the Z end stop.
Apparently, that doesn't work? It auto-homes to 0 just fine, if I check the bed level across the print area it's still 0. But when it goes to print it does not come back down all the way, it's trying to print about 1mm above the surface of the glass. The last few prints I've manually adjusted my Z end stop to make up for the discrepancy. But I can't find any settings anywhere in Cura to adjust or change whatever setting is doing it. Any ideas??
-
04-19-2016, 11:53 AM #7Staff Engineer
- Join Date
- May 2014
- Location
- Highlands Ranch, Colorado USA
- Posts
- 1,437
Yeah I guess the cartridge being loose could lead to it running hotter than usual. Regardless, a few have had early failures with their cartridge heater so you're not alone. You've measured it with a multimeter and it reads open rather than some low resistance?
I've never implemented ABL so I can't really help with the Cura issue, but I can offer that I was initially frustrated getting the first layer figured out when I switched from Slic3r. From what I could read, others were running into similar issues. Although it didn't make sense, I ended up adjusting the nozzle clearance to a snug fit with a piece of paper, yet had to set Cura for a 0.35mm first layer height to get things to come out acceptable. You might try asking Roxy for help up a level in the reprap forum or in the Marlin firmware enhancements subforum, but I don't know if she's done much with Cura. EDIT: This Cura experience was from late 2014/early 2015.Last edited by printbus; 04-19-2016 at 11:59 AM.
-
04-24-2016, 08:10 PM #8Student
- Join Date
- Apr 2016
- Location
- MI
- Posts
- 7
So I've been able to make several good prints at this point, again, thanks to everyone for helping!
Where I'm at now, I'm trying to print with some wax material (for use with investment casting), the baseline I have to work with is a nozzle temperature of 145C. The issue is that appears to be below a threshold for the extruder motor. How do I bypass or adjust that limit?
-
04-24-2016, 09:18 PM #9Staff Engineer
- Join Date
- May 2014
- Location
- Highlands Ranch, Colorado USA
- Posts
- 1,437
In at least older versions of Marlin, this is the line in configuration.h that sets the minimum extrusion temperature Originally Posted by MattStrike

#define EXTRUDE_MINTEMP 170
Another gutsy approach would be to send the printer a M302 gcode command as part of the startup section in your gcode. That'll allow a cold extrusion at any temperature. Use at your own risk.
-
04-25-2016, 08:09 PM #10Student
- Join Date
- Apr 2016
- Location
- MI
- Posts
- 7
Both of those options are a bit beyond my ability at the moment, as I'm not sure how to do either of them. Not that I don't understand. Originally Posted by printbus
Option #1 sounds like it would require that I reprogram something, presumably the main board on my printer, which is something I've never done. Though I wouldn't say I'm completely incapable (I have written several simple Java apps, made an adapter to backup and restore saved games on a pokemon game pack to my PC that I could also use to 'trade' pokemon with my PC emulator and gameboy, soft-modded my xbox back in the day, etc...). Is that something that can be done via USB, and what software/interface do I need to learn how to use? I couldn't find an option in the printer itself to adjust that, but is there a way to add that setting?
I would like to retain the min temp for extrusion, as I do leave the printer running overnight. Doesn't sound like there's a way to do that with the gcode.

 Reply With Quote


QIDI Slicer "Plater" is...
04-12-2024, 02:21 AM in QiDi 3D Printer Forum