


Results 21 to 30 of 125
Thread: 10" Pegasus Build
-
03-03-2016, 04:23 PM #21Technician

- Join Date
- Nov 2015
- Posts
- 73
When you get to putting the heat plate on the y-bed use 4 extra lock nuts (in my kit he supplied more than enough to do this). Install a screw and lock nut to the heat plate first and tighten down so the screw can't turn. Then adjustments will be one handed with just one wrench from the bottom, and later if you print some thumb wheels the change will be really simple.
-
03-04-2016, 12:29 PM #22Technician
- Join Date
- Nov 2014
- Posts
- 73
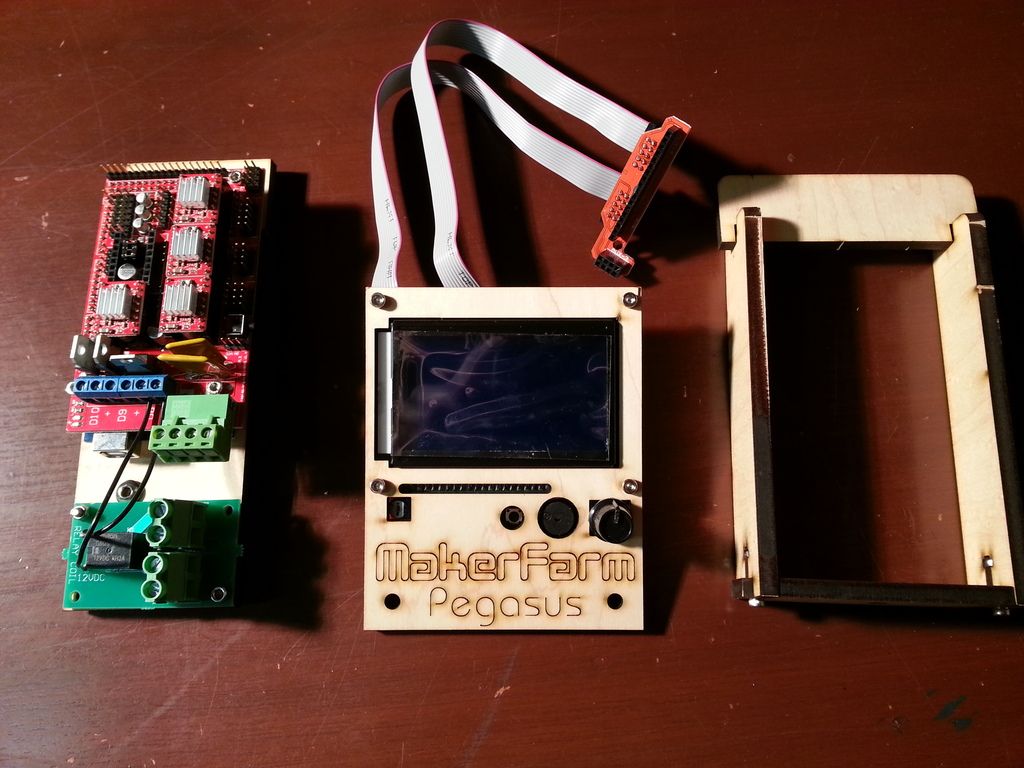
Getting the electronics pieced together and I also did the spool holder
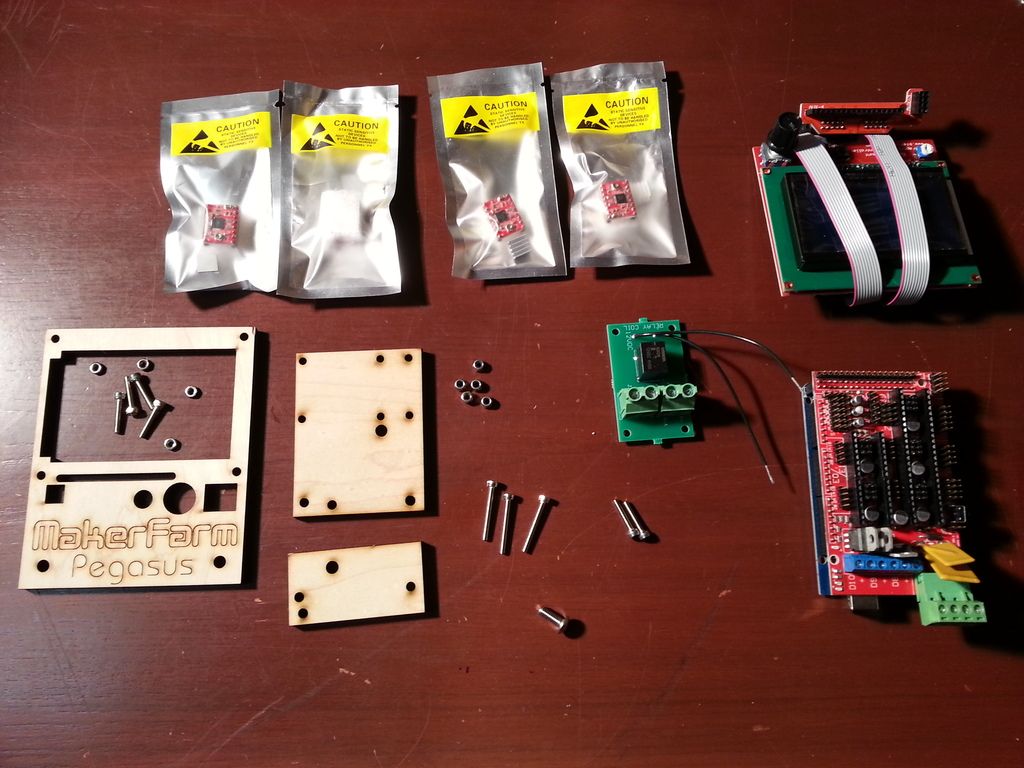
I've come to the end of what I can do as there was a bag of fasteners and a couple metal brackets that were not in the package. A quick email exchange with Colin (everybody is right, he does consistently answer within a few minutes) and the parts were mailed with a tracking number amazingly fast. However, now I have to impatiently wait for USPS to deliver to me up here in the Great White North.
-
03-04-2016, 12:30 PM #23Technician
- Join Date
- Nov 2014
- Posts
- 73
OH, I like that one. Thanks for the tip again. Originally Posted by Dustin B

-
03-04-2016, 06:22 PM #24Student

- Join Date
- Jan 2016
- Location
- Ocean County NJ
- Posts
- 19
I hear you on the patience, I have sent over 5 emails and called over 3 times to get the replacement parts for my wanhao. Blah Blah about got me mad. Well it did get me mad, then I did this. 20160303_210829.jpg
-
03-04-2016, 06:48 PM #25Technician
- Join Date
- Nov 2015
- Posts
- 73
I got lucky in that the only thing I was missing was the hotend mounting plate and I was able to make my own. Still don't have the part from Colin yet. I'm also in the great white north. Should get it on the 8th. Not sure if I'll change it out or not.
-
03-08-2016, 11:19 AM #26Student
- Join Date
- Jan 2016
- Posts
- 34
Flatty did you get your pegasus assembled?
I did a few test prints over the weekend, first 3 came out pretty good, last one ran overnight and looks like the bed moved up/down twice during heating. I changed the code to PID control the Fet board im using.
-
03-08-2016, 12:22 PM #27Technician
- Join Date
- Nov 2014
- Posts
- 73
No, I'm at a standstill waiting for a couple parts... they should be here in the next day or two I hope. I have been reading about people switching from bang bang to PID control and I may look into that as well but I'm just going to get the printer going first and see how things go from there. Originally Posted by Donziboy2
-
03-23-2016, 02:41 PM #28Technician
- Join Date
- Nov 2014
- Posts
- 73
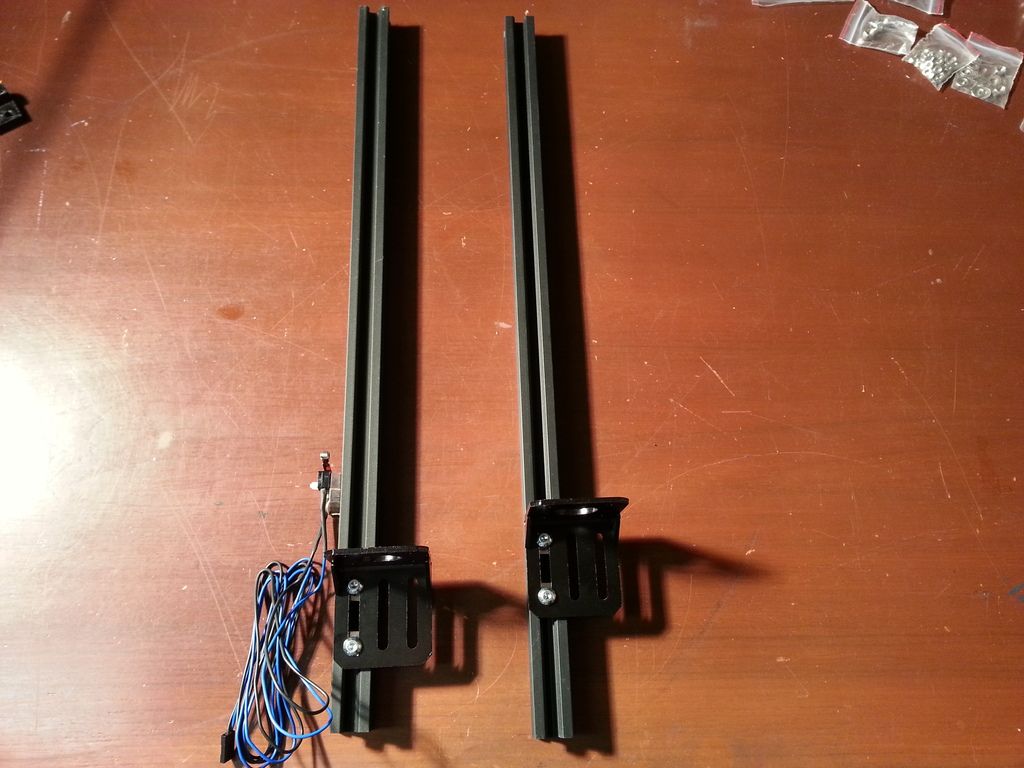
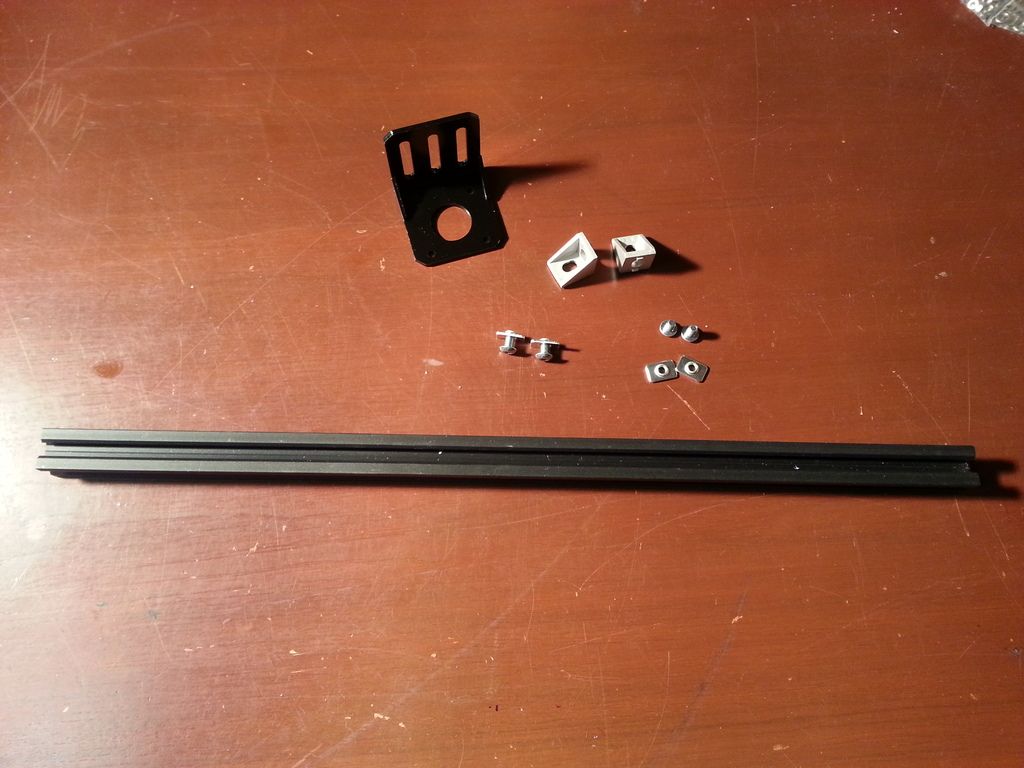
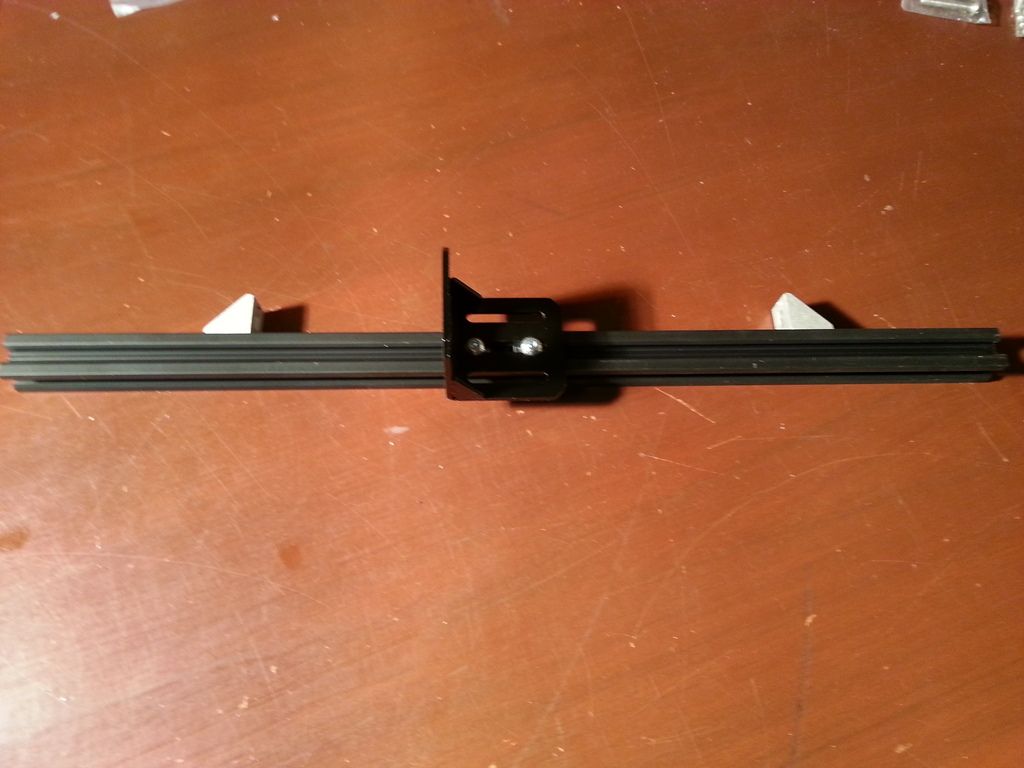
OK, I'm back in business and continuing the build. Next up are the Z motor brackets. The parts required are pictured below:
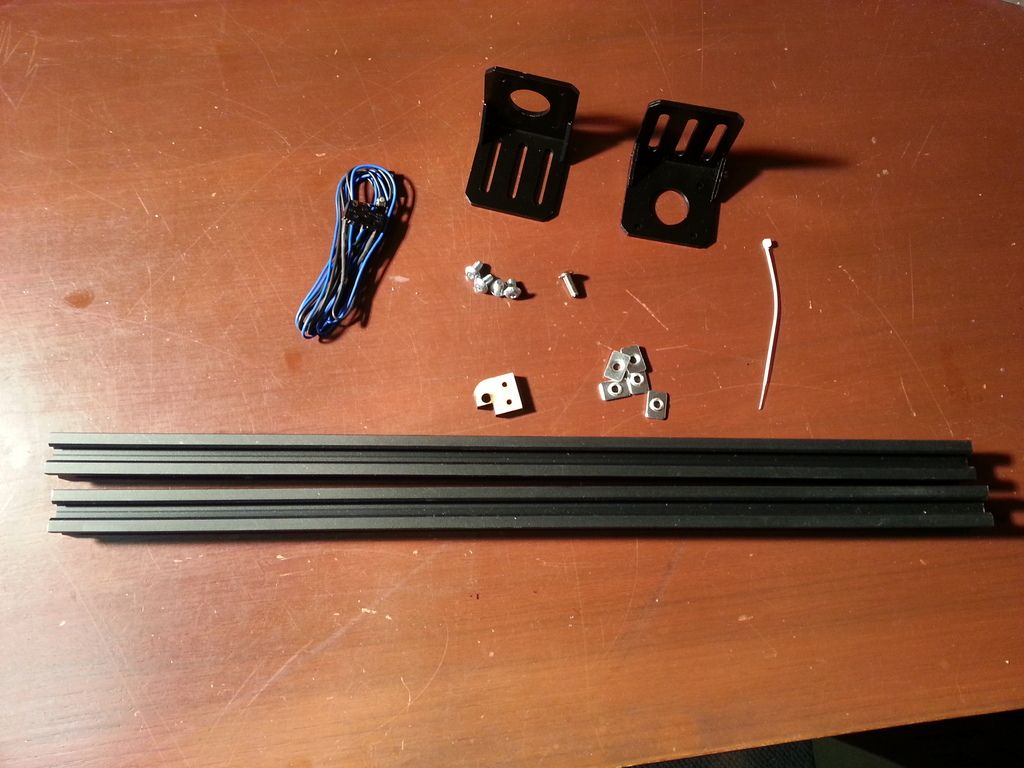
After putting things together it looks like this
-
03-23-2016, 02:54 PM #29Technician
- Join Date
- Nov 2014
- Posts
- 73
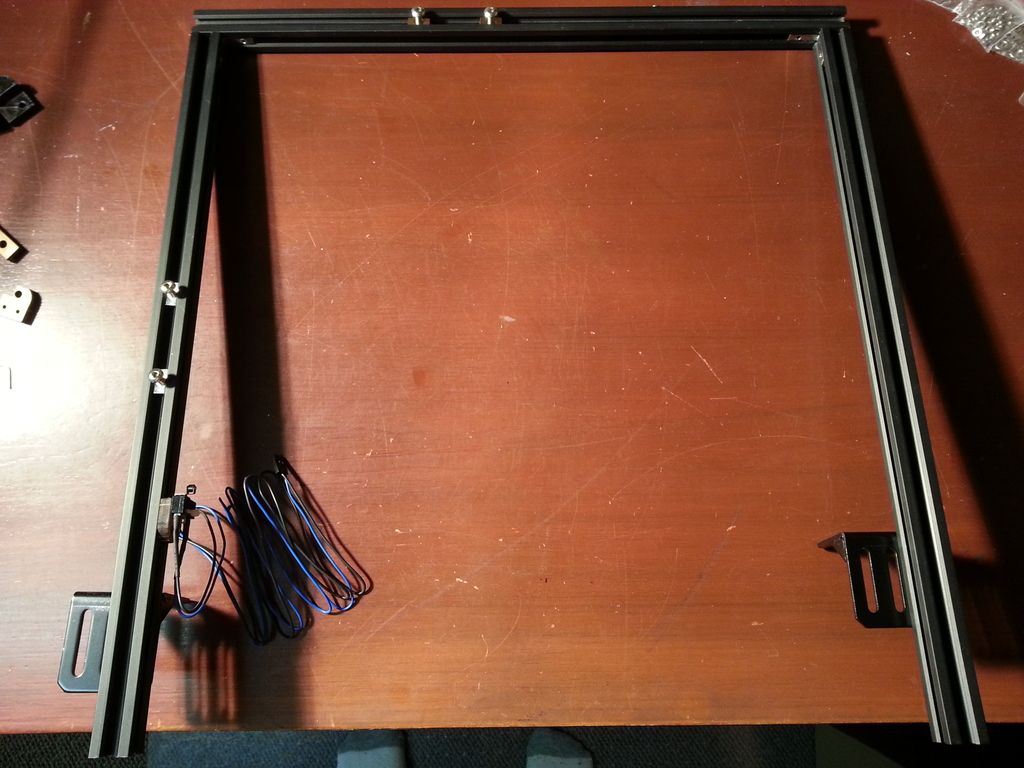
Next is the Y motor bracket
-
03-23-2016, 02:55 PM #30Technician
- Join Date
- Nov 2014
- Posts
- 73
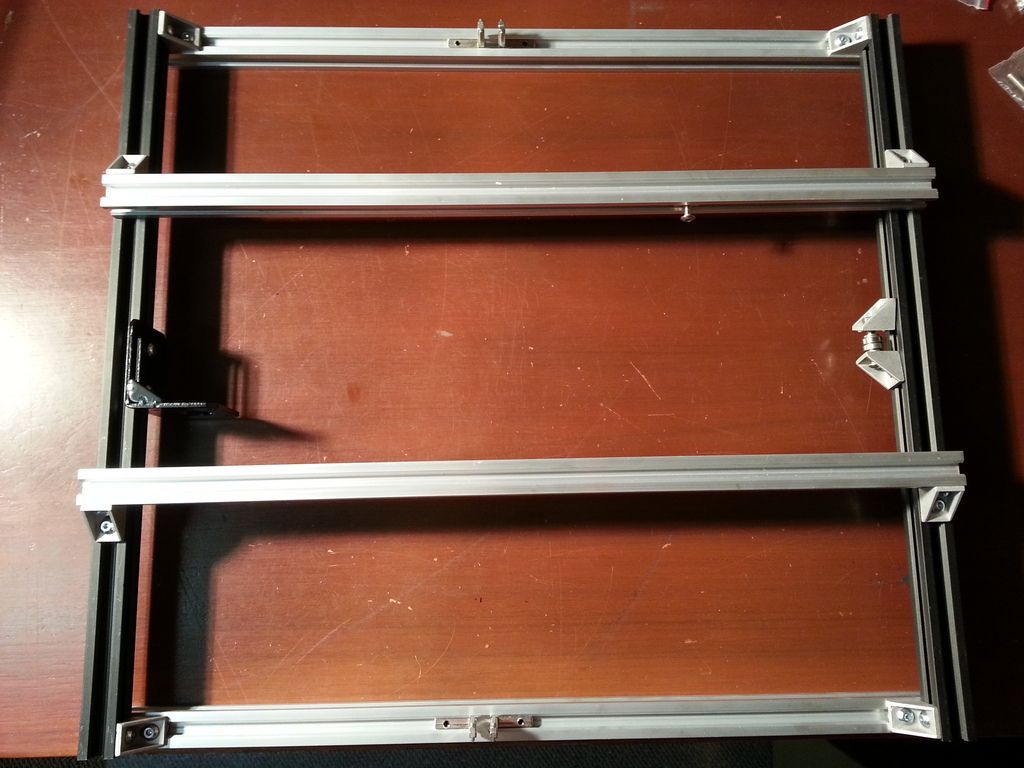
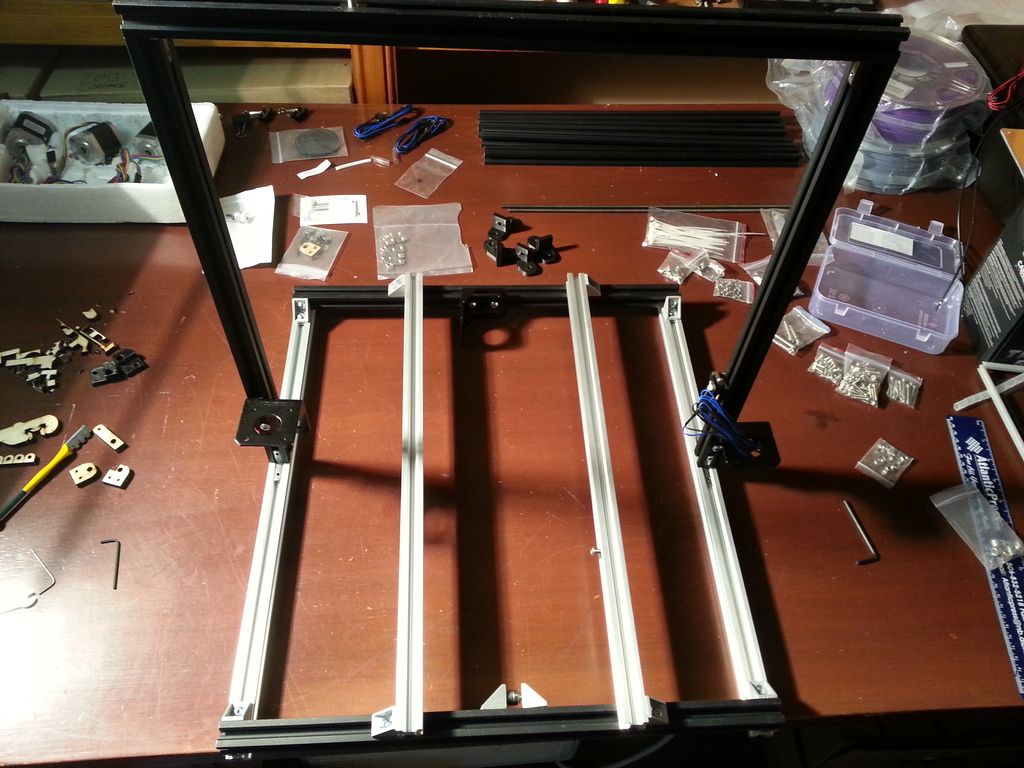
It's finally time to start assembling the frame


 Reply With Quote


QIDI Slicer "Plater" is...
04-12-2024, 02:21 AM in QiDi 3D Printer Forum