Results 1 to 3 of 3
-
02-16-2016, 10:27 AM #1Student

- Join Date
- Feb 2016
- Posts
- 1
Large "Flat" base has major warp... Help!
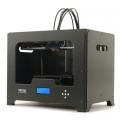
I am brand new to this forum, and pretty new to 3D printing. I have a FF Creator Pro, I'm using MakerBot software, and have only printed in ABS (white) with rafts so far. I have printed a handful of small to medium size parts of my own design with great results. Also have downloaded some Thingies and those have printed well also. So far so good, until...
My first attempt at a larger part: I have designed a 115 mm cube shaped box with 6 mm thick walls (50% fill) divided into 3 compartments. Each compartment has a sliding lid that snaps into place. I decided to test a much smaller box with the same wall thickness and fill to prove the design concept and find the best print orientation. It printed beautifully and the door snapped into place just as I hoped it would. Time to give the full size box a try...
The print started flawlessly, but when I got to about 30% complete the bottom corners really started to lift off the build plate and curl up. When I cancelled the print at about 38% the corners had curled to the point that they were about 5 mm off the build plate. This obviously ruined the box. I have read that this amount of warp on a print with a large flat base is common. That seems unacceptable... Some people combat this dreaded "corner curl" with small "pucks"or "Mickey Mouse ears" built into the design that are cut off later.
I am planning to try the "puck" concept on the corners with small piers underneath the box. These pieces will not be part of the box, but will be held about 0.2 away. My hope is to lift the base of the box off the BP so that the piers will be sacrificed and the base of the box will hold flat.
Has anyone had any experience with the"pucks" or "piers" strategy for combating these curling and warping problems? Does my "pier" idea make any sense?
Can anyone give me some practical advice? Thanks!
-
02-16-2016, 01:09 PM #2
ABS, right?
In order to print successfully with ABS you need to fully enclose your printer and let it preheat.
-
02-16-2016, 01:25 PM #3Engineer-in-Training

- Join Date
- Aug 2015
- Posts
- 256
You need very strong bed adhesion and a hot build chamber to do what you're trying.
-The pucks are a good idea, I always use them for things like this.
-Do whatever you can to improve bed adhesion--I use a liberal amount of abs slurry on things like this. The part will be hard to remove when it's done, I print on glass so I can remove the build plate and put the whole thing in the freezer to make it easier to remove.
-Increase the heat! plug the holes on the side of the FFCP, and make sure the room isn't too cold or drafty. Increase the bed temperature as high as you can get away with, you may find that if you increase temperature after the first 5-10 layers you can push the heat up higher without having the deformation problems at the base that a too-hot bed can cause.
-You also want to print at a high nozzle temp as well, this won't help it from peeling of the plate but it will help prevent splitting between layers. I typically print abs at 220 to prevent stringing, but for things like this I crank it up to 235.
I've even heard of people piping the output of a hairdryer into the side holds of their FFCP to increase chamber temperature. I haven't had to go that far yet, but it's an option.


 Reply With Quote


Print not sticking to base plate?
Yesterday, 01:26 PM in General 3D Printing Discussion