


Results 1 to 10 of 24
-
03-04-2015, 12:59 PM #1Engineer-in-Training

- Join Date
- Jul 2014
- Location
- Ontario, Canada
- Posts
- 257
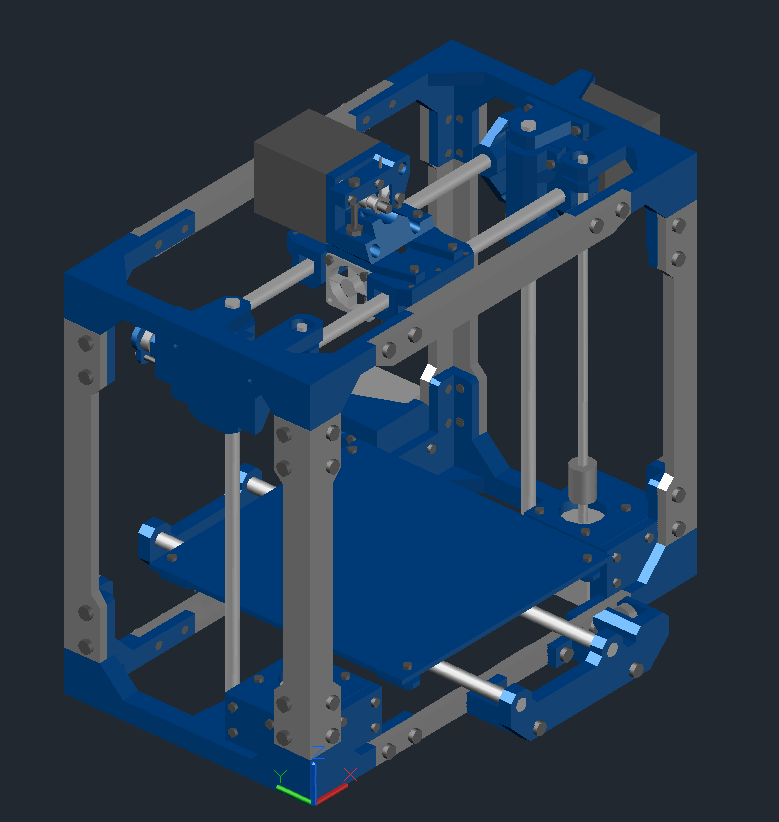
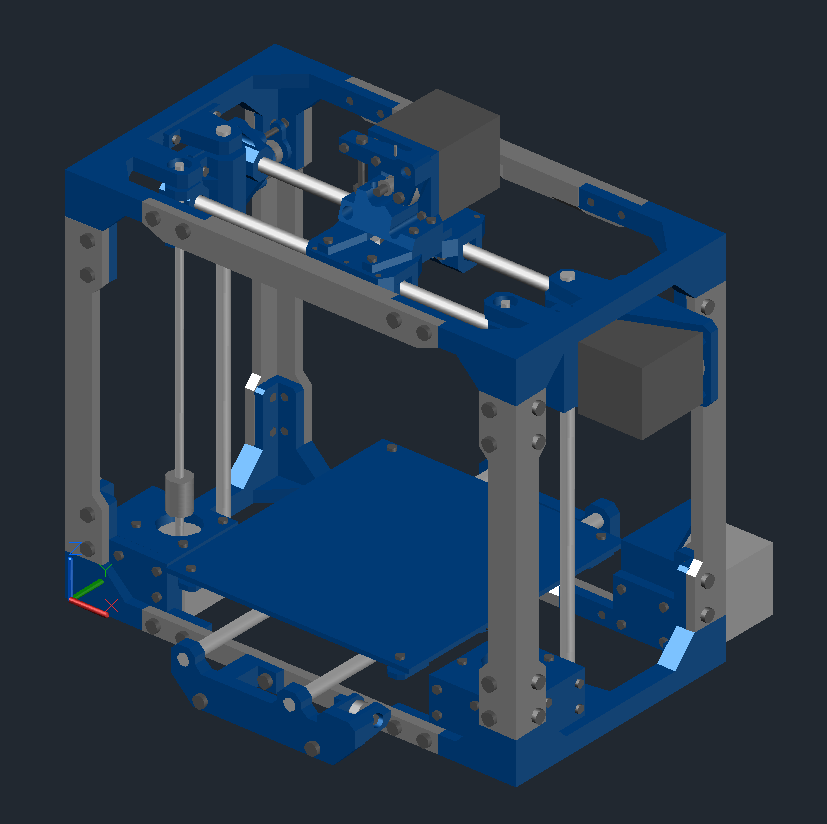
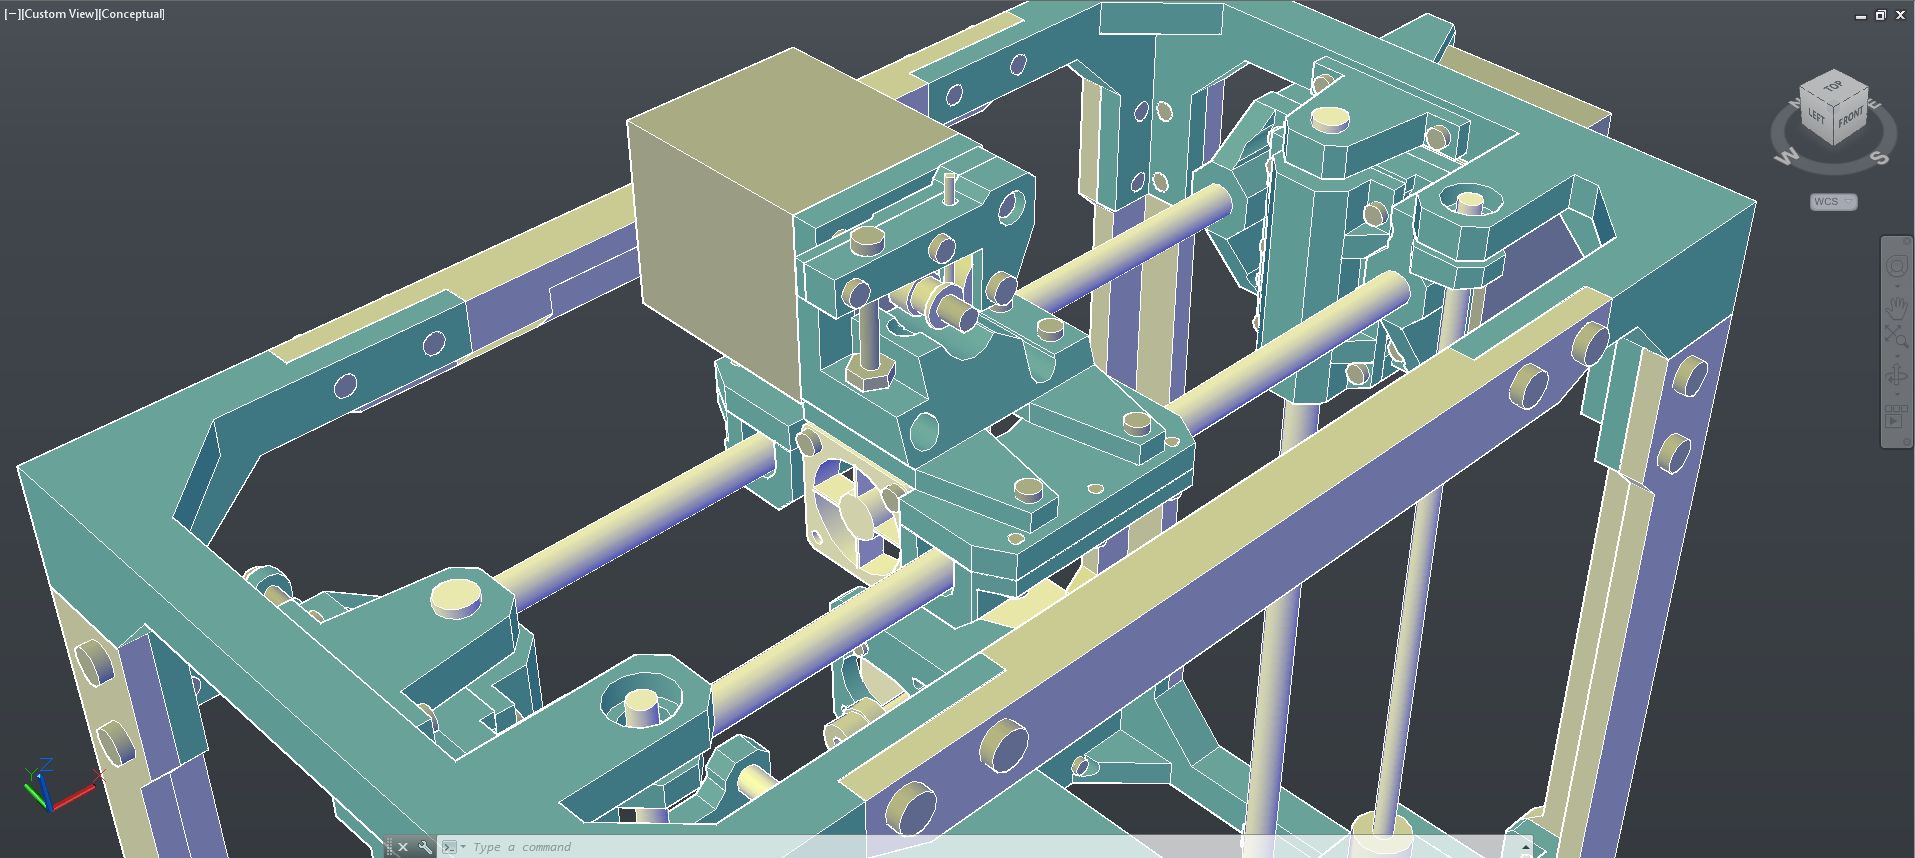
MaplePrint V2 3D Printer Progress Thread
Hi All,
I'm back at it again, after finishing off my first printed printer, I'm back at it on version 2, new, and greatly improved. My primary goal of this new printer design was to address some of the shortcomings found in my previous printer. The updates ultimately culminated in an entirely new printer design with the following features:
- Enlarged build volume of 150x150x140mm (can technically be extended to 150x180x140)
- Semi open frame design with the equal or better rigidity
- Custom designed extruder with Hexagon hot end
- Provisioning for upgrades such as auto bed levelling, heated bed and dual extruders
- Improved mechanical design, linear rod mounts are larger, parts are reinforced
- Fewer printable parts, hopeful goal being able to print all the required parts in 20 hours
- All parts are smaller than 200x200mm, printable on most printers
- Easier assembly, every component is easier to get to, build is broken into 3 sub assemblies which make up the entire printer
- 300x200x250mm overall foot print, larger than the last printer, but still small enough for even the smallest of desks
- RAMPS 1.4 electronics with LCD support, built in spool holder, optional carrying handles
Below is a few quick screen captures of the current design progress. The design is pretty close to complete, with only a few odds and ends remaining. I hope to begin printing frame components in the next few days, and as always will update my progress as I go!

Cheers
Ryan
-
03-10-2015, 07:15 AM #2Engineer-in-Training
- Join Date
- Jul 2014
- Location
- Ontario, Canada
- Posts
- 257
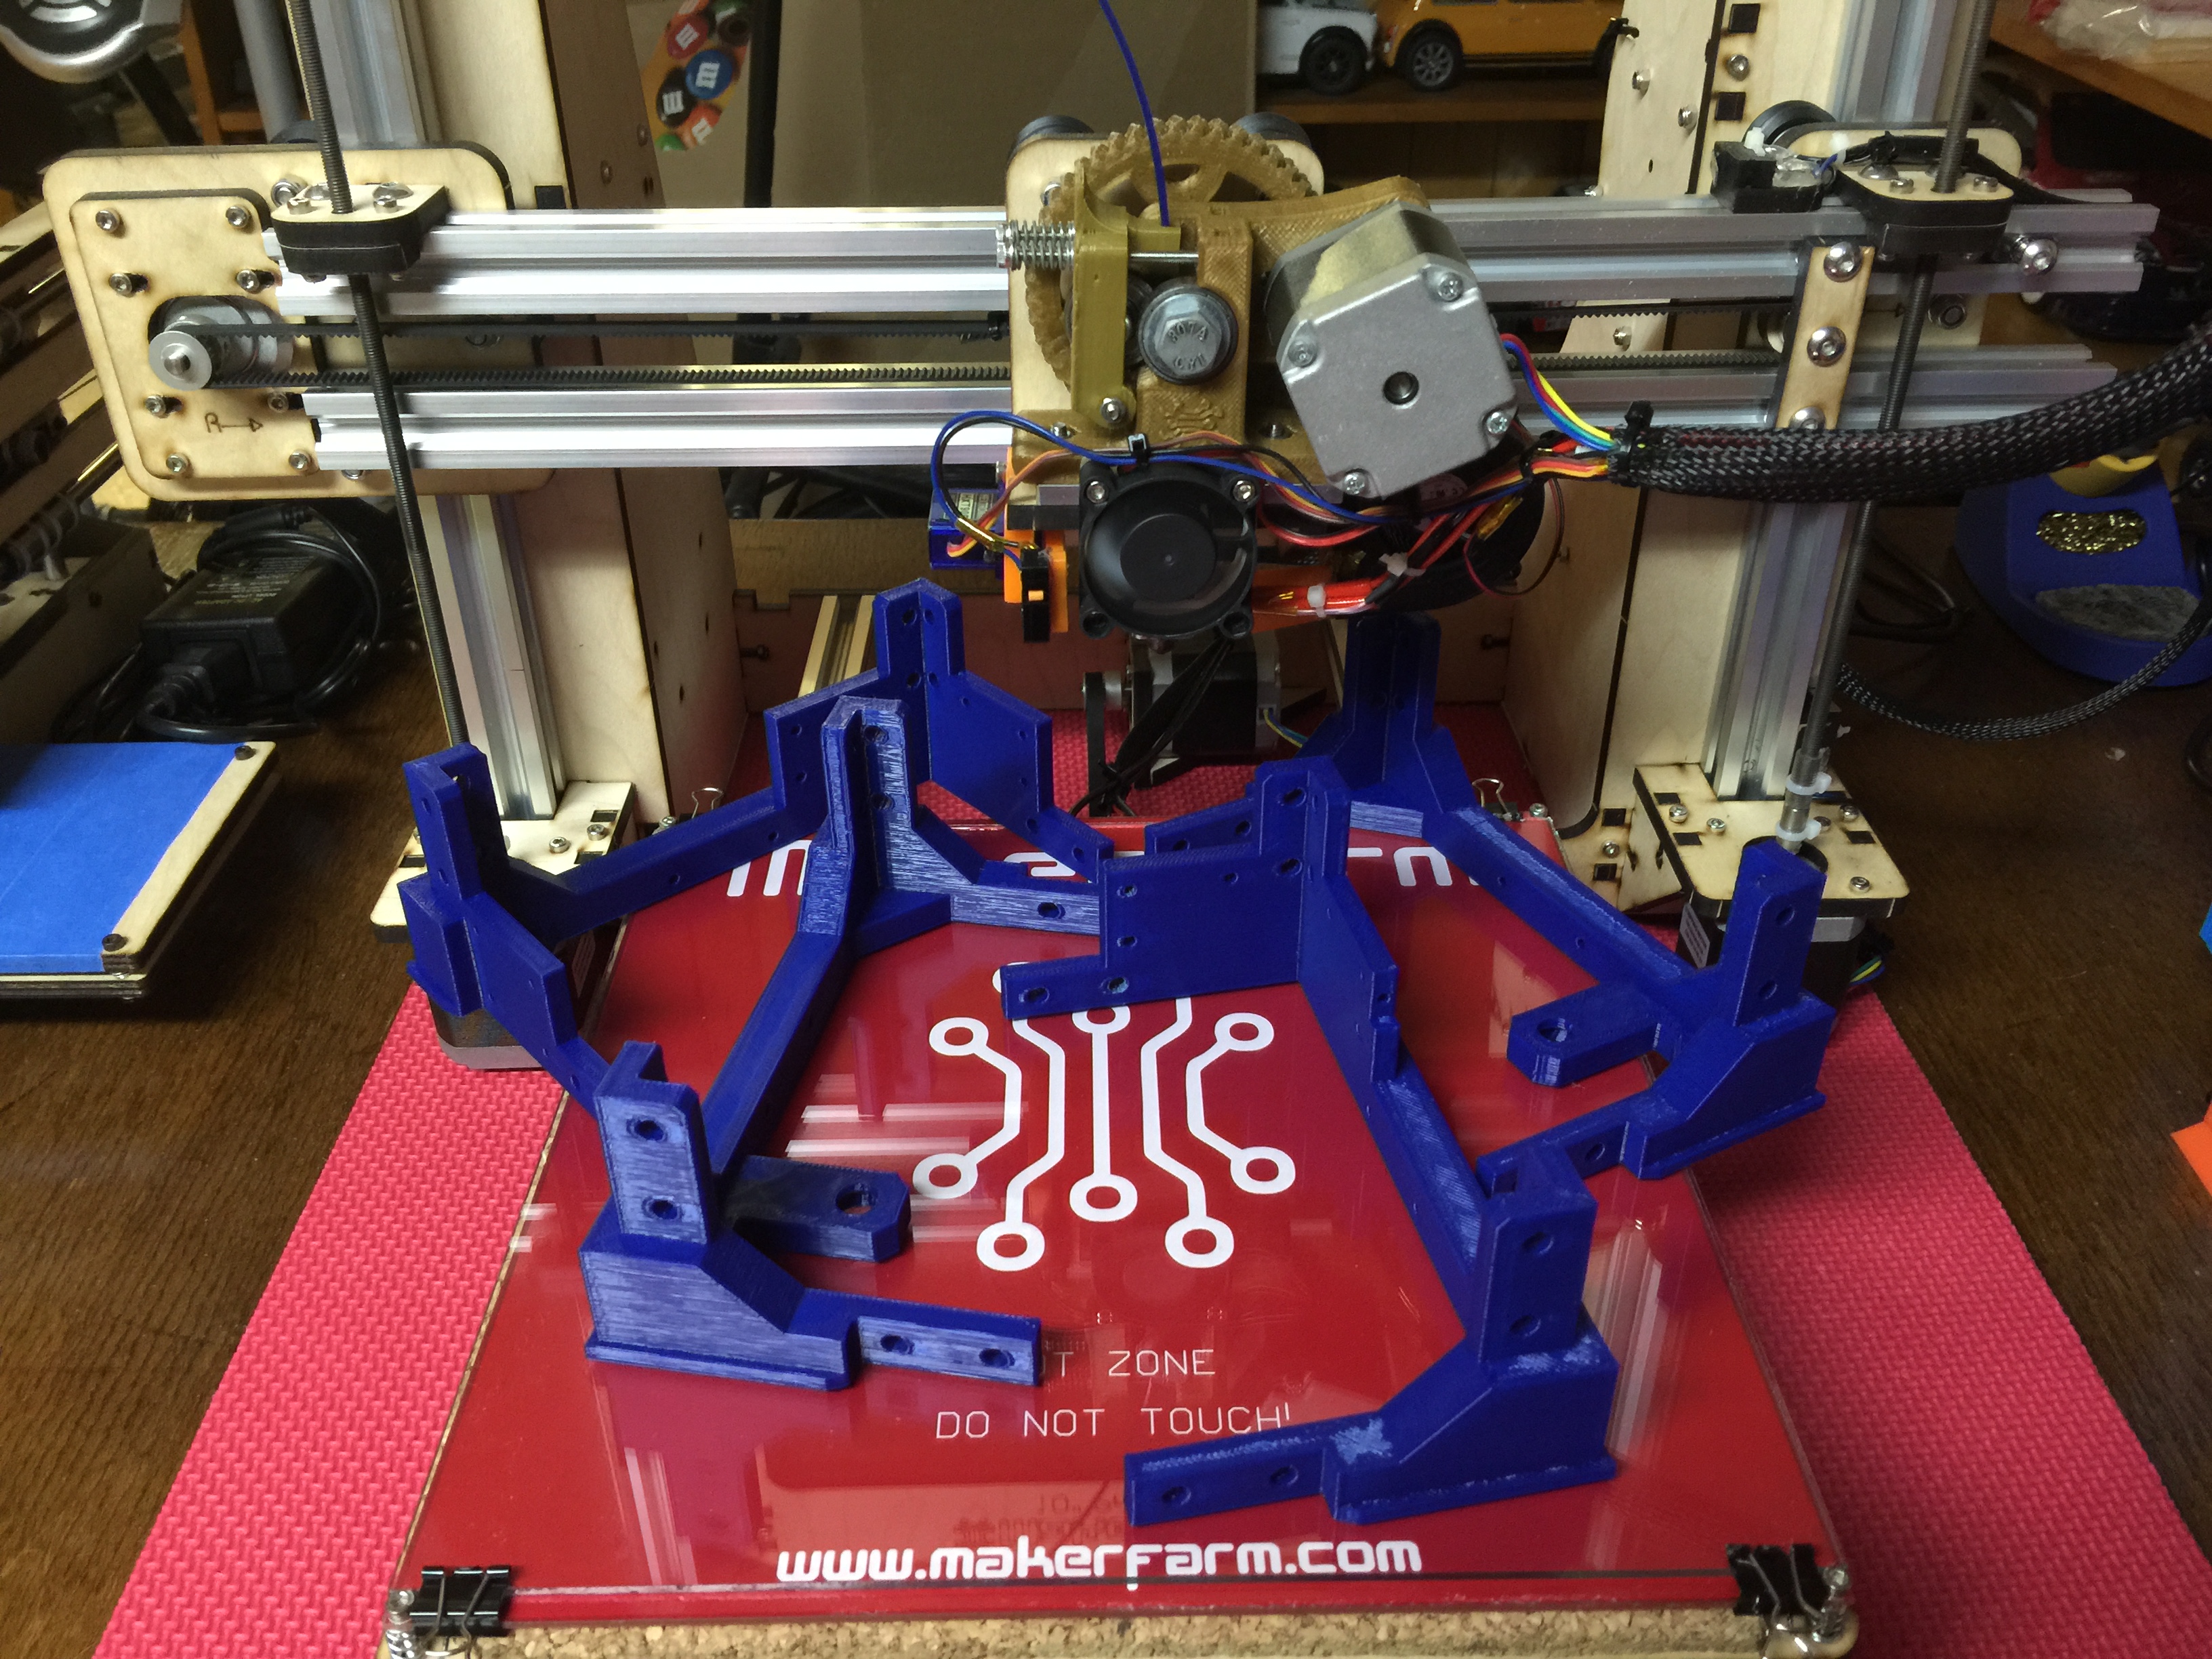
The first prints have rolled off the assembly line here. The 4 major frame components have printed beautifully, and mark the completion of the single largest items of the build. Next up will be the Z motor mounts, and Y-bed mounts as well. Stay tuned for more!
-
03-12-2015, 06:21 AM #3Engineer-in-Training
- Join Date
- Jul 2014
- Location
- Ontario, Canada
- Posts
- 257
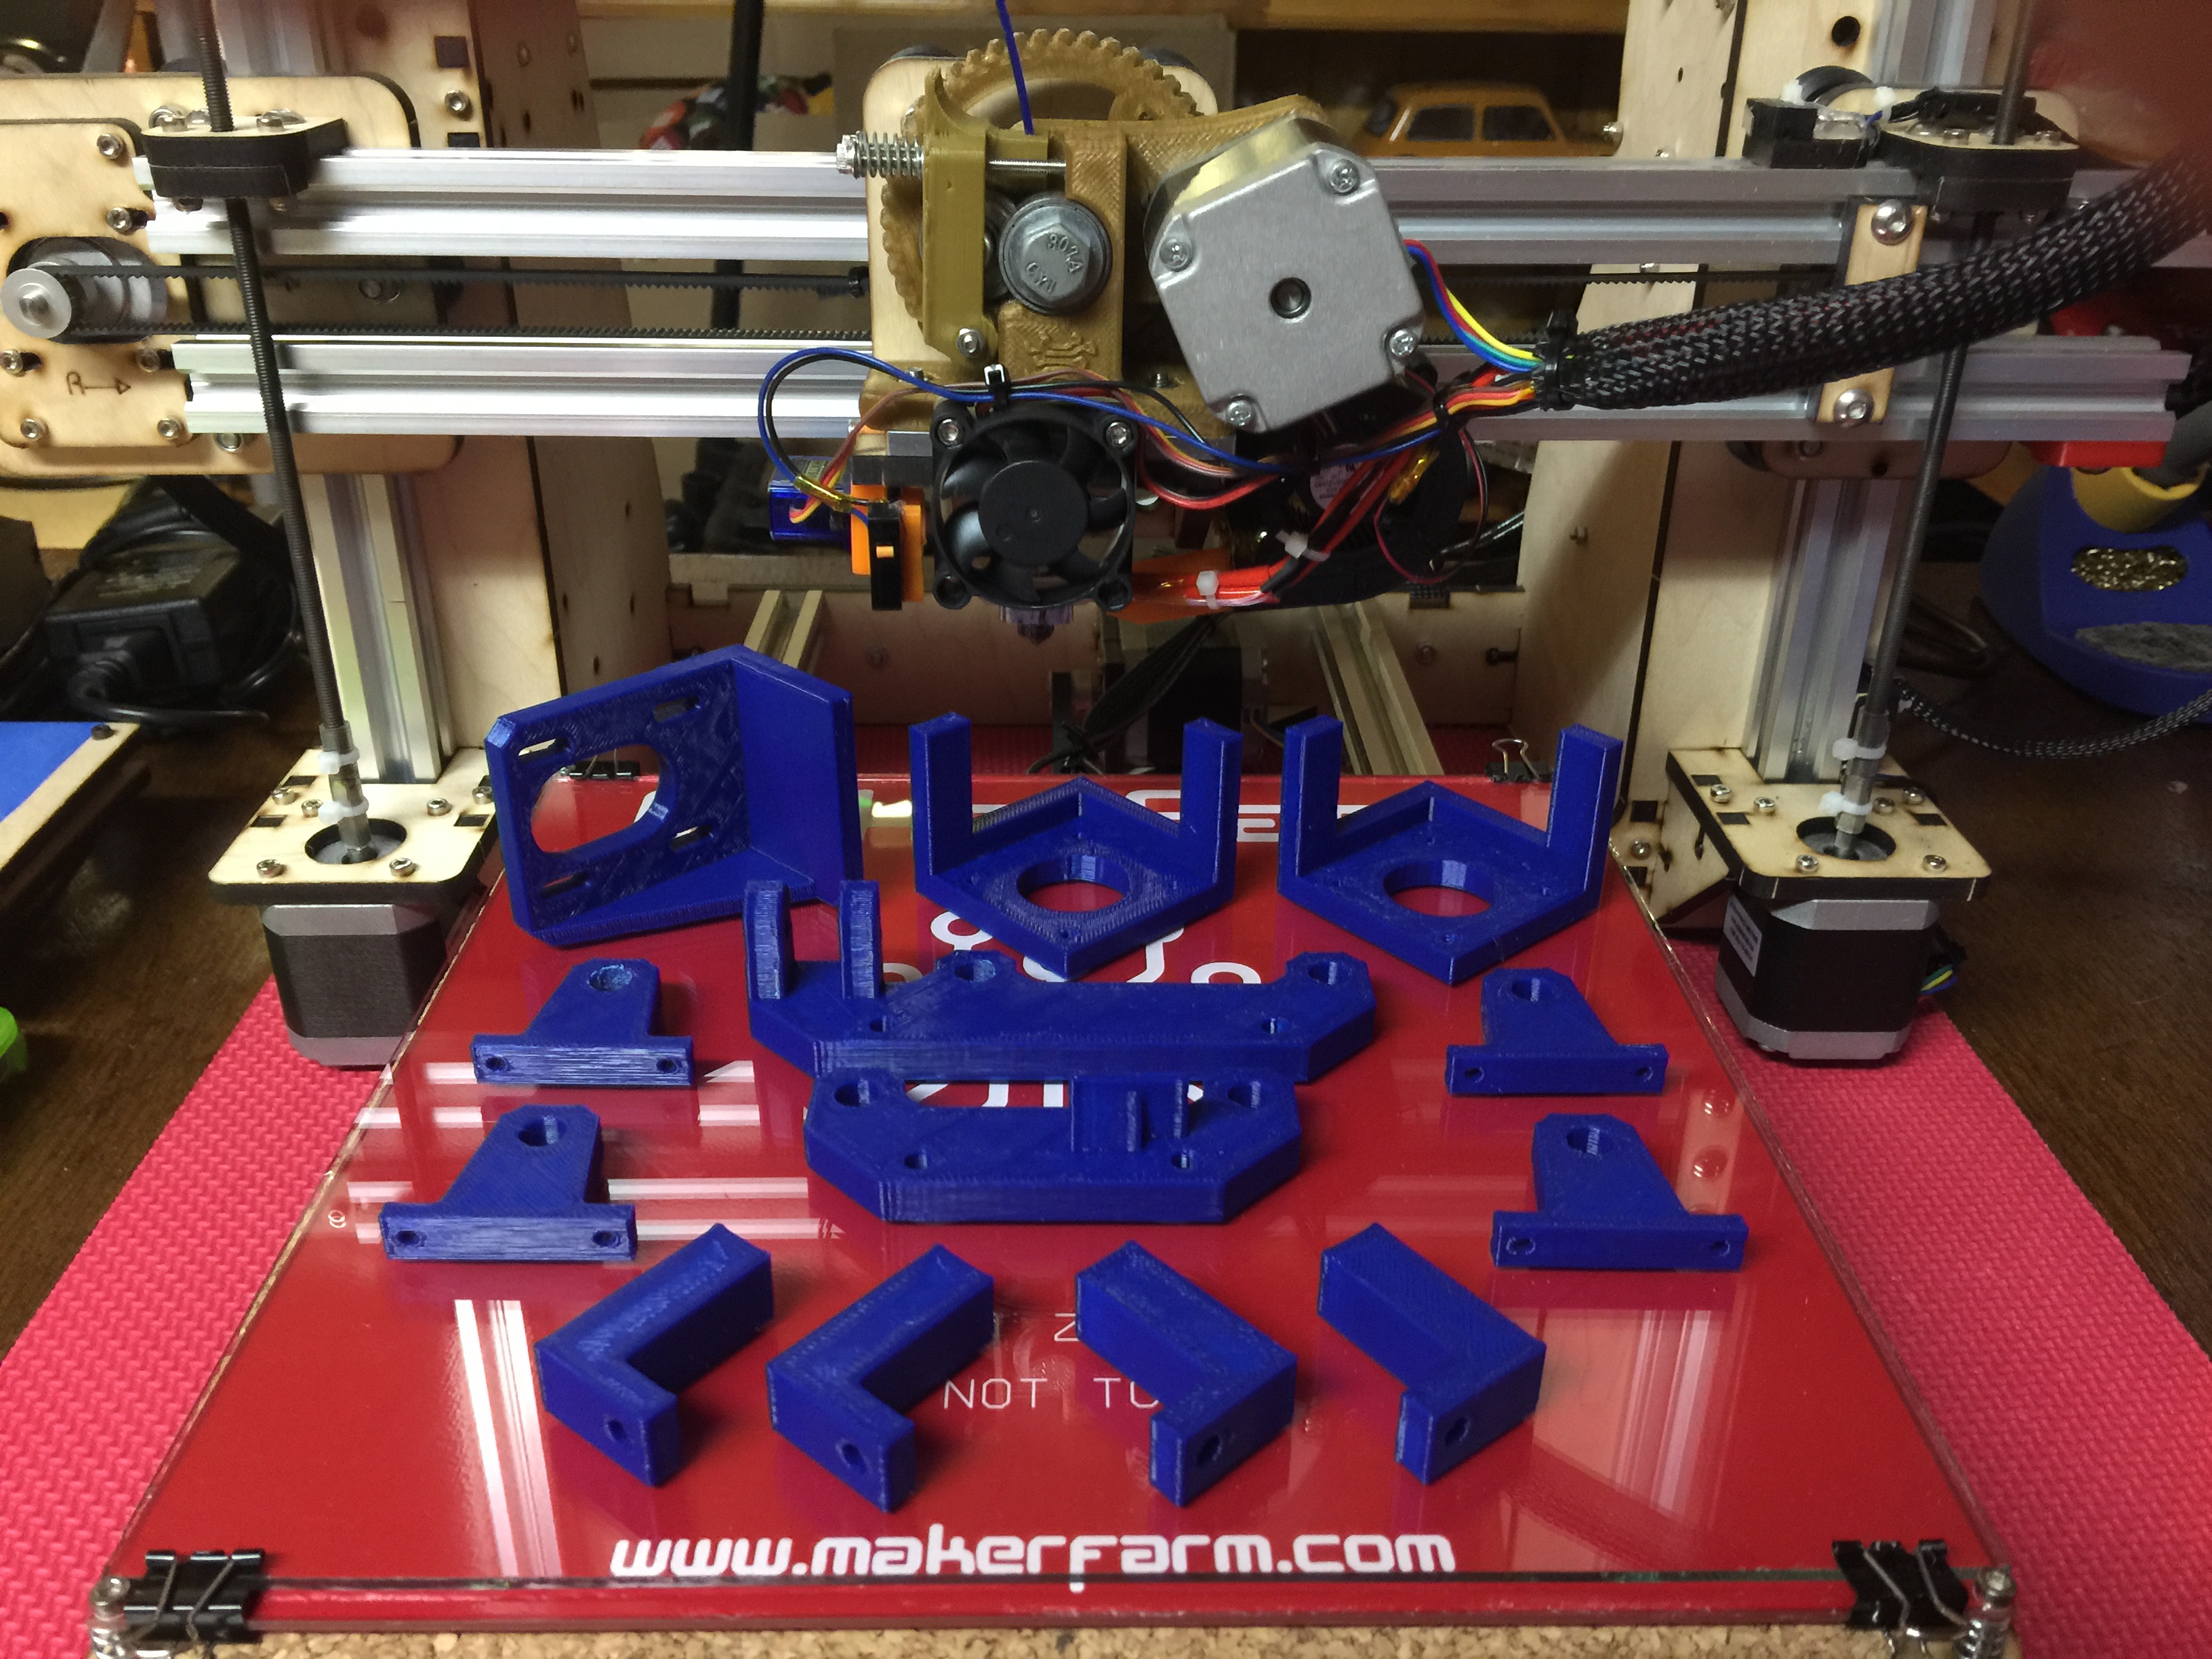
More progress on the parts yesterday and today. Most of the frame components are complete now, as is the first revision of the extruder. There was some slight mis-calculations on various areas of the extruder, mostly related to flanges and measurements of the hot end, but nothing a quick revision in CAD couldn't fix.
Aside from printing, work has begun on a build guide and how to manual to compliment the printer, and contemplating the idea of retailing kits and other goodies
Ryan
-
03-12-2015, 12:21 PM #4Super Moderator
- Join Date
- Jul 2014
- Posts
- 8,818
Now that's seriously impressive !
Hell i might even try it myself :-)
(if for no other reaosn a new 3d printer makes me clear another area of my workshop lol)
-
03-12-2015, 03:17 PM #5Engineer-in-Training
- Join Date
- Jul 2014
- Location
- Ontario, Canada
- Posts
- 257
Thanks Curious Aaardvark! I hope to have the design files published soon. The overall print time is a bit longer than expected, about 35 hours give or take, but its much more manageable this time around.
This is the final revision that's being printed currently. Added in an LCD, electronics enclosure and spool holder.


-
03-13-2015, 04:00 AM #6Technologist
- Join Date
- Mar 2015
- Location
- eezitec.com
- Posts
- 130


That's so neat! Keep us updated of the continued progress!
-
03-16-2015, 11:41 AM #7Engineer-in-Training
- Join Date
- Jul 2014
- Location
- Ontario, Canada
- Posts
- 257
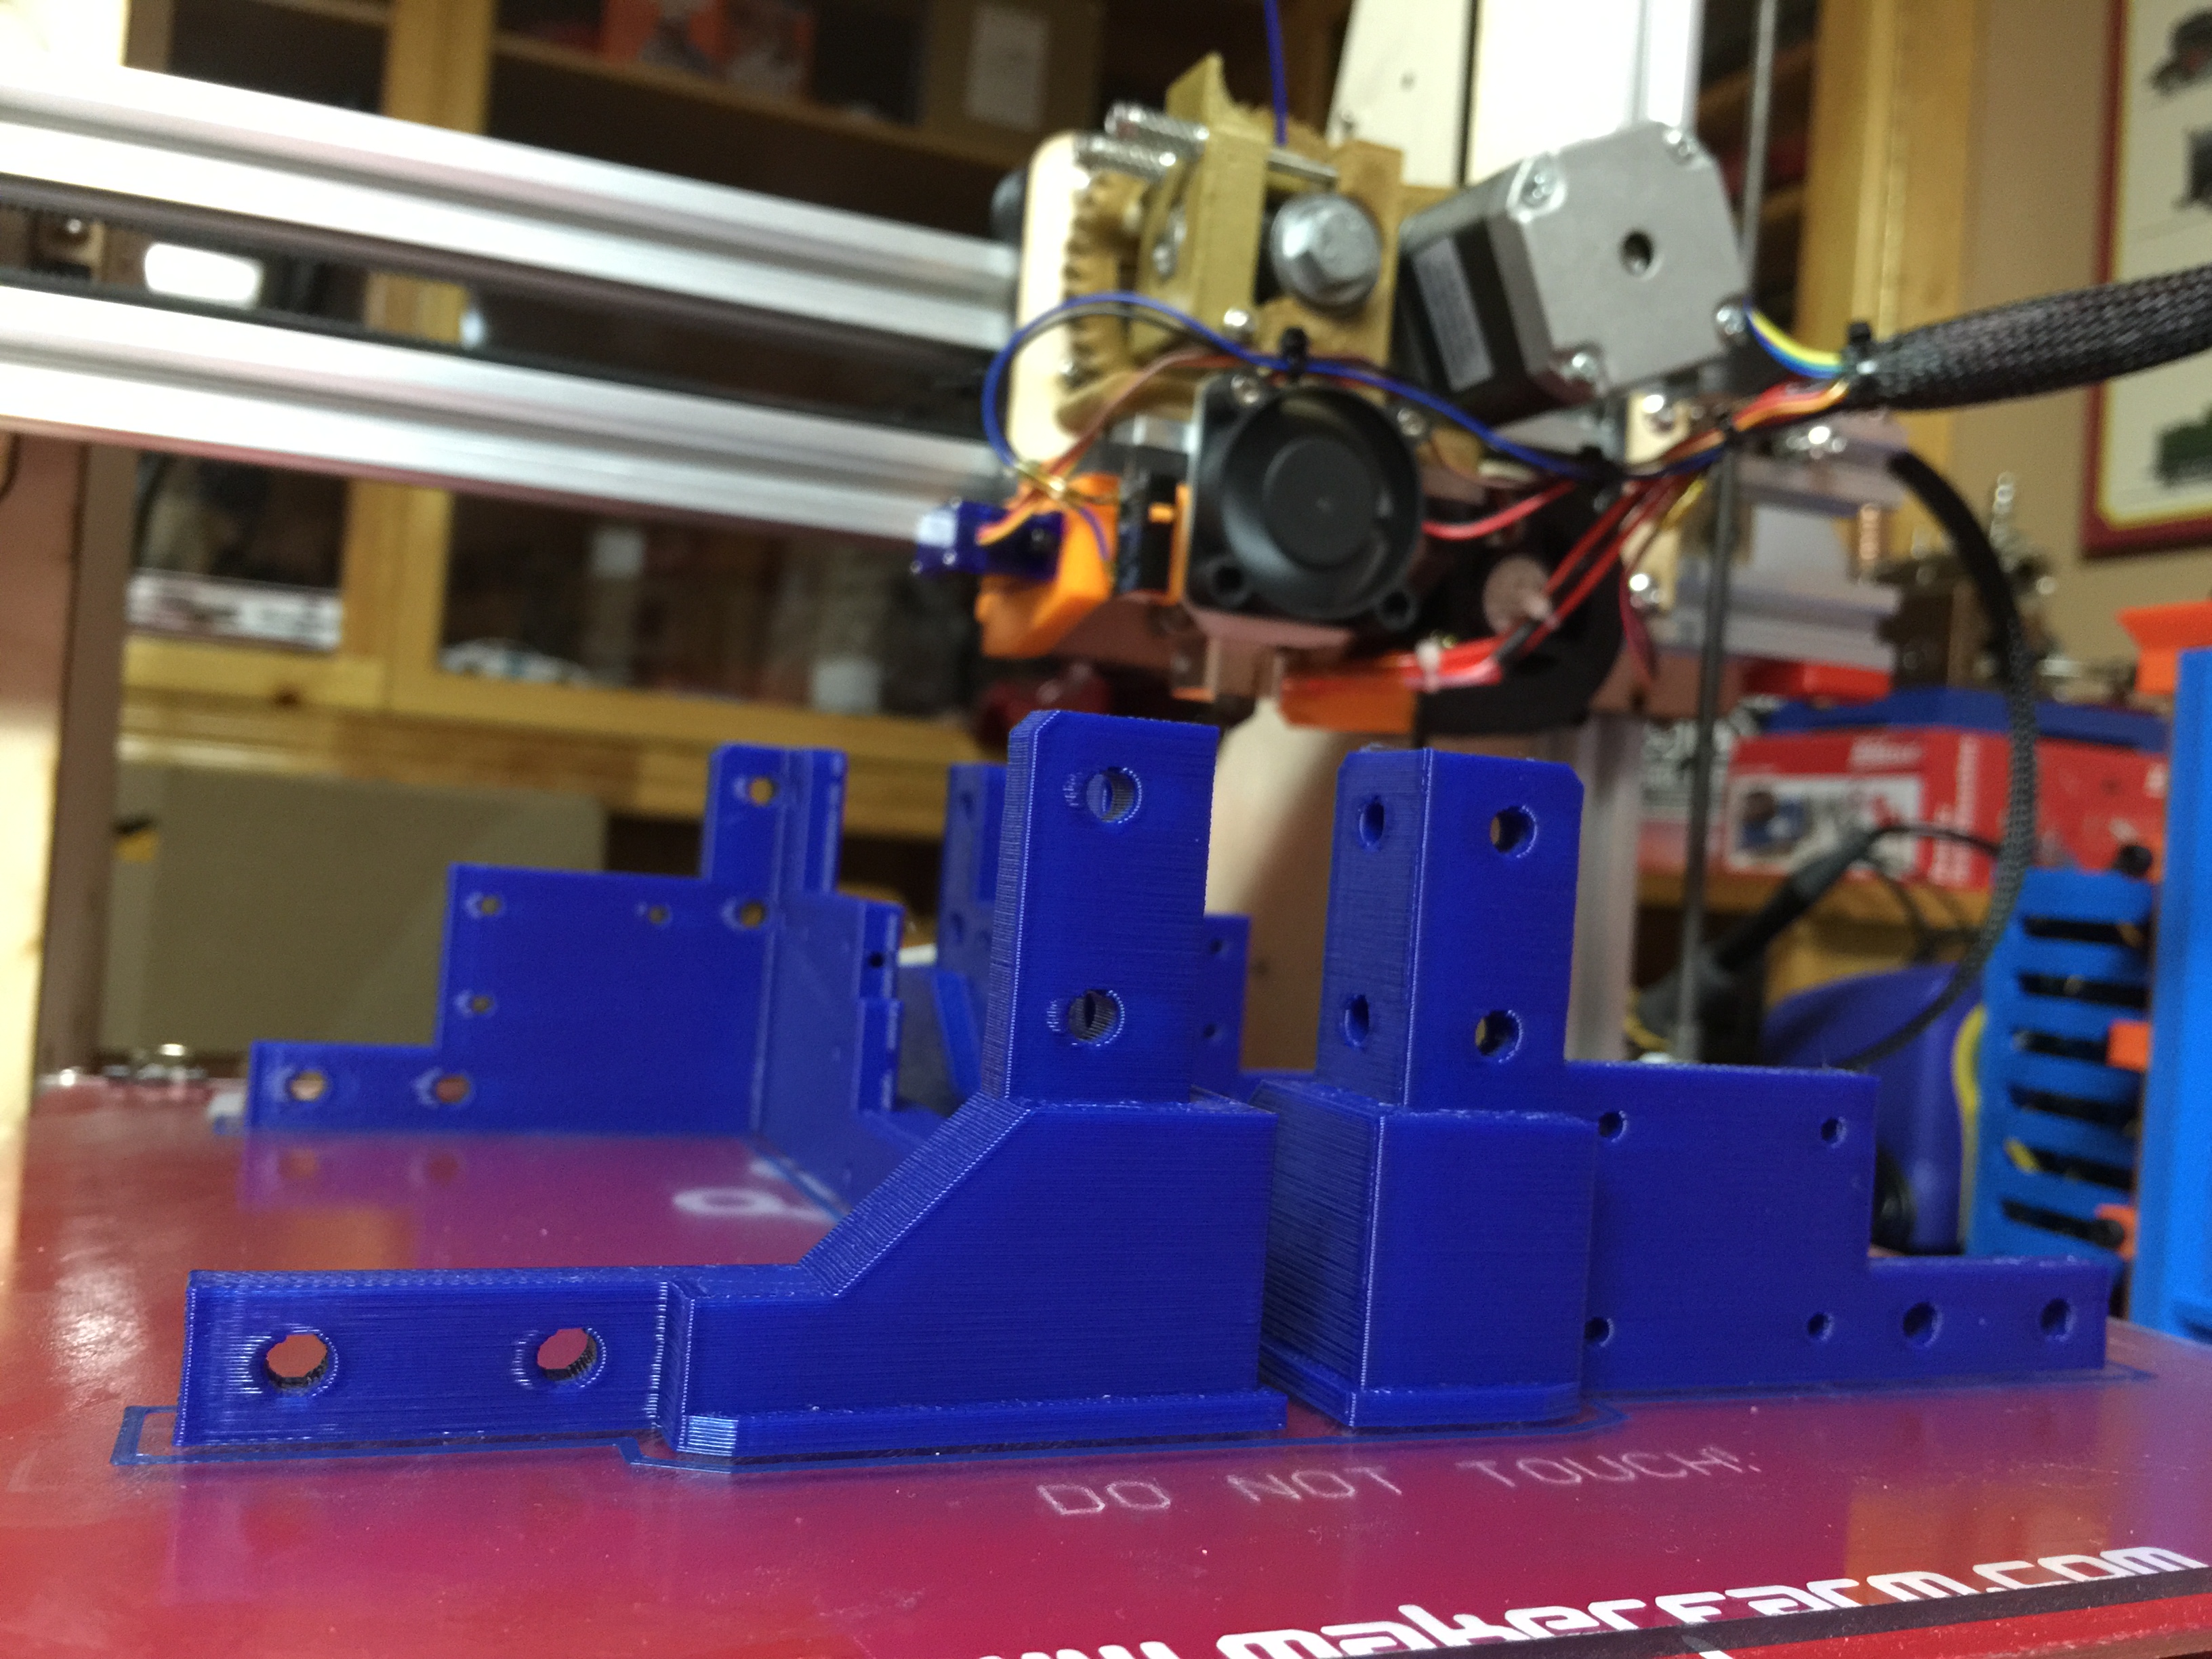
Printing has progressed very well. I'm happy to report that all of the printed components for the printer are complete. Total print time was just over 30 hours, which in all honesty, is not as good as I hoped, but still very manageable. The first print was started last Monday, and the final part printed Sunday evening, keeping in mind, there was only a 4 hour print window each day.
I have a slight revision to the LCD panel mount as my original measurements were off, but aside from this, assembly will hopefully commence this week. I'm awaiting the mechanical bits, bearings, and electronics, but everything should be here by the end of the week.
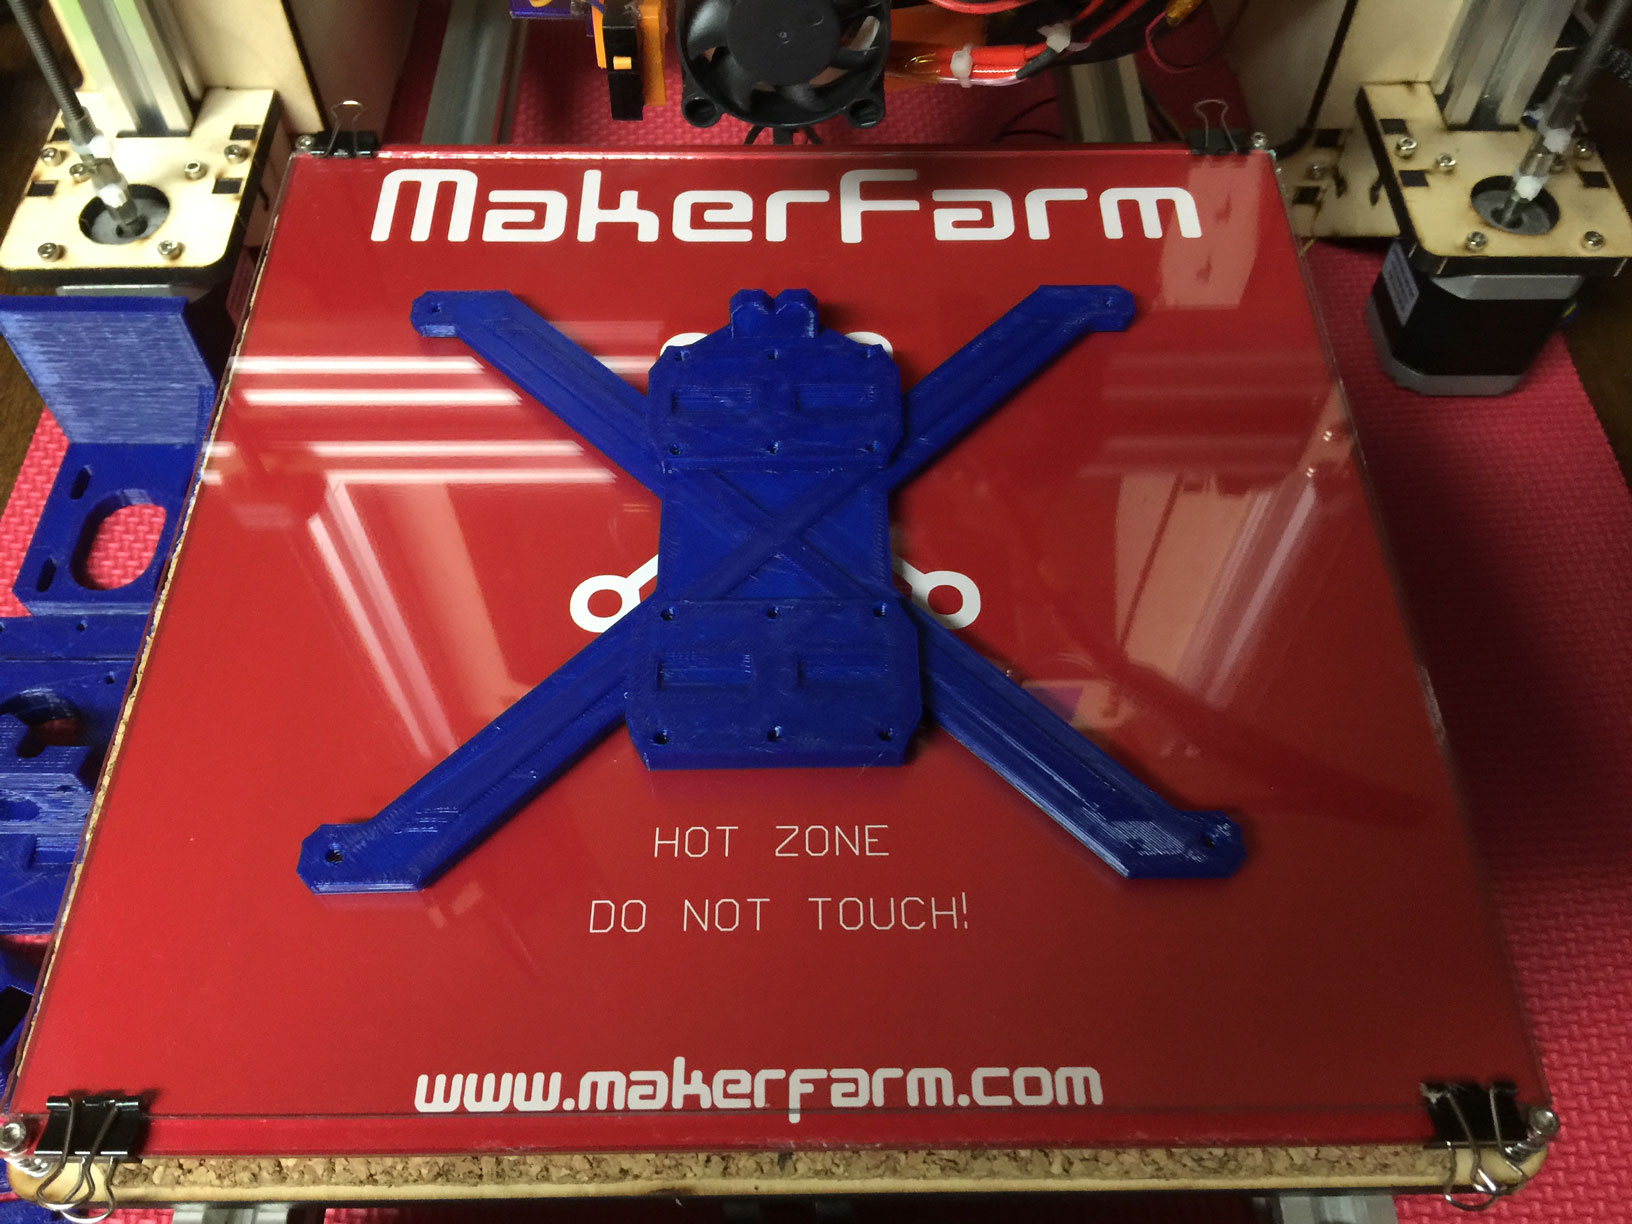
The lower bed frame, looking much like a quad copter frame haha
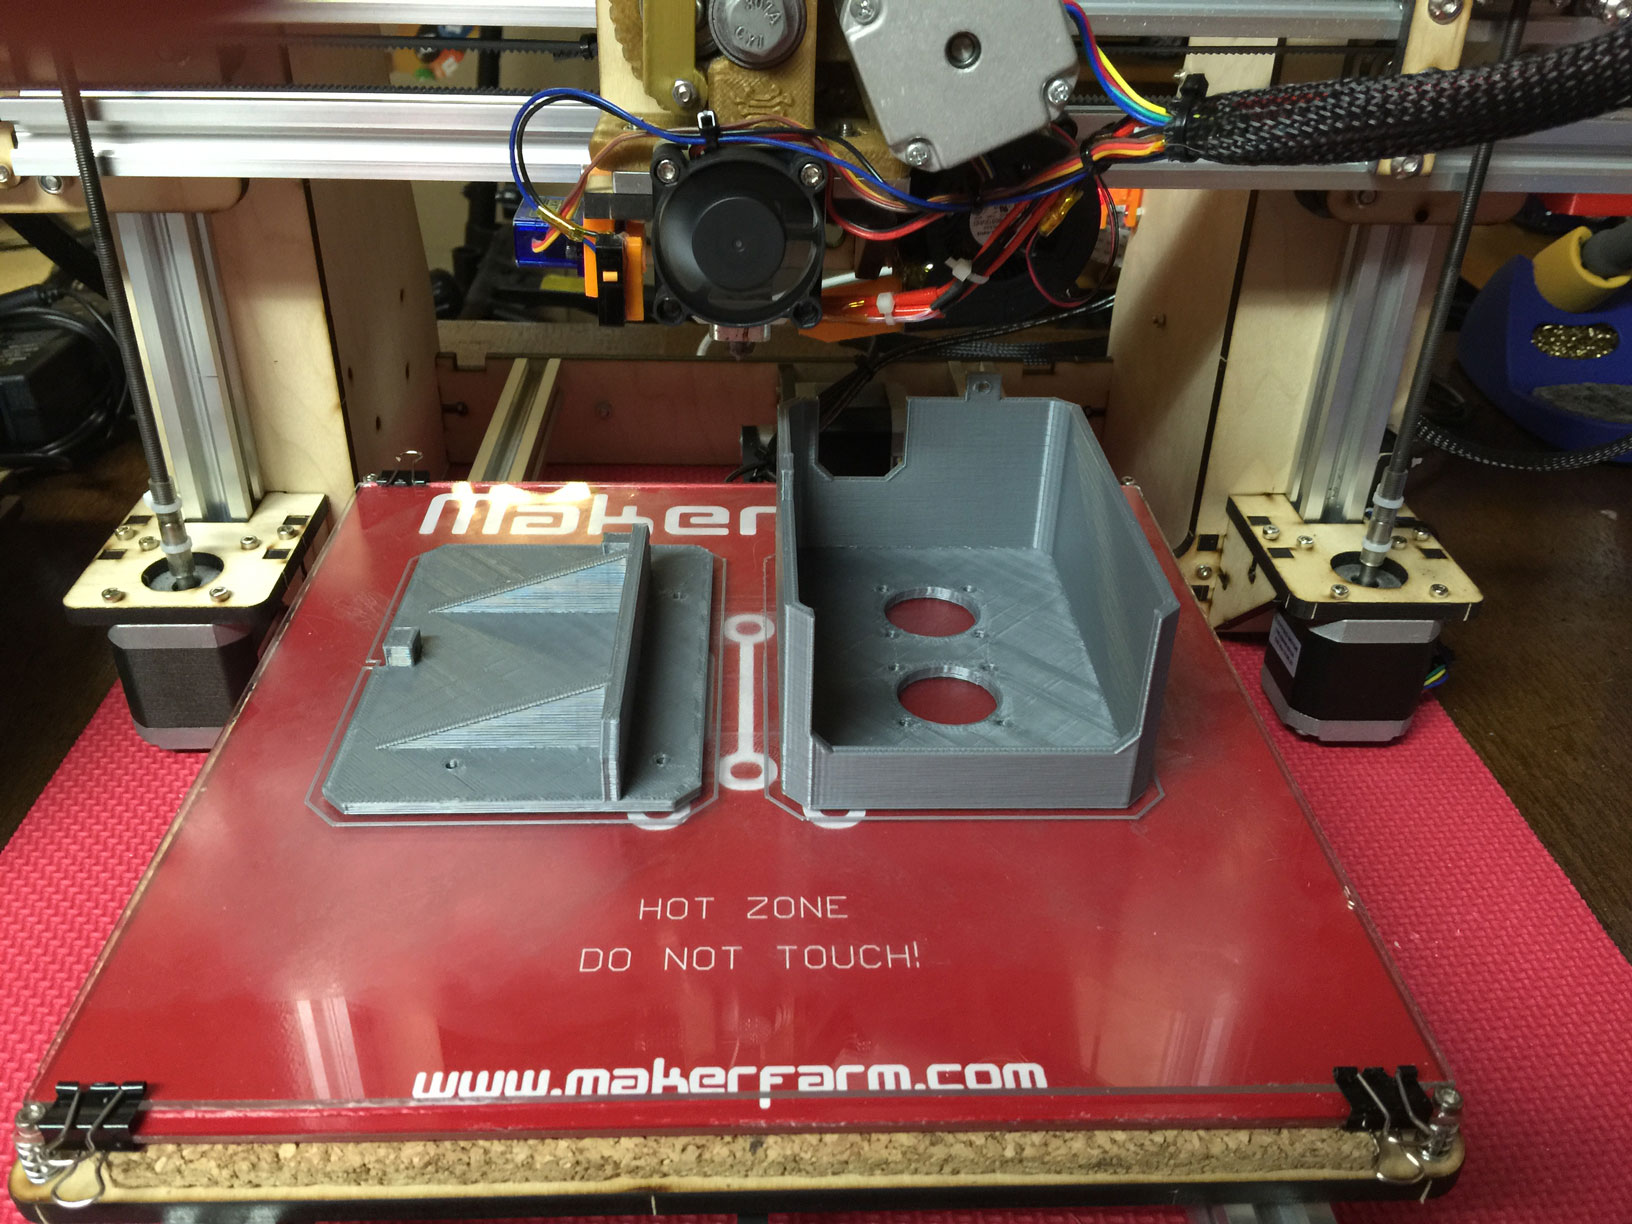
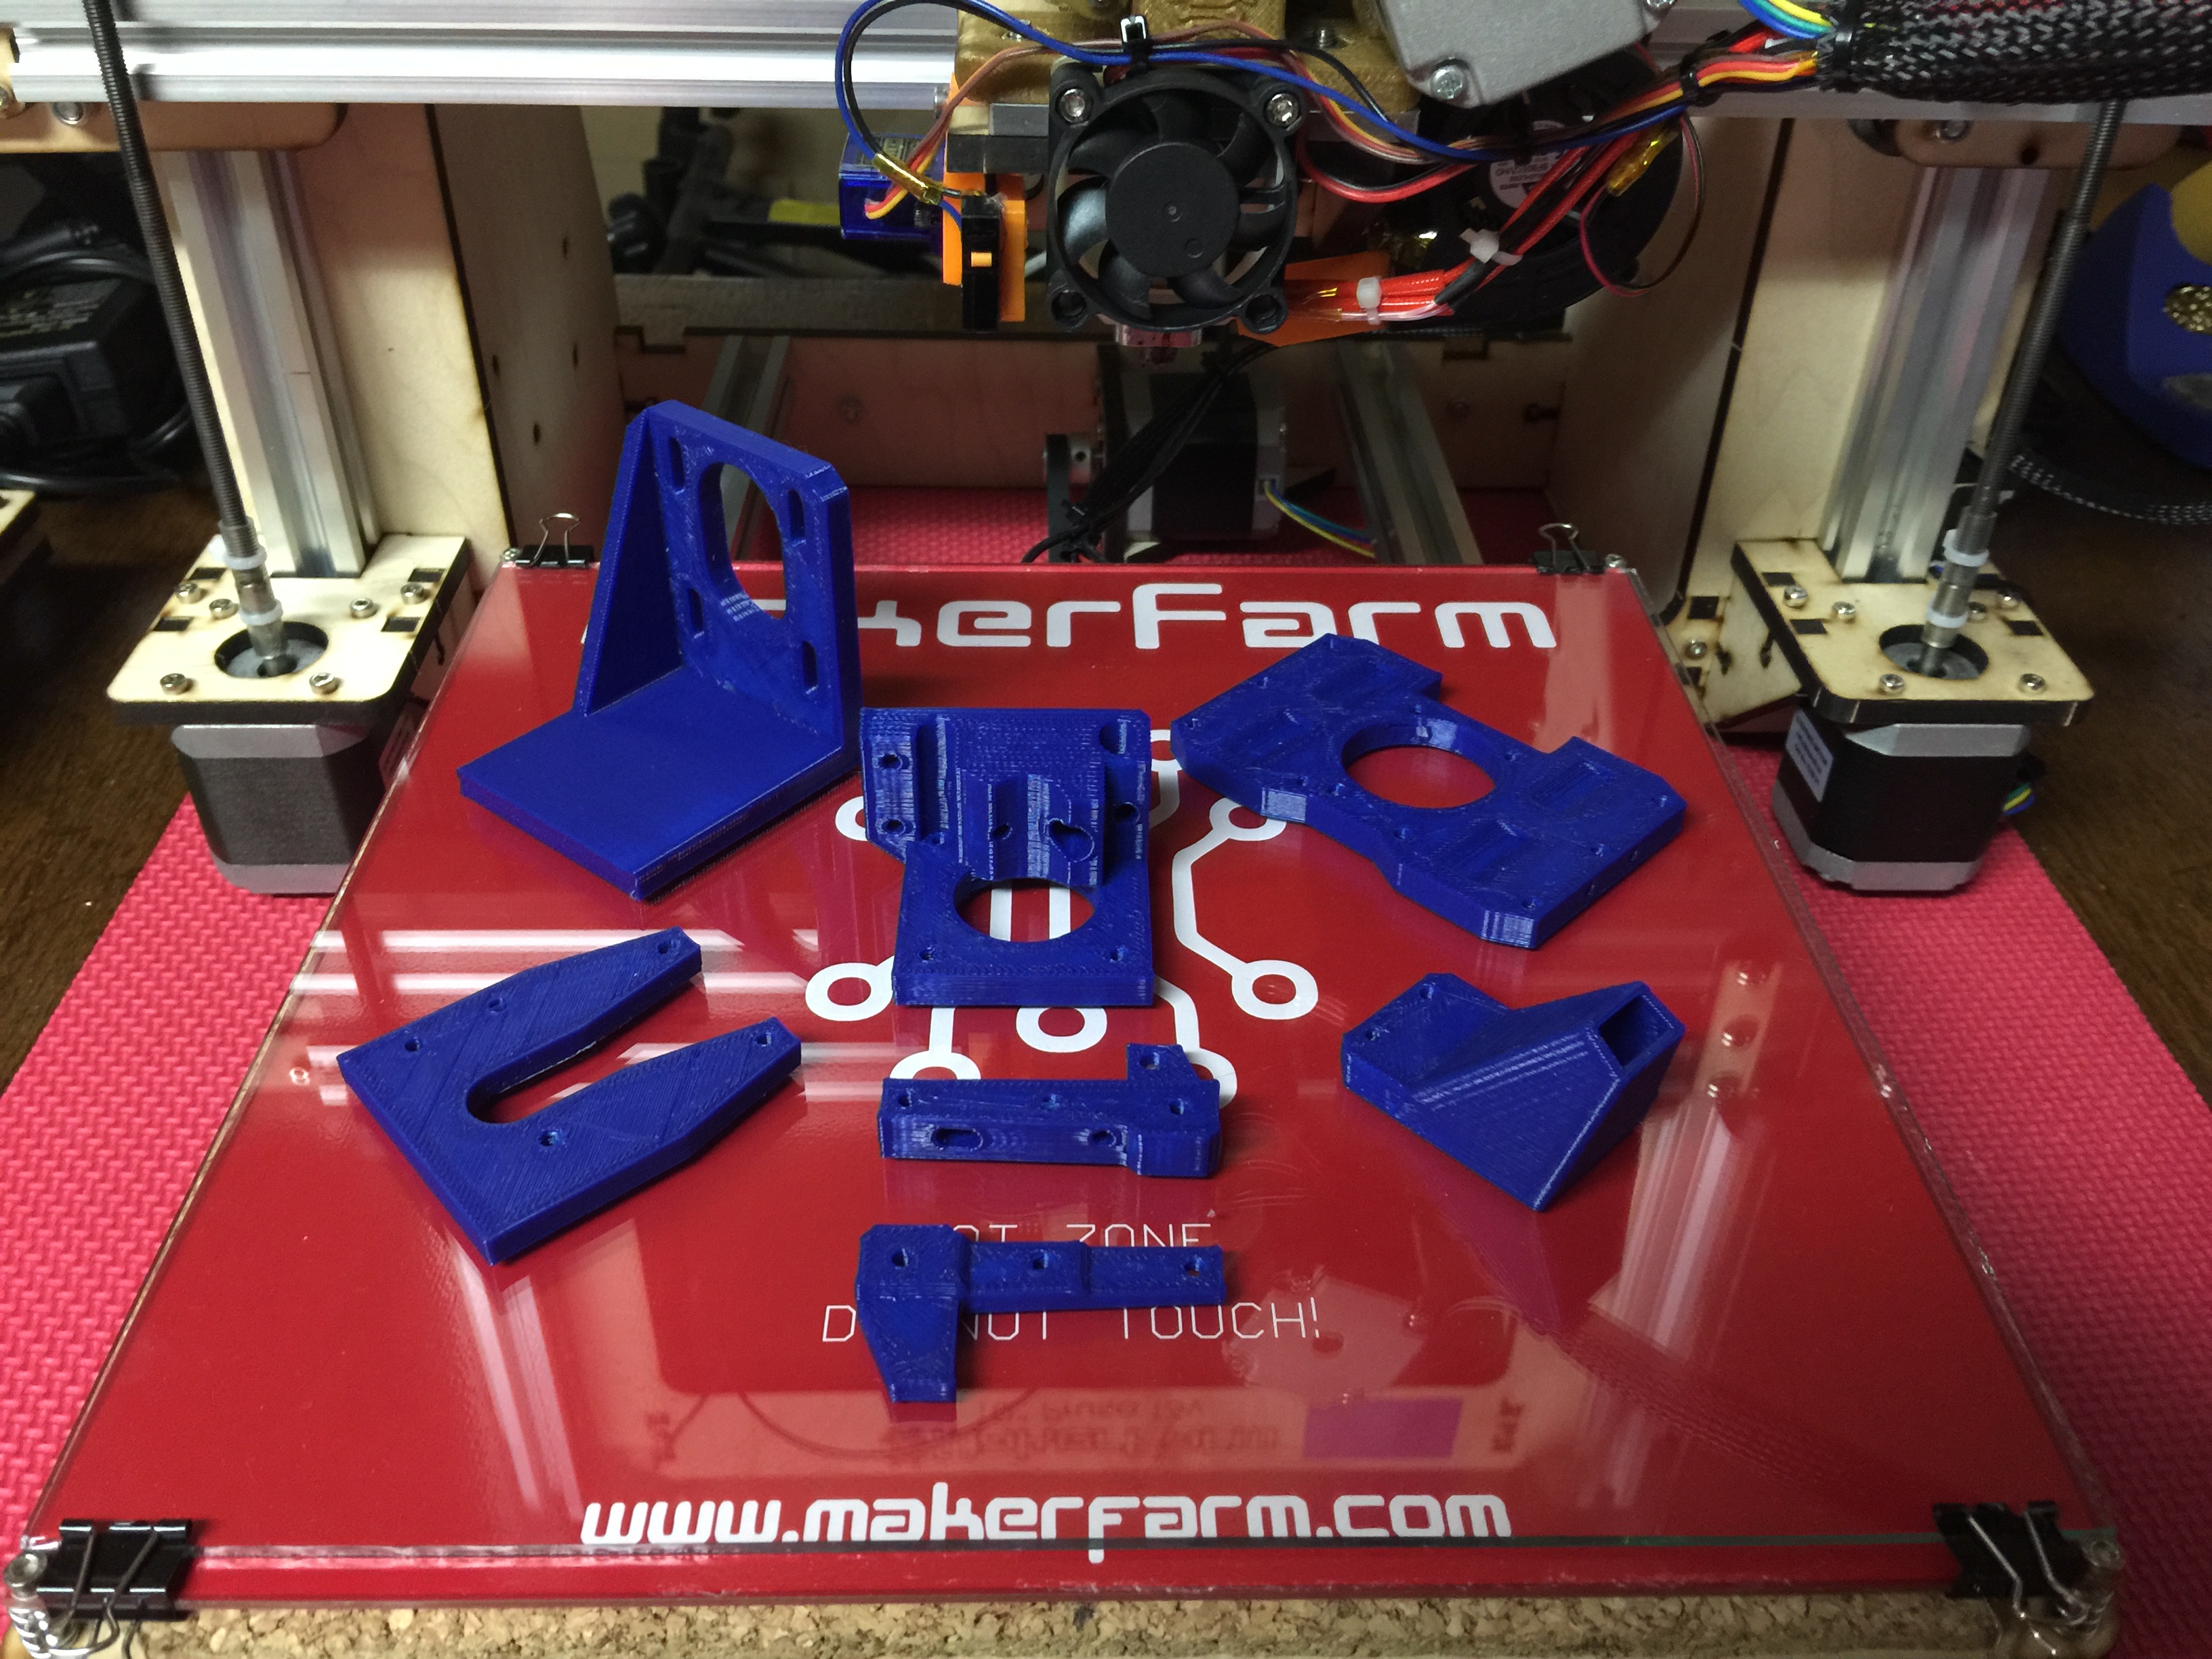
The RAMPS enclosure printed in silver

The overall foot print of the printer compared to that of a 13" MacBook. The printer is fairly compact given its printing volume, and isn't a whole lot larger than my first design.
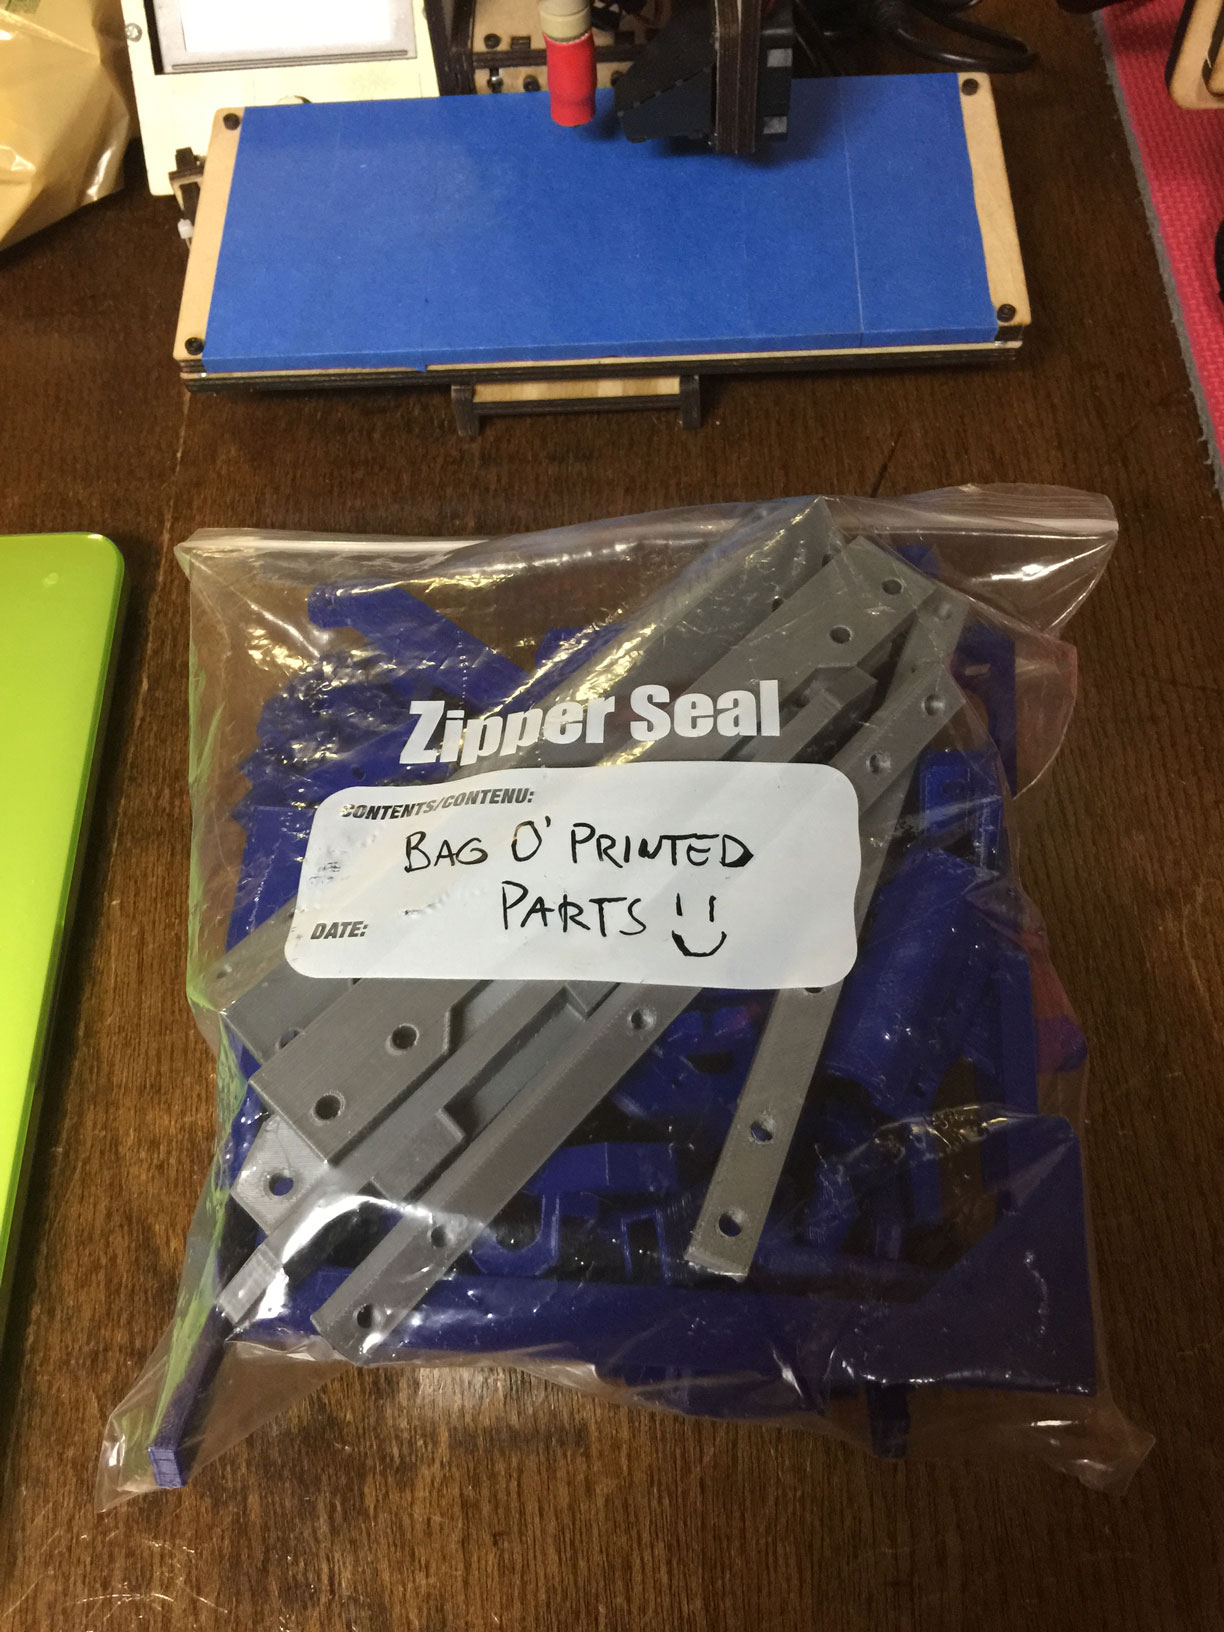
Lastly, one giant bag 'o printed parts. That is almost every part for the printer in one, large zip lock bag
More updates on the way!
Ryan
-
03-18-2015, 06:20 AM #8Engineer-in-Training
- Join Date
- Jul 2014
- Location
- Ontario, Canada
- Posts
- 257
The frame is complete! (well mostly)
The frame went together very well last night, and is almost as strong as I had anticipated. It was a bit shocking to see how quickly the frame came together, in under an hour, compared to the time it took to assemble the frame of the first printer. I'm awaiting linear rods, bearings and motors to arrive, so progress has slowed slightly, but it will give me some more time to work on the build guide, and further updates!
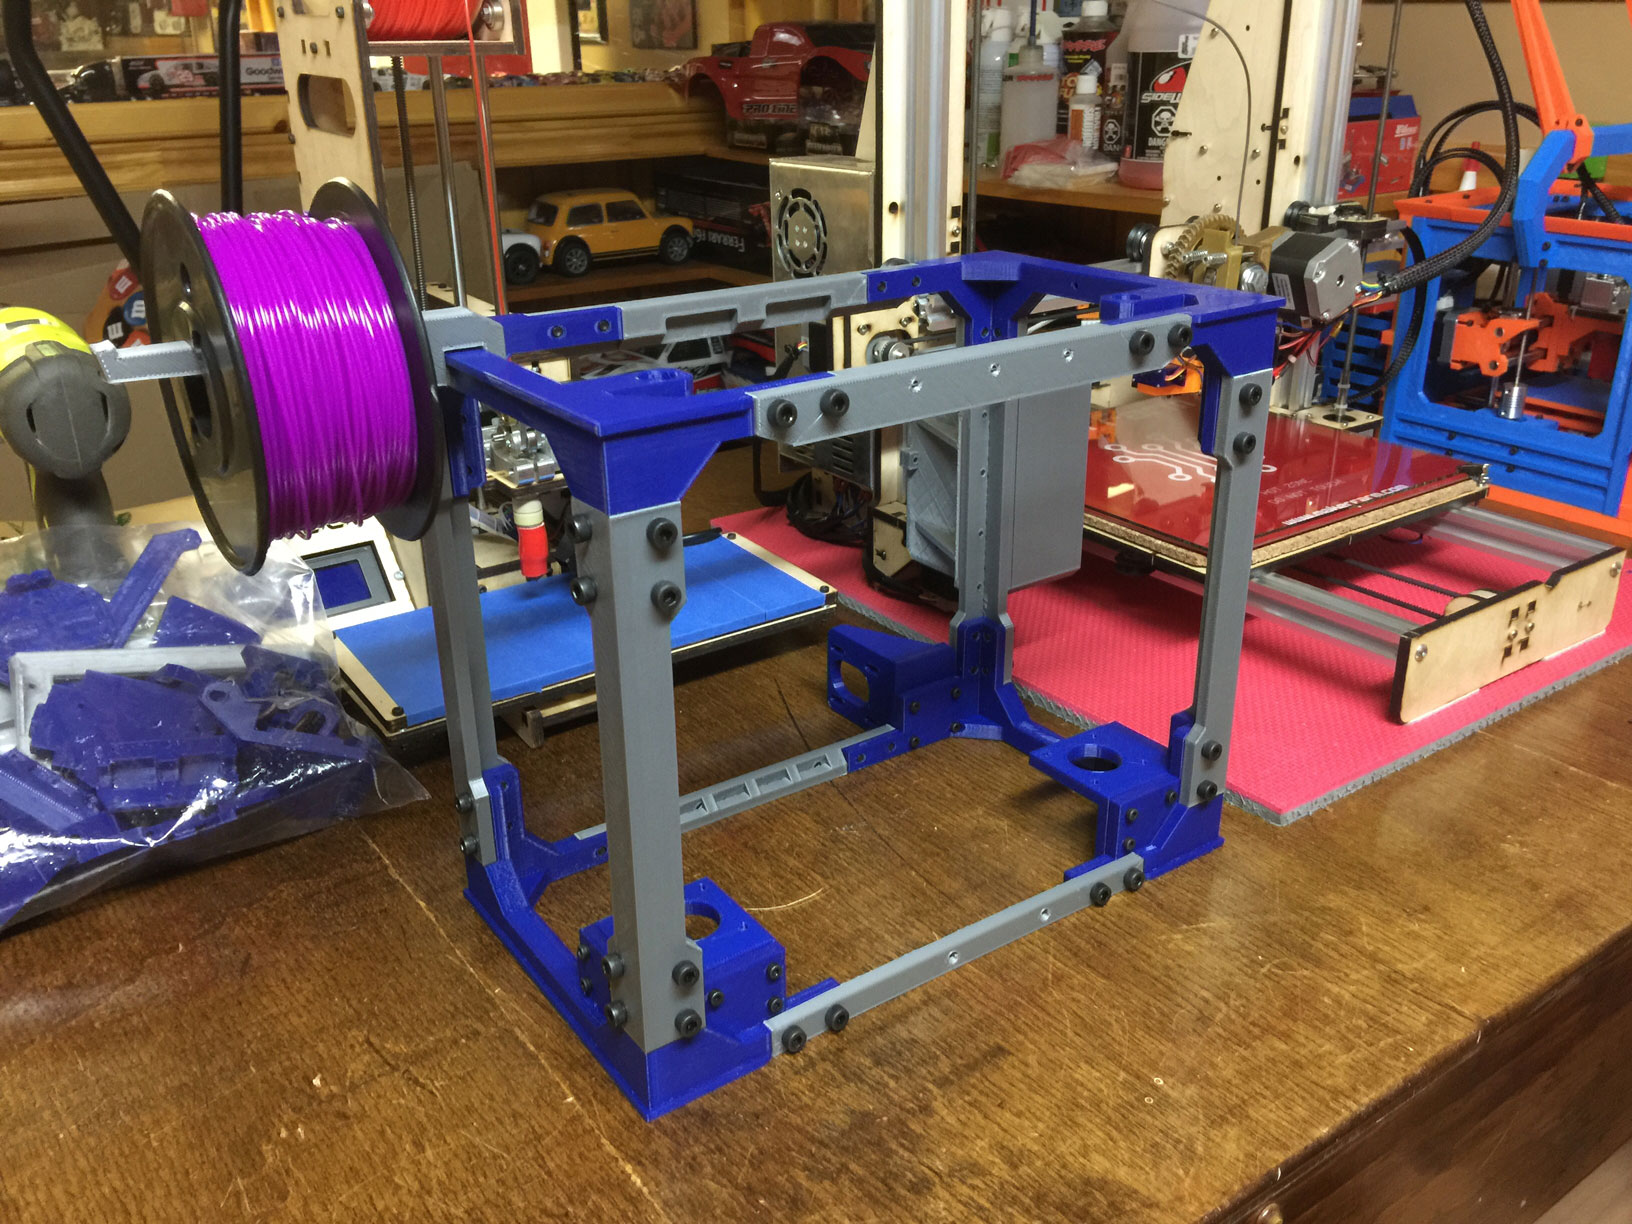


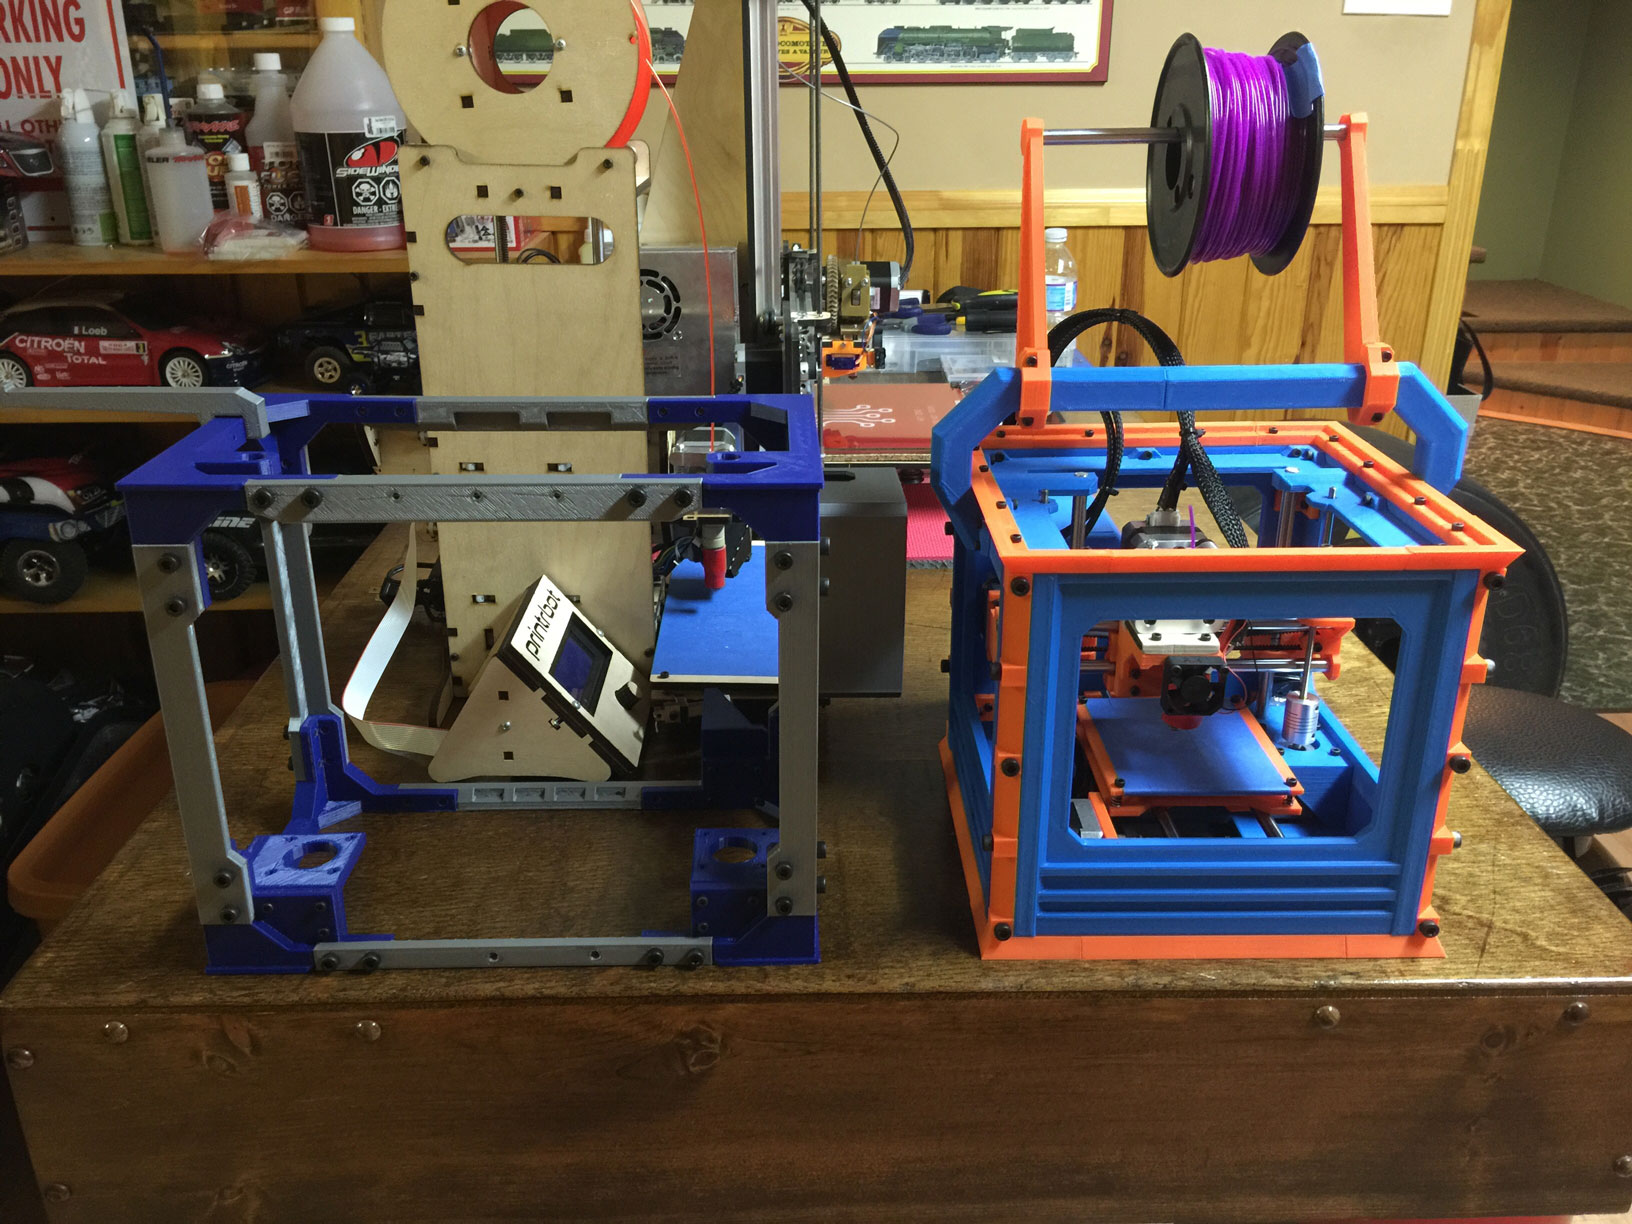
Lastly, the frame compared to the first printer. It's slightly taller, and a bit wide, but not quite as deep. The printer right now feels smaller than the first though, but I guess that's down to a light weight design and open frame.
Cheers
Ryan
-
03-18-2015, 01:54 PM #9Technician
- Join Date
- Mar 2015
- Location
- San Diego CA
- Posts
- 60
Looking good! Hopefully you wont have to wait too long on those components.
-
03-19-2015, 05:56 AM #10Engineer-in-Training
- Join Date
- Jul 2014
- Location
- Ontario, Canada
- Posts
- 257
Well the package is stuck somewhere in customs at the moment, looking unlikely that it will make it here by the end of Friday. Oh well, nothing can be done about that!
In the mean time, I thought I'd share a few pics comparing parts between the first printer design and version 2.

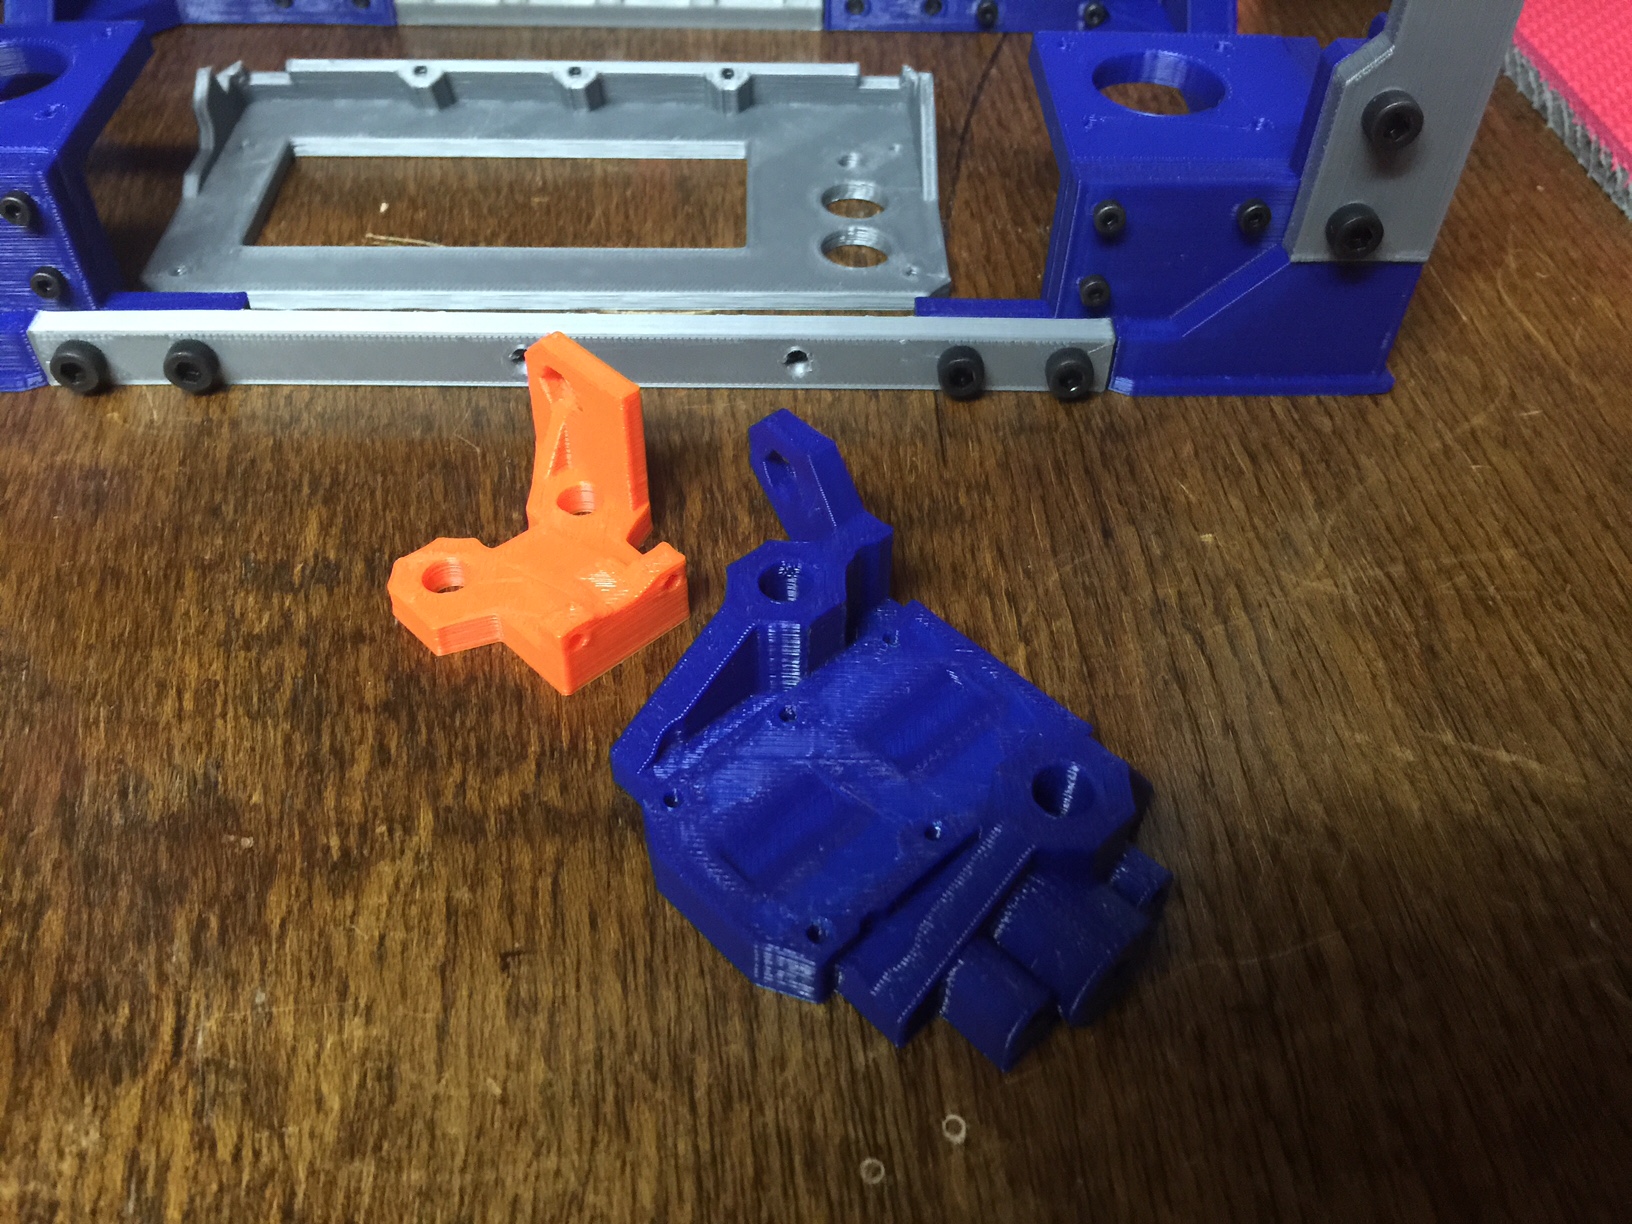
The extruder base, which was originally 1 piece in the first revision is now 3 pieces, and of a much larger design. Note that originally, the carriage was mounted vertically, whereas version 2 is now horizontal, for hopefully increased rigidity.
One of the bearing holders, this one used on the X axis. Not a huge change, but larger, and stronger compared to the original.
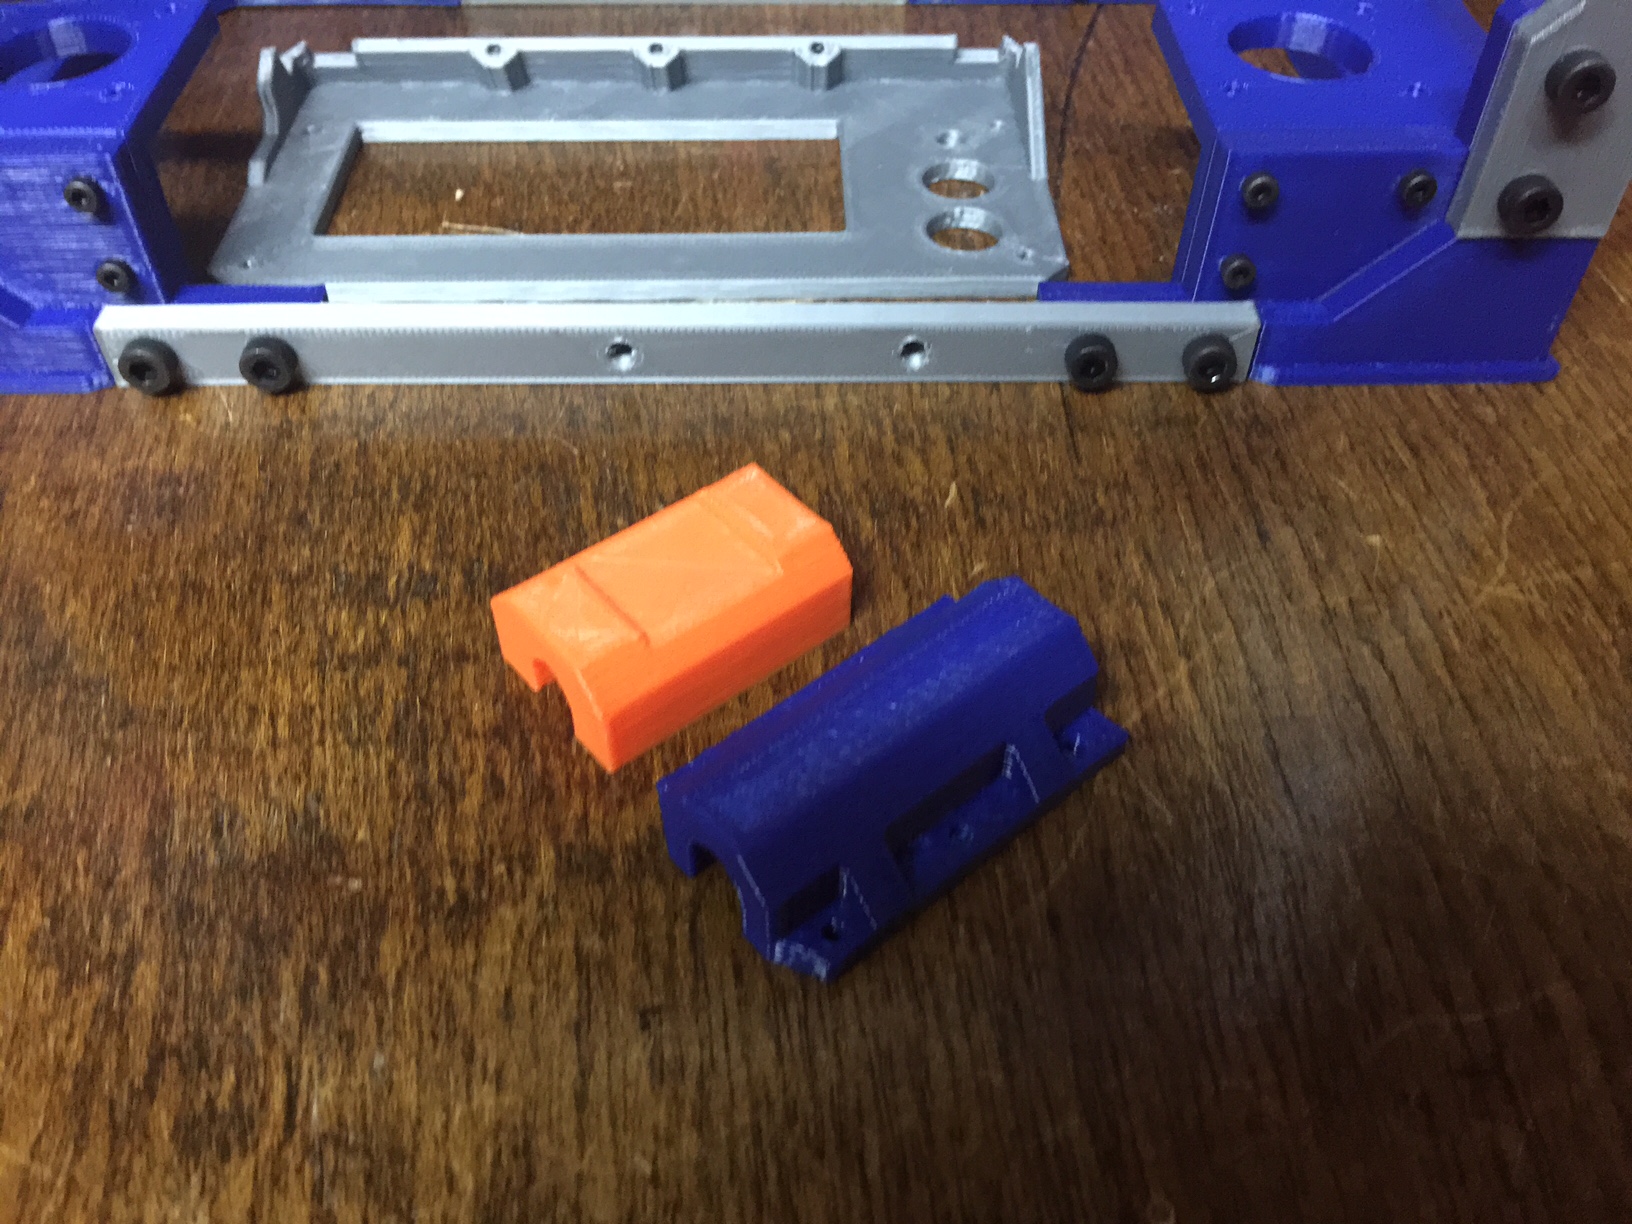
My favourite shot, the X axis rod carriers. Massive compared to the original, and much, much stronger.
Lastly, with a bit of down time, I was able to get a start on the design of the build guide and layout. While not finalized just yet, here's a small sample of the design and layout you can expect when assembling this 'bot
Cheers
Ryan

 Reply With Quote


What's wrong with this prting?
04-14-2024, 05:15 PM in General 3D Printing Discussion